Author: admin

  • Fuel Stabilizer 101: Protecting Your Engine Through Months of Storage

    Fuel Stabilizer 101: Protecting Your Engine Through Months of Storage

    The most common spring problem we hear about is not a dead battery or a frozen pipe. It is an engine that cranks but will not fire, or one that starts rough and stumbles for the first ten minutes. The culprit is almost always the same: fuel that sat too long, untreated, in a tank.

    Fuel stabilizer is a small bottle of liquid that costs less than lunch, and it prevents almost all of that. The confusing part is figuring out when you need it, how much to add, and which product actually does the job. This guide answers all of that in plain English so you can pour, run, and store with confidence.

    What Is Fuel Stabilizer and What Does It Actually Do?

    Fuel stabilizer is an additive you pour into your fuel tank before the engine sits for an extended period. It slows the chemical reactions that break gasoline down over time, and the marine and outdoor-power versions add corrosion inhibitors and moisture control on top of that.

    Gasoline is not a stable finished product. It is a blend of light hydrocarbons that keeps evolving from the moment it leaves the refinery, oxidizing on contact with air and slowly losing the volatile components that make it burn cleanly.

    Stabilizer works by wrapping antioxidant molecules around the fuel and holding those reactions off, buying you months instead of weeks.

    What stabilizer does not do is regenerate fuel that has already broken down. If your tank has been sitting untreated for six months, no bottle is going to restore it. Stabilizer is preventive medicine, not a rescue kit.

    Why Does Gasoline Go Bad in Storage?

    Two things go wrong when gasoline sits in a tank for months: oxidation and moisture absorption. Modern E10 pump gas makes the second problem much worse than it used to be.

    Oxidation is the slow chemical breakdown of the hydrocarbons in gasoline, driven by contact with air. As it progresses, the fuel forms gums and varnishes that coat the inside of carburetors, stick injectors, and gum up small passages.

    Fuel storage experts consistently recommend treating any gasoline that will sit longer than about 30 days for this reason. [2]

    Moisture absorption is the ethanol problem. Ethanol is hygroscopic, meaning it actively pulls water molecules out of humid air. That water gets pulled into the fuel through the tank vent, mixes with the ethanol, and slowly builds up.

    Once enough water accumulates, the ethanol and water sink to the bottom of the tank as a separate layer. This is called phase separation, and no additive on the market can reverse it. Once it happens, the only fix is to drain the tank and start over with fresh fuel. [3]

    Cutaway of a fuel tank showing clear gasoline over a cloudy ethanol and water layer settled at the bottom
    Phase separation: once ethanol pulls in enough water, it drops out of the fuel as a separate milky layer at the bottom of the tank.

    How Long Does Treated vs Untreated Fuel Actually Last?

    The difference is dramatic. The rough windows below hold for typical central Minnesota storage conditions.

    Fuel type Usable storage life What causes failure
    Untreated E10 (regular pump gas) 30 to 90 days Oxidation, phase separation from ethanol absorbing water
    Ethanol-free gasoline About 6 months Slow oxidation only, no ethanol moisture pathway
    Stabilized E10 (fresh, treated immediately) 12 to 24 months Very slow oxidation, moisture still a factor in humid tanks
    Stabilized ethanol-free 24+ months Minimal, if the tank stays sealed and full

    A Minnesota boat layup typically runs from October to May, roughly seven months. Untreated E10 will not survive that window. Stabilized fuel comfortably will, with margin on either end.

    Two things matter more than the specific product. First, the fuel has to be fresh when you treat it. Stabilizer added to gas that is already three months old cannot undo the aging that already happened.

    Second, the tank should be nearly full before storage, because a half-empty tank is a half-tank of humid air, and that air is what phase-separates ethanol fuel.

    How Do You Use Fuel Stabilizer Correctly?

    The whole routine takes about fifteen minutes and it is the same on a boat, an RV, a generator, or a snowblower.

    1. Start with fresh fuel. Fill the tank with gas that is no more than a week or two old, ideally from a station with high turnover.
    2. Fill to about 95%. Leave a small expansion gap but no meaningful airspace. A nearly full tank means almost no humid air to pull moisture from.
    3. Add stabilizer at the label ratio. For STA-BIL storage formula, that is roughly one ounce per 2.5 gallons of gasoline. Marine and small-engine formulas have their own ratios: read the bottle.
    4. Run the engine 5 to 10 minutes. This pulls treated fuel through the carburetor, injectors, fuel pump, and fuel lines. If you skip this step, only the tank is protected. The rest of the fuel system sits full of untreated gas.
    5. Shut it down and store. On outboards, follow the manufacturer’s guidance about fogging the cylinders as a separate step. On carbureted engines, some owners drain the carburetor bowl as a belt-and-suspenders move.

    That is the whole job. Skipping any step, especially the “run the engine” part, is where most owners get in trouble.

    Which Stabilizer Should You Buy for Boats vs RVs vs Small Engines?

    Most brand-name stabilizers do the core job well. Where they differ is in secondary additives designed for specific environments.
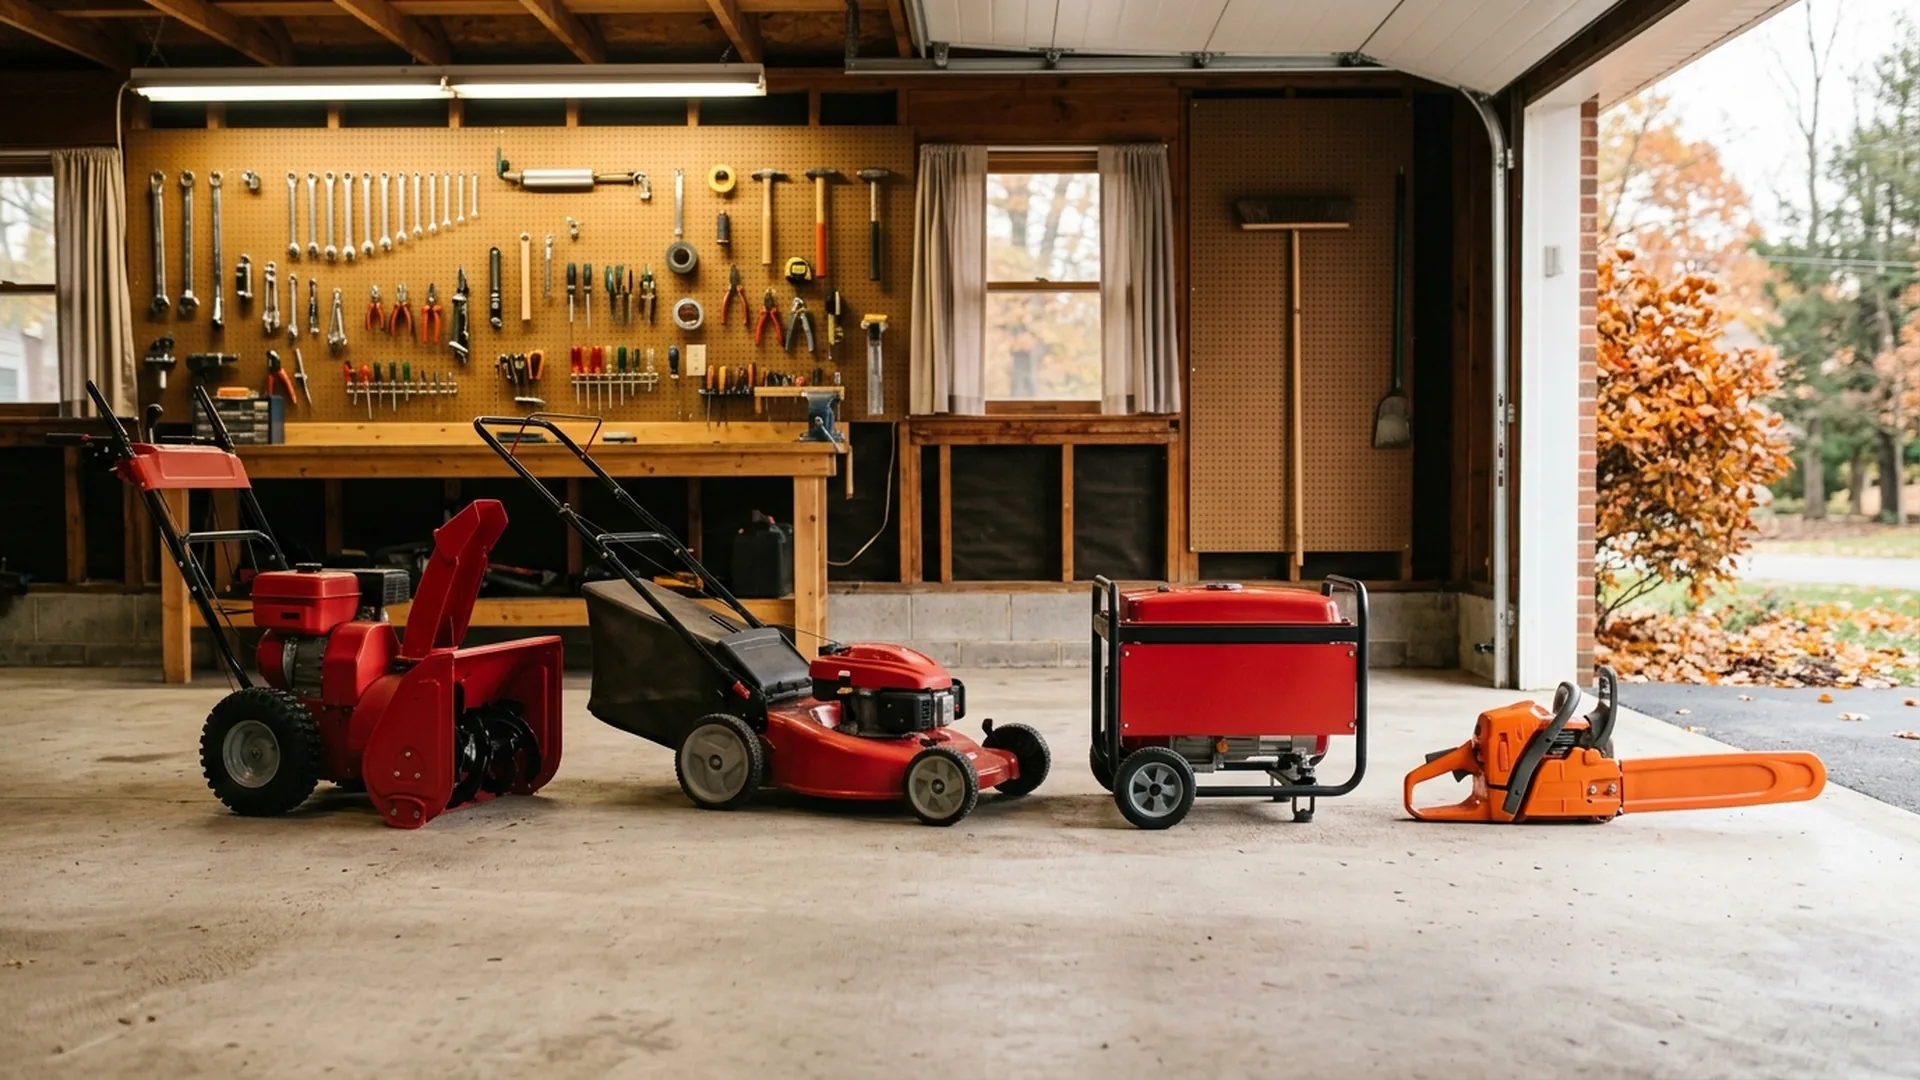
    A snowblower, lawn mower, portable generator, and chainsaw lined up in a garage with fuel stabilizer bottles
    The same treat-before-layup rule covers every small engine in the garage: snowblower, mower, generator, and chainsaw.

    For Boats and Marine Engines

    Buy a marine-specific stabilizer or a product labeled as dual-purpose. Marine formulas include extra corrosion inhibitors for aluminum tanks and metal fuel components, plus moisture-control additives geared toward the wet environment boats live in.

    Mercury Marine’s outboard winterization guide treats fuel stabilizer as a standard step alongside fogging oil and cooling-system drain. [4]

    For RVs and Generators

    Standard storage-grade stabilizer works well for RV gasoline engines and onboard generators. The environment is drier than a boat’s, so basic oxidation protection is the priority. If your RV also has a diesel generator, use a diesel-specific stabilizer and biocide instead, because diesel storage problems are different.

    For Small Engines (Snowblower, Mower, Chainsaw)

    Use a small-engine or ethanol-treatment formula. These are calibrated for the tiny fuel volumes and often add detergents to keep the fine passages in a small carburetor clean. The same rule applies: treat before the seasonal layup, not after the engine has already sat.

    What Happens If You Skip It?

    You get to meet the shop, is the short version. Skipped fuel treatment shows up as one of a handful of predictable failures.

    • Hard starting or no start. The most common outcome. Aged fuel loses its light, volatile components and does not ignite reliably in cold cylinders.
    • Rough running and stumbling. Varnish deposits in the carburetor jets throw off the fuel-air mixture, and the engine loses power or stalls at idle.
    • Clogged injectors on fuel-injected engines. Injector cleaning or replacement can run several hundred dollars per cylinder on a marine engine.
    • Full tank drain and clean-out from phase separation. Once ethanol and water have separated, you are looking at a fuel system flush before the engine will run properly again.
    • Corrosion in the fuel system. Water sitting in the bottom of an aluminum tank causes pitting over time, and pitted tanks eventually need replacement.

    BoatUS estimates that improper winter storage causes more than $50 million in preventable damage to boats across the country every year. Not all of that is fuel-related, but fuel-related repairs are one of the top spring service categories. [5]

    Compare that to a $10 bottle of stabilizer that lasts several seasons. The math is not close.

    What We See at Due North Storage
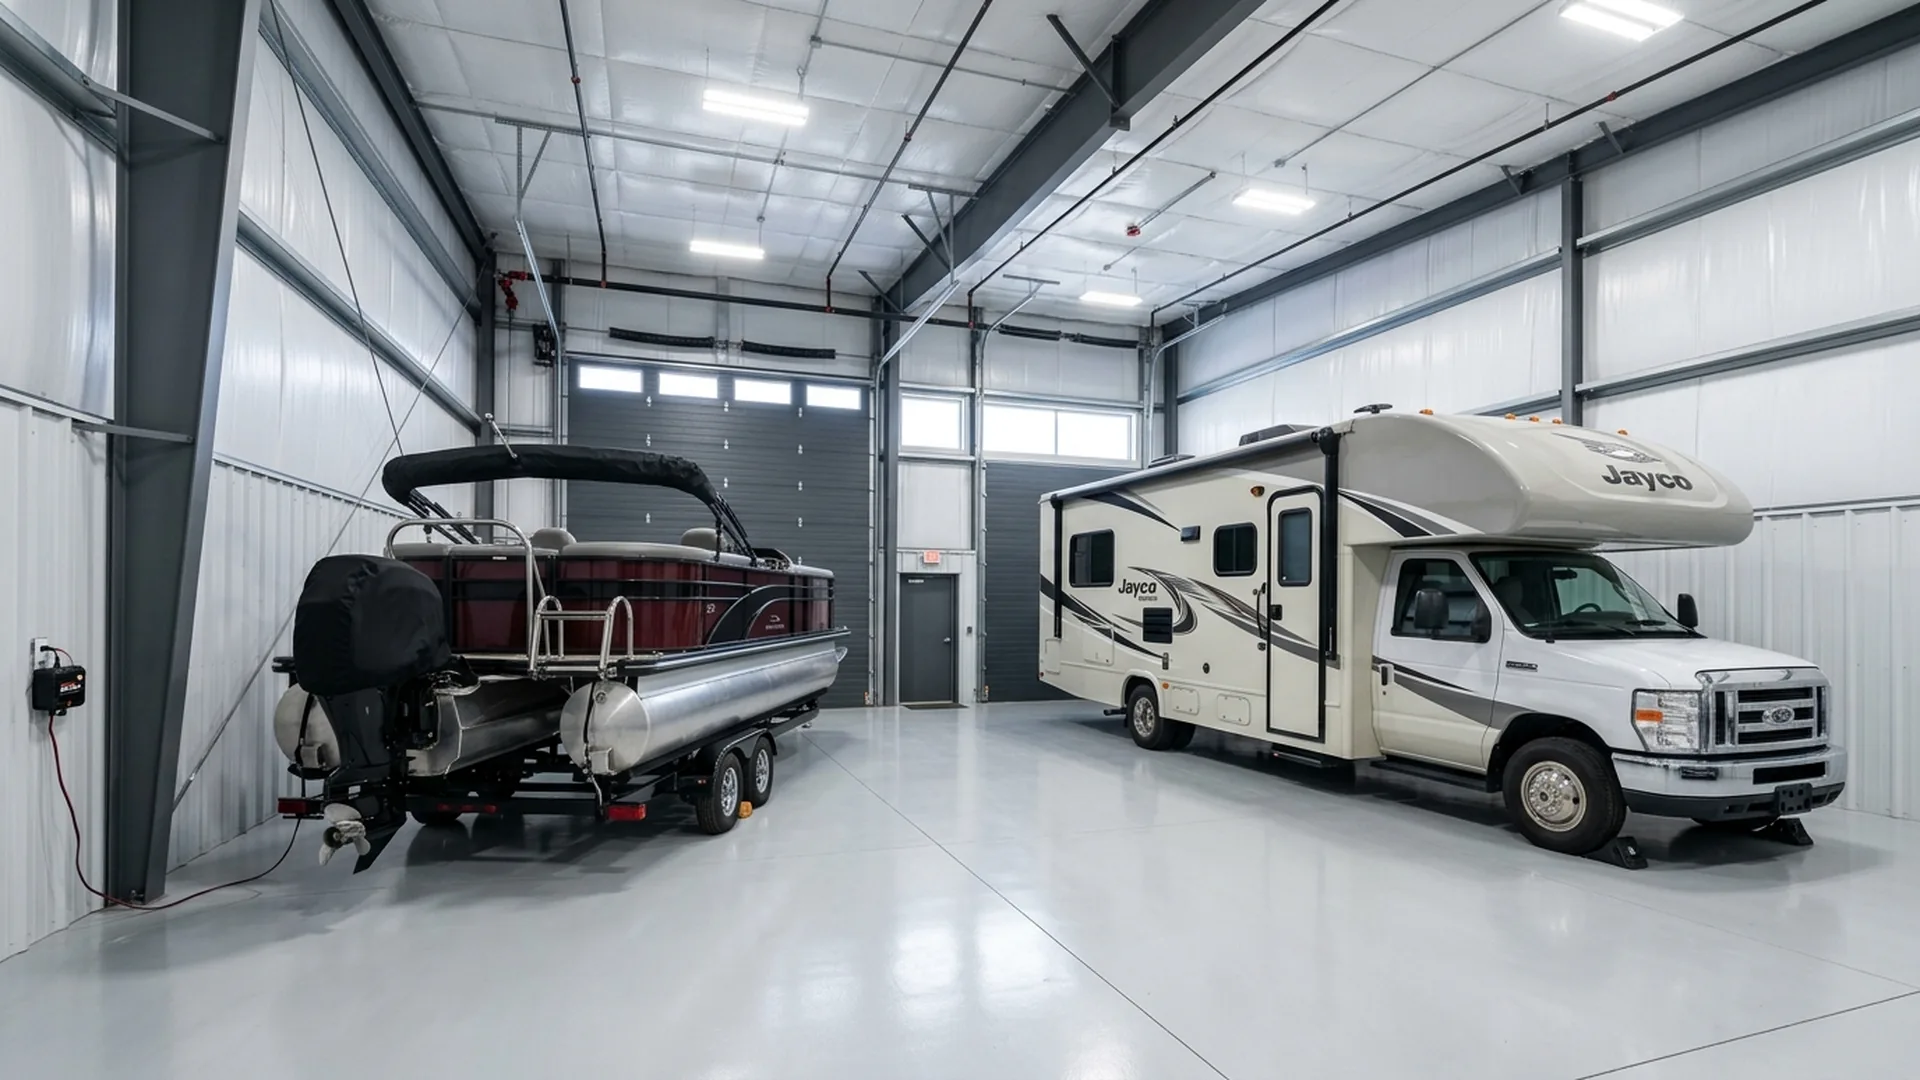
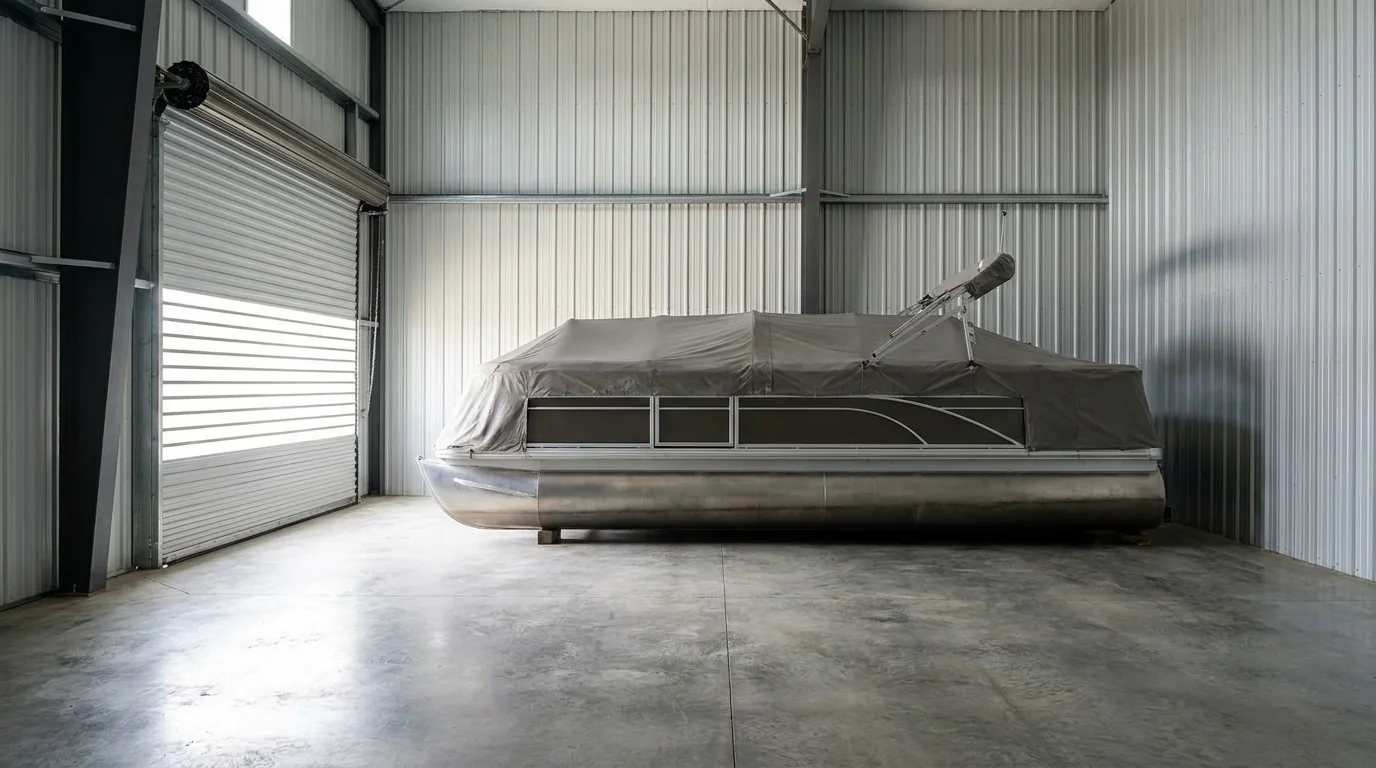
    A pontoon boat and a Class C RV parked side by side in a clean indoor storage bay for winter
    A pontoon and a motorhome tucked into a dry indoor bay for the winter, battery on a trickle charger.

    The pattern is remarkably consistent every spring. Customers who winterized carefully, including treating the fuel and running the engine, roll out clean on the first warm Saturday. Customers who parked the rig full of untreated pump gas in October come back for a jump-start or a tow.

    The stabilizer step is the one owners most often forget, because it seems minor compared to draining the cooling system or fogging the cylinders. It is not minor. Fuel is what actually gets the engine running in April, and fuel is what most commonly fails after six months in the dark.

    Pair fuel treatment with the rest of the storage prep. If you are also winterizing an RV or a boat, add stabilizer while you are already elbow-deep in the checklist. It takes five extra minutes and it protects everything downstream of the tank.

    Store Indoors, Start Clean in Spring

    Due North Storage offers indoor units up to 14×40 with electricity included, off Highway 10 in the St. Cloud area. Pair proper winterization with a dry, protected bay and skip the spring surprises.

    Frequently Asked Questions

    How long does fuel stabilizer keep gas fresh?

    STA-BIL’s storage formula keeps fresh gasoline usable for up to 24 months when added at the right ratio and treated immediately after purchase. Other marine and small-engine stabilizers offer similar 12 to 24 month windows.

    The key word is fresh: stabilizer preserves good fuel, it does not restore fuel that has already broken down.

    Do I need fuel stabilizer for a boat or RV that sits over winter?

    Yes, and it is one of the cheapest insurance policies you can buy for a stored engine. Untreated E10 gasoline can start breaking down in as little as 30 days.

    Over a Minnesota five to seven month layup it can gum up carburetors, clog injectors, or phase-separate. A few dollars of stabilizer prevents a repair bill.

    Can I use car fuel stabilizer in my boat?

    You can use a general-purpose stabilizer in a boat, but a marine-specific product is a better fit because marine formulas add corrosion inhibitors and moisture control for the wet, humid environment boats live in.

    If the label says marine or dual-purpose, you are covered.

    What is phase separation and can stabilizer prevent it?

    Phase separation happens when ethanol fuel absorbs enough water from the air that the ethanol and water sink to the bottom of the tank as a separate layer. No additive can reverse it, so the tank must be drained.

    Stabilizer helps by slowing moisture uptake, but a nearly full tank is the strongest defense.

    Should I store the tank full or empty?

    Full, to about 95 percent. A nearly full tank leaves almost no room for the humid air that causes condensation.

    Empty tanks let air move in and out with temperature swings, and that airflow is exactly what pulls moisture into the fuel.

    How do I add fuel stabilizer correctly?

    Add stabilizer to a nearly full tank of fresh fuel at the ratio on the label (commonly one ounce per 2.5 gallons for STA-BIL), then run the engine for five to ten minutes so treated fuel reaches the carburetor, injectors, and fuel lines.

    Treating only the tank leaves untreated fuel in the rest of the system, which defeats the point.

    Can old, untreated gas be saved with stabilizer?

    Not really. Stabilizer preserves fresh fuel; it does not restore fuel that has already oxidized or phase-separated.

    If your tank has been sitting untreated for six months, drain it and refill with fresh treated fuel rather than trying to rescue what is in there.

    Final Thoughts

    Fuel stabilizer is one of the highest-return five minutes you can spend on a stored engine. It costs less than a coffee, prevents the most common spring failure by a wide margin, and works across boats, RVs, generators, and every small engine in the garage.

    Treat fresh fuel, top the tank to 95%, run the engine long enough to pull the treated gas through the whole fuel system, and shut it down for the season. Do that, and April starts with a first-try startup instead of a service bill.

    Indoor Boat & RV Storage in Central Minnesota

    Clean, dry indoor units up to 14×40 with electricity included, just off Highway 10 near Saint Cloud and Little Falls. Reserve your spot before the fall rush.

    Sources:
    [1] State of Hawaii DLNR, Division of Boating and Ocean Recreation. Ethanol And Your Marine Engine (E-10). Retrieved 2026-07-28.
    [2] Gold Eagle. STA-BIL Storage Fuel Stabilizer (Product & Usage Guidance). Retrieved 2026-07-28.
    [3] U.S. Department of Energy, Alternative Fuels Data Center. Ethanol Fuel Basics. Retrieved 2026-07-28.
    [4] Mercury Marine. How to Winterize Your Outboard. Retrieved 2026-07-28.
    [5] BoatUS. To Winterize Or Not To Winterize? 2025. Retrieved 2026-07-28.
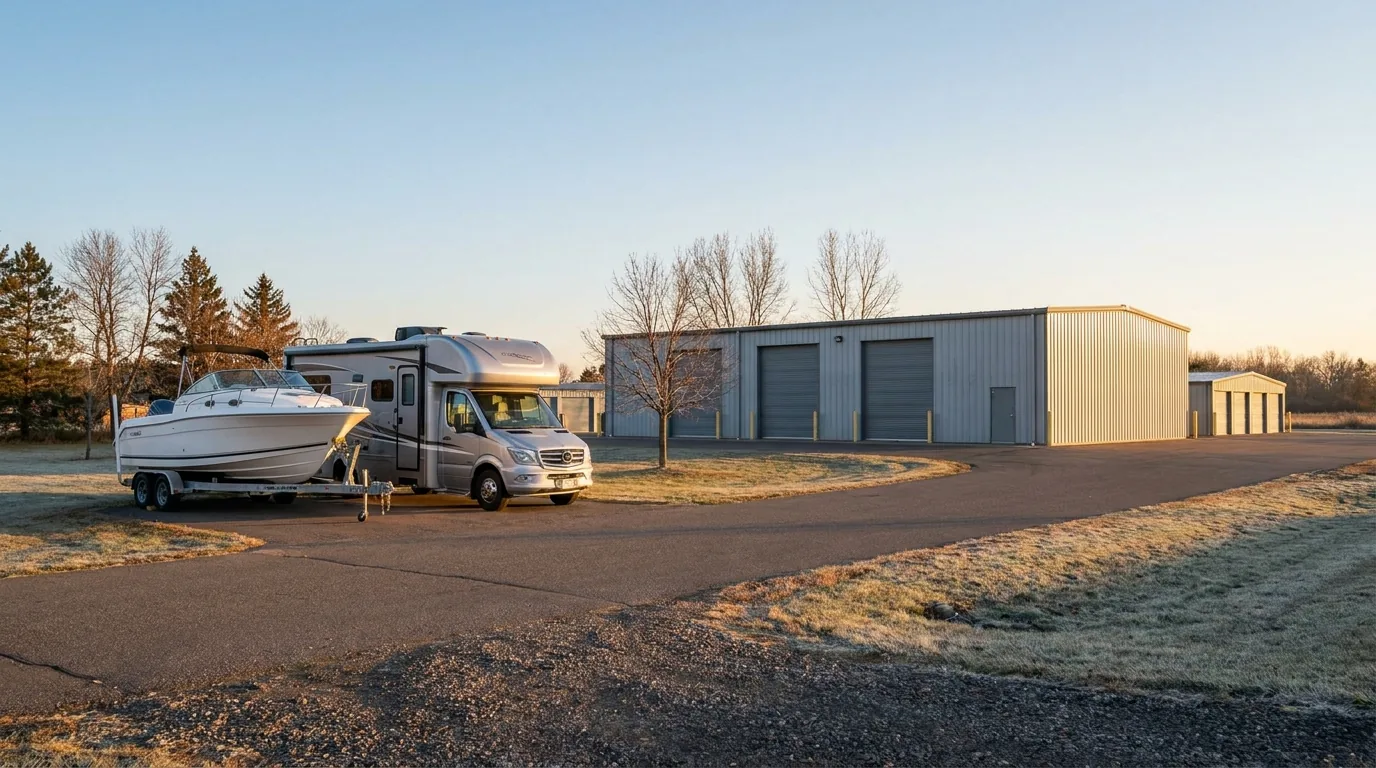
  • Indoor vs. Outdoor vs. Covered Storage: Which Is Right for Your Boat or RV?

    Indoor vs. Outdoor vs. Covered Storage: Which Is Right for Your Boat or RV?

    The first warm Saturday in April, you peel the cover off the boat and a mouse bolts from a nest in the captain’s chair. The vinyl is shredded, the wiring underneath is chewed, and the season has not even started. That morning was decided back in October, by one choice: where it spent the winter.

    The cheapest storage option in central Minnesota is a spot in your driveway. It is also the most expensive one, because that is where the freeze damage, rodent chewing, and sun-baked gel coat get done. Where you park a boat or RV for the off-season decides how much of it survives to next spring.

    Central Minnesota is thick with rigs that need an off-season home. As of 2025, Minnesota ranks first in the nation for registered boats per capita, roughly one for every six residents, [1] and RV makers shipped 342,220 units nationwide in 2025. [2] Most of them sit unused for months, and where they sit is the whole question.

    Storage comes in three flavors: fully enclosed indoor units, open-sided covered canopies, and open-air outdoor lots. Each has a price, and each has a real cost that shows up months later. This guide walks through what you actually get for the money, so you can match the option to the boat or RV instead of the sticker price.

    What Are Your Three Storage Options?

    Storage facilities usually market three tiers, and knowing which tier you are looking at prevents a lot of surprise the first winter. The names get used loosely, so it helps to define them the way the industry actually does.

    Indoor Storage (Fully Enclosed)

    Indoor units are walled and roofed, with a lockable door. You back the boat or RV in, close the door, and it sits in a sealed bay for the off-season. Premium indoor units include electricity, drive-in access, and door heights that fit tall coaches and pontoons.

    What you get: no snow load, no UV, no wind-driven rain, and a much smaller opening for rodents to find. What you pay: the highest per-month rate of the three options, offset by the fact that you skip most weather-related repair bills.

    Covered Storage (Canopy)

    Covered spots have a roof and often side walls on one or two sides, but the ends and at least one long side are open. Think of a pole barn without full walls. Snow load lands on the canopy instead of the rig, and the sun does not hit the deck directly.

    What you get: solid protection from snow load and UV, plus a break from most precipitation. What you pay: less than indoor, more than open outdoor. What still gets in: blowing snow, blowing dust, road-salt spray, and small animals looking for shelter.

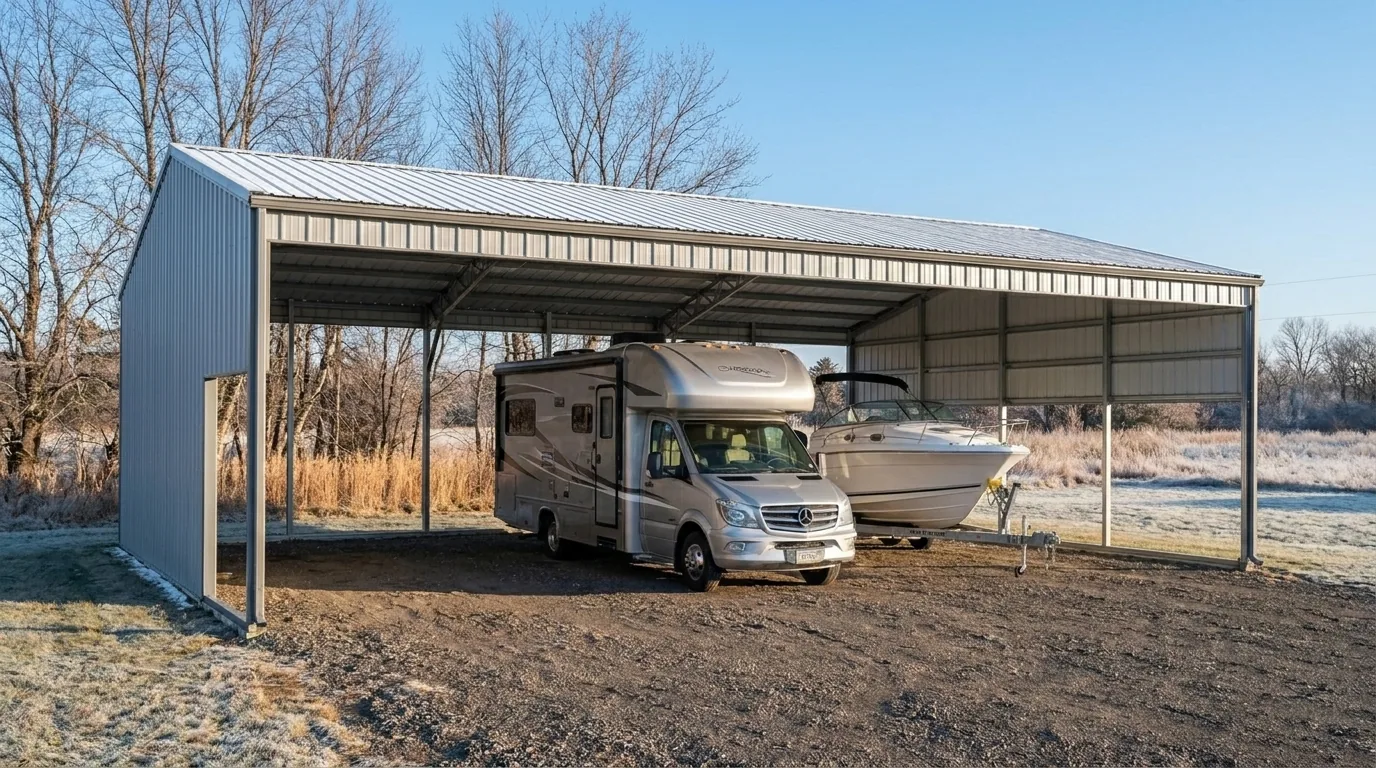
    RV and boat parked under an open-sided steel canopy with snow on the roof at a central Minnesota storage facility
    A canopy takes the snow load and blocks direct sun, but the sides stay open to wind and pests.

    Outdoor Storage (Open Lot)

    Outdoor storage is a marked parking spot or a section of gravel or asphalt with no roof or walls. It sits under the sky for six to seven months.

    What you get: the lowest monthly cost, plus easy back-in and pull-out access. What you pay: everything else. Snow accumulates on the cover, sun bakes the finish, freeze-thaw cycles work the seams, and rodents get a wide-open runway.

    How Much Protection Does Each Option Actually Offer?

    Protection breaks down into four things a boat or RV cares about: freeze exposure, snow load, UV and weather, and rodent pressure. Here is how the three storage types stack up on each.

    Factor Indoor Covered Outdoor
    Freeze exposure Same as outside air (unheated units), but no wind chill or blowing snow on seals Same as outside, some wind protection Full exposure, wind chill, freeze-thaw hitting every seam
    Snow load Zero on the rig Zero on the rig; canopy takes the weight Heavy load risk on covers, roofs, and frames
    UV and weather Fully shielded Roof blocks direct sun and rain Continuous UV, rain, and salt spray
    Rodent pressure Low; single entry point Moderate; open sides invite small animals High; no barrier at all

    Notice what indoor storage does not do: it does not heat the space. Most indoor storage in central Minnesota is unheated, so the interior temperature still drops well below freezing on a January night. That is why winterization matters regardless of where it spends the winter.

    What indoor storage does do is remove everything else. No snow load on the roof, no UV on the gel coat, no blowing salt on the aluminum, no rodent freeway from the field next door. It sits in still, dry air for seven months.

    What Does Storage Cost in Central Minnesota?

    Prices swing quite a bit between facilities and unit sizes, but the general shape holds. Outdoor lots run the cheapest, canopies sit in the middle, and enclosed indoor bays cost the most. Location matters too: units close to the highway with easy access typically list higher than remote lots that require a longer drive to reach.

    Rough monthly ranges for secure boat and RV storage near St. Cloud, whether you own a boat, an RV, or a camper:

    • Outdoor lot: $40 to $90 per month, depending on lot access and whether the surface is gravel or paved.
    • Covered canopy: $75 to $150 per month, usually with basic electrical shared across the row.
    • Indoor unit: $125 to $280 per month for premium sizes from 11×22 up to 14×40, typically with individual electricity and drive-in access.

    The math changes when you fold in what each option costs when something goes wrong. When BoatUS analyzed roughly a decade of its marine insurance freeze claims, more than 75% involved a cracked engine block or exhaust manifold, and the group estimates improper storage causes over $50 million in preventable damage nationwide every year. [3]

    A single cracked block can total an older outboard. Replacing one commonly runs well above $10,000 before labor. Set that against the roughly $120 per month gap between outdoor and premium indoor storage over a seven-month layup, and the “expensive” option starts to look like the cheap one.

    Which Storage Type Wins for a Minnesota Winter?

    Winter is where the three tiers separate the most. St. Cloud sits below freezing for just over three months a year, from late November into early March, and in the 1991–2020 climate normals its average January low sits near 2.9°F. [4] Water expands about 9% when it freezes, [5] with enough force to crack a cast-iron engine block. [3]

    Add the two facts together and any water left in the engine, cooling system, or water lines becomes a repair bill. That is true whether it winters indoors or outdoors, which is why full winterization is the price of entry either way. Where storage type matters most is in the second layer of damage: the roof, the finish, the interior, and the electrical.

    Outdoor storage catches all of it. A February snowstorm dumps eight inches on the cover, the sun warms it in the afternoon, it refreezes overnight, and by March the seams under it have been worked loose. Mice hop up from the field, find a gap, and spend the winter nesting in the cushions.

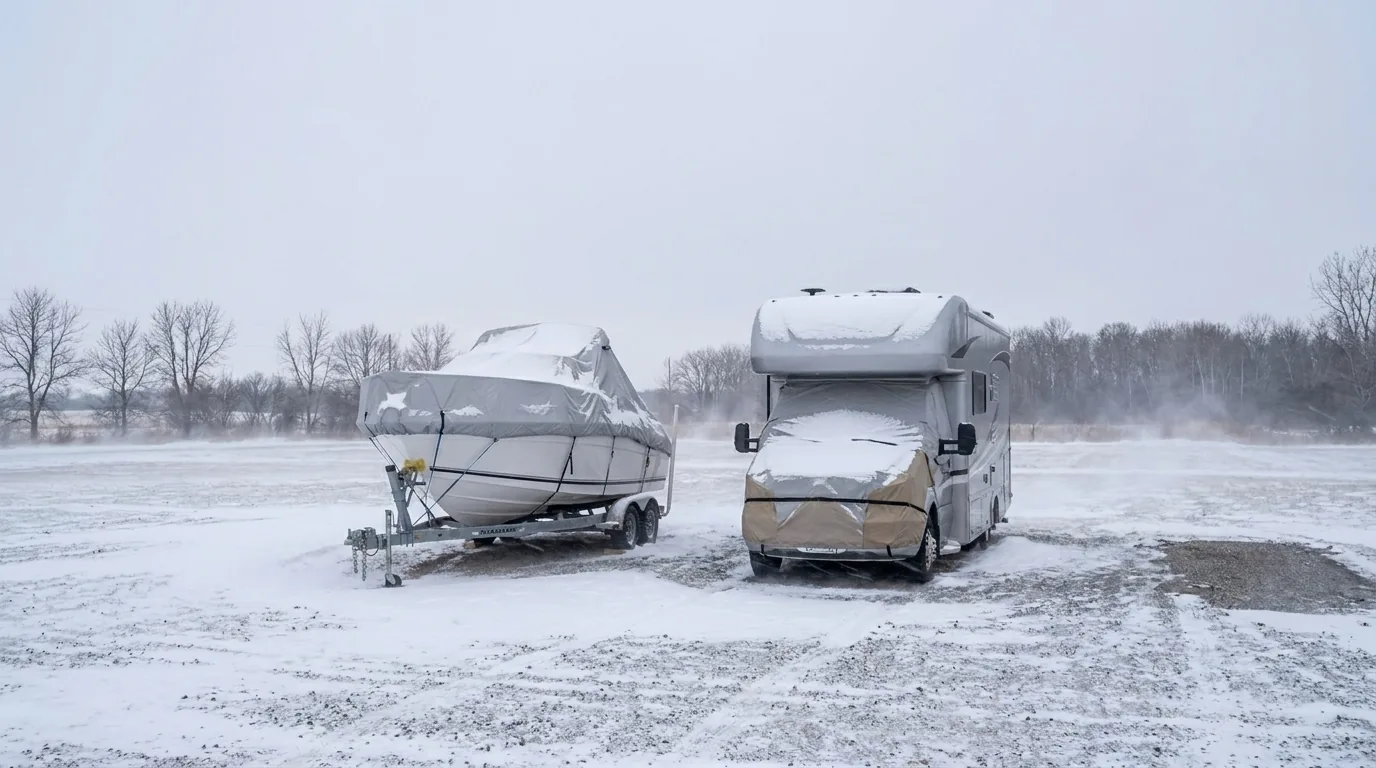
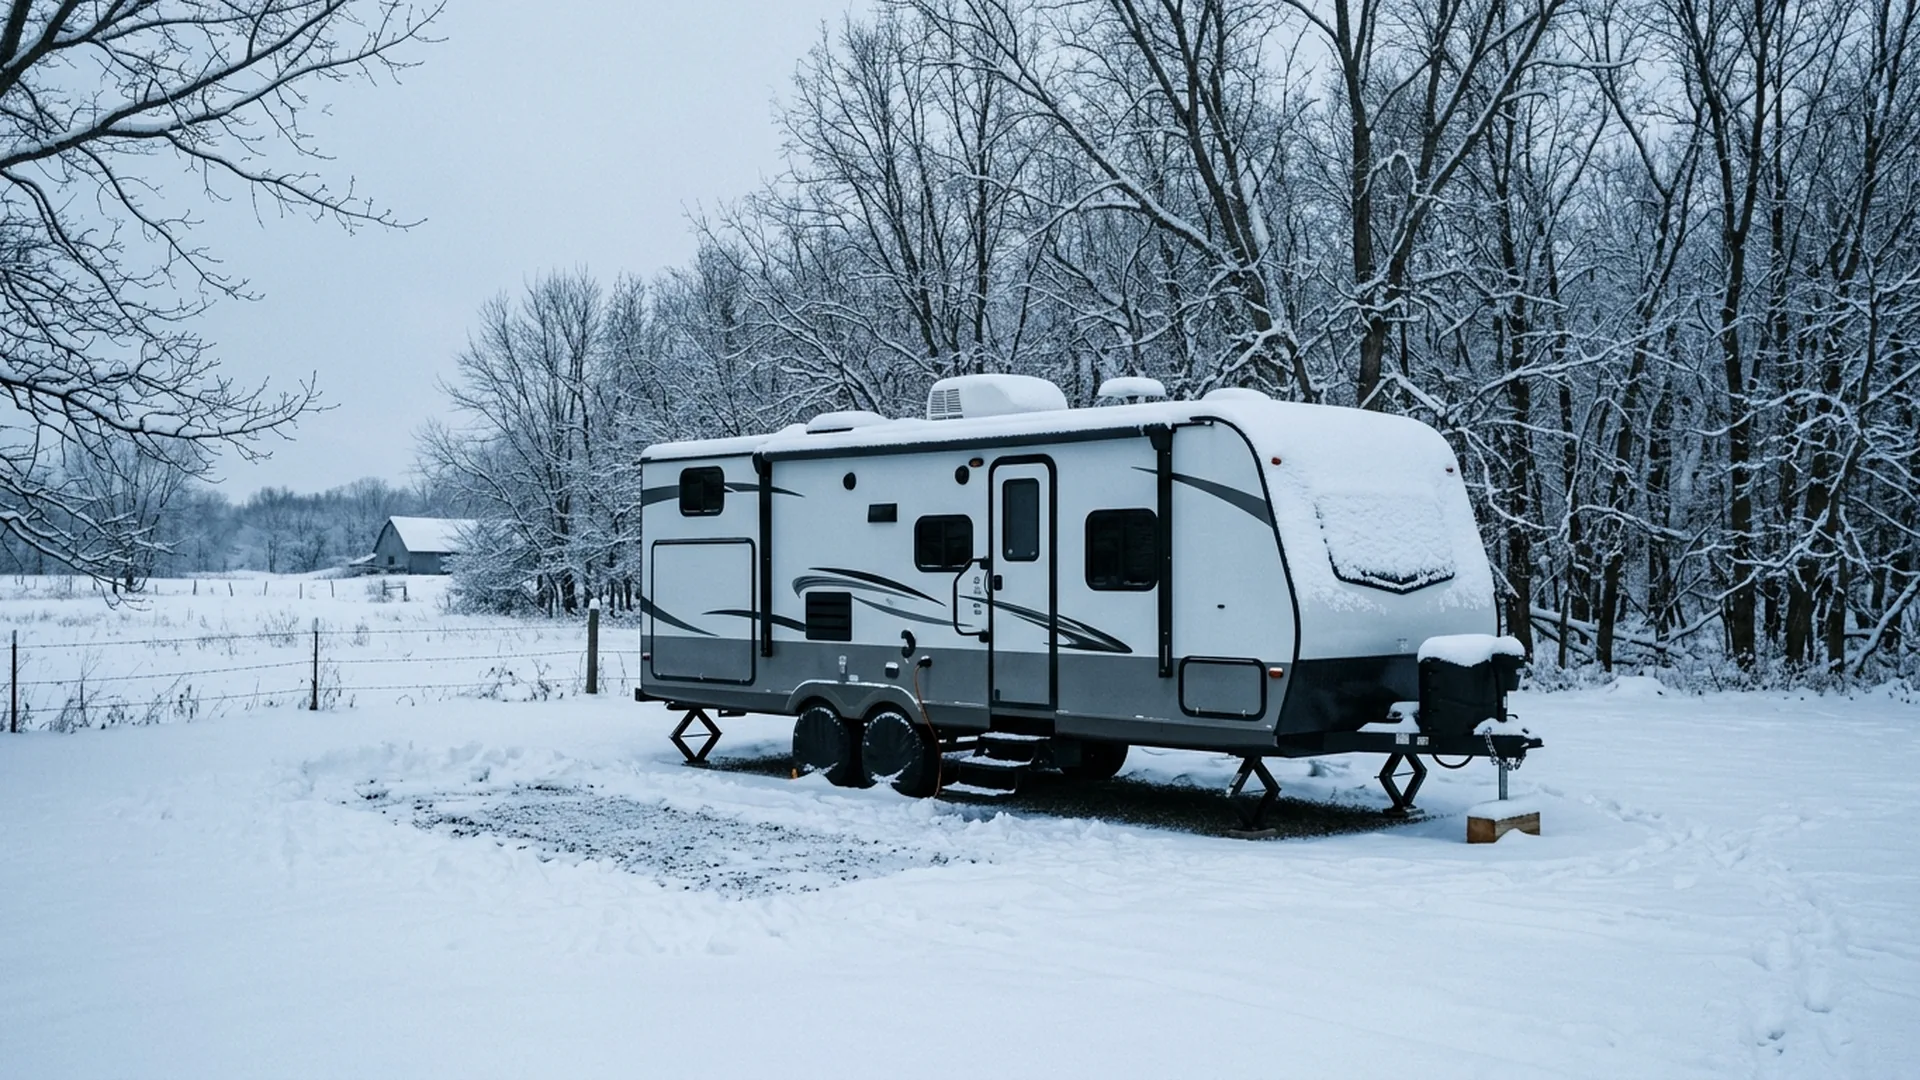
    Covered boat and travel trailer under deep snow on an open outdoor storage lot in Minnesota winter
    On an open lot, snow piles on the cover and freeze-thaw works every seam all winter.

    Indoor storage removes those variables at once. The cover, the tires, and the electrical harness look the way they did in October, because nothing has been working on them all winter. If you are already going to winterize the RV or the boat, indoor storage is what protects the work you just did.

    What About Summer Storage?

    Summer is easier on a stored rig, but not free. Sun exposure adds up fast on vinyl seats, gel coat, and tire sidewalls, and one that sits three weeks between weekend uses in a full-sun outdoor lot ages noticeably in one season.

    Frequent-use owners often park outdoor during the boating and camping months, when the boat or RV is out on the water or on the road most weekends. Occasional-use owners tend to keep indoor storage year-round so the finish and the interior stay showroom clean between longer gaps.

    Covered storage splits the difference well in summer. The roof blocks direct sun and the daily rain hits the canopy instead of the deck, and the open sides let air circulate so nothing stays damp. If it lives outdoors during the season, a canopy spot is a small upgrade with a real payoff for the finish.

    How Do You Choose the Right Option for Your Rig?

    Match the storage tier to what you own and how you use it, then check that the bay actually fits the rig; our guide to what size storage unit you need walks through the dimensions. The bigger the investment and the longer the layup, the more indoor storage makes sense.

    A rough sorting rule:

    • Choose indoor if the rig is worth $30,000 or more, sits for four or more months at a time, has a battery you want on a maintainer, or has soft goods (vinyl seats, canvas, custom interior) you want to protect.
    • Choose covered if you want a middle-tier upgrade over open outdoor, or if it is used frequently in the off-season and you mostly need snow-load and UV protection.
    • Choose outdoor if the boat or RV is inexpensive to replace, you keep an eye on it through the winter, and you are comfortable with a full winterization routine and a high-quality cover.

    There is a fourth factor most owners forget: HOA rules and city ordinances. A lot of central Minnesota neighborhoods cap how long an RV or boat can sit in a driveway, and some ban them entirely. If the driveway is not really an option, the choice narrows to which paid storage tier fits the rig and the budget.

    What We See at Due North Storage

    The pattern is consistent every spring. The rigs that come out ready to launch or roll are almost always the ones that spent the winter indoors, whether that is with us or in an owner’s shop. The rigs that come in for surprise repairs almost always spent the winter outside under a tarp.

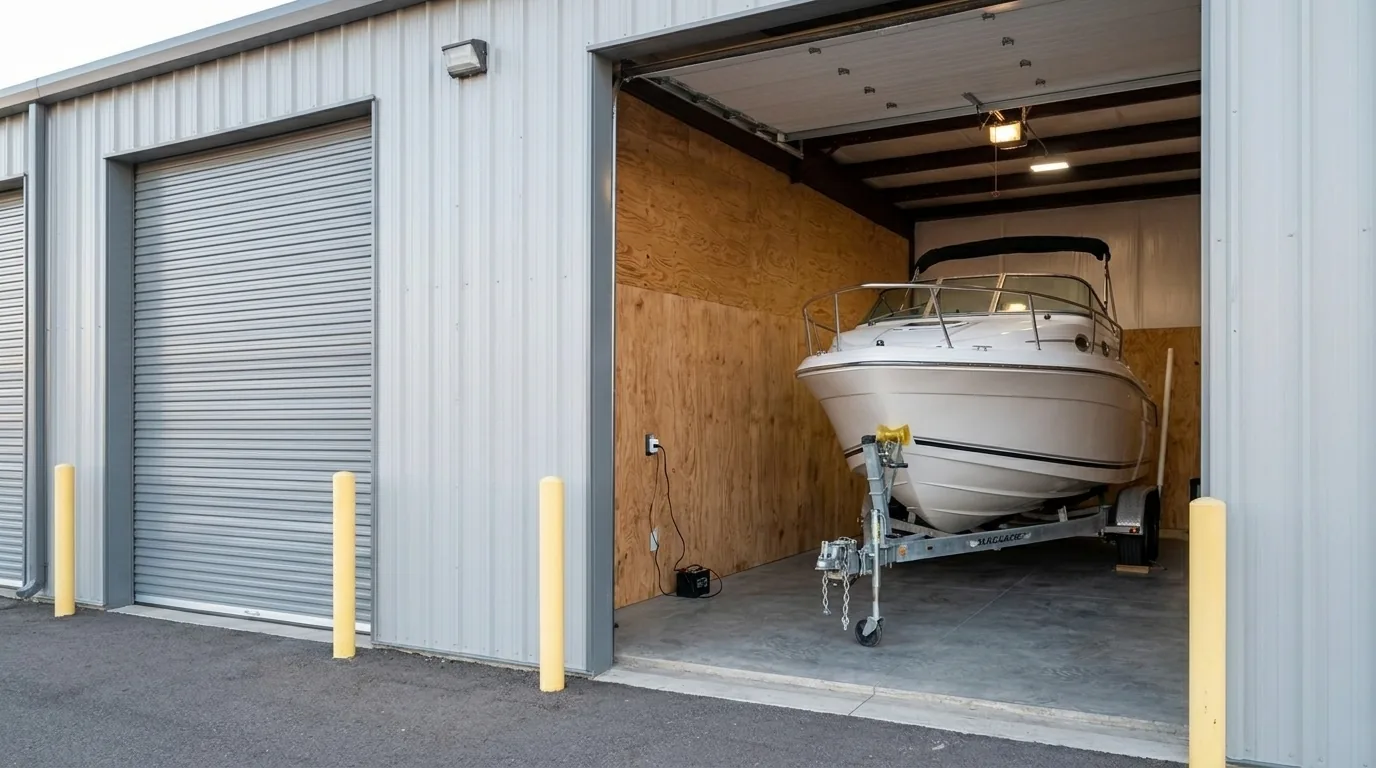
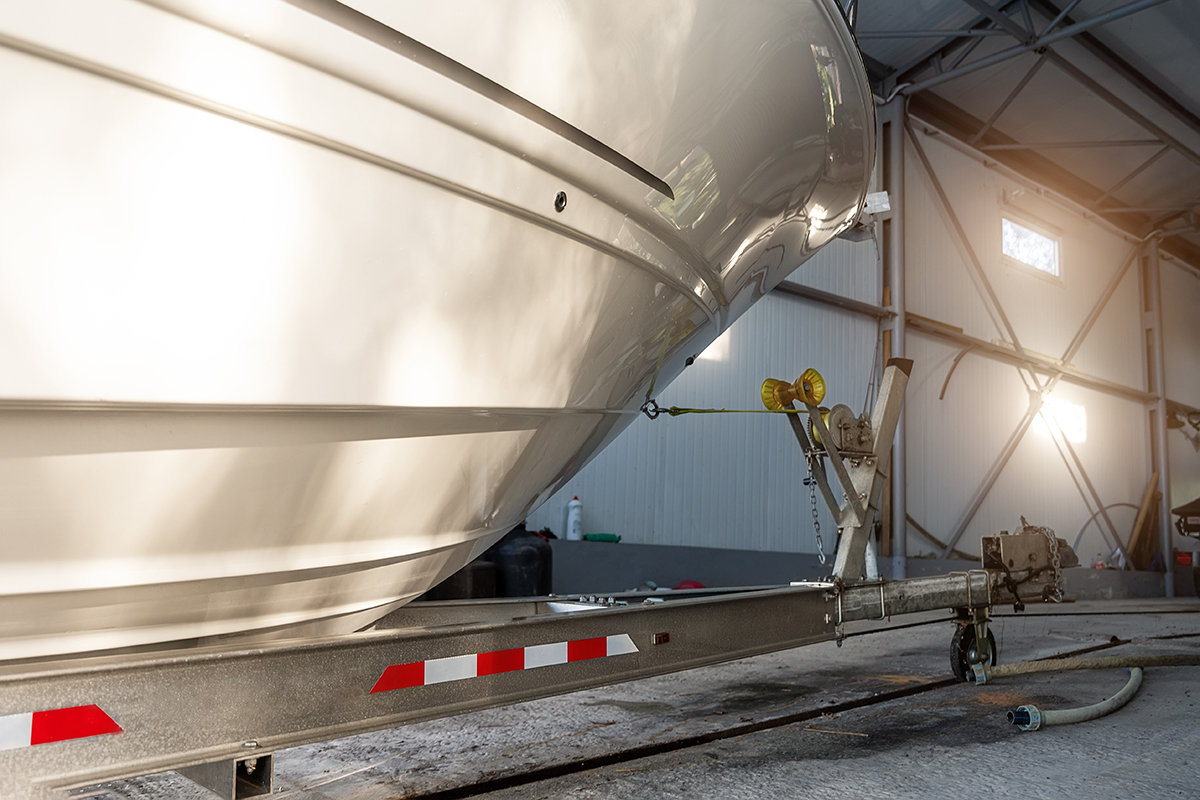
    Boat on a trailer inside a clean enclosed indoor storage unit with the door open
    An enclosed unit keeps the boat or RV in still, dry air, with an outlet for a battery maintainer.

    Freeze damage gets the headlines because it is the most expensive single failure, and that piece is preventable with proper winterization regardless of storage. What indoor storage prevents is the slow-motion damage: the faded gel coat, the mildew on the seats, the mouse-chewed wiring harness, the cracked cover seam that leaked water into the cabin from December through March.

    Owners tell us the calm feeling is worth as much as the physical protection. You are not checking the weather app after every storm to see if you need to sweep the roof. The rig is safe, dry, and ready when you are.

    Store Indoors This Season

    Due North Storage offers indoor units up to 14×40 with electricity included, just off Highway 10 in the St. Cloud area. Skip the snow load, the freeze-thaw, and the spring surprises.

    Final Thoughts

    The right storage tier is the one that matches the value of the rig and the length of the layup. Outdoor is cheap and honest about what it delivers. Covered is a real upgrade for snow load and UV, but leaves the sides open. Indoor costs the most up front and, for most Minnesota owners, quietly pays for itself over one bad-luck winter avoided.

    Whatever you choose, do the winterizing work in October. The rig that arrives at storage properly prepped comes out clean in April. The rig that skips those steps comes out with a repair estimate. Where it sleeps decides how much of the season it costs you.

    Frequently Asked Questions

    Is indoor storage worth the extra cost in Minnesota?

    For most boat and RV owners, yes. Indoor storage removes snow load, UV, and rodent pressure, and units with electricity keep the battery on a maintainer all winter.

    Given that a replacement outboard can top $10,000, the price gap between outdoor and indoor storage usually pays for itself the first spring you skip a weather-related repair.

    Does a covered outdoor space protect against Minnesota cold?

    A canopy blocks snow and UV, but the air temperature inside is still the outside temperature. Freeze damage happens the same way under a canopy as in the open, so you still need to fully winterize the rig.

    Covered storage is better than open outdoor, but it is not a substitute for winterization.

    How much does boat or RV storage cost in central Minnesota?

    Outdoor lots typically run the lowest, covered canopies sit in the middle, and indoor units cost the most. In the St. Cloud area, indoor vehicle units generally range from about $125 to $280 a month depending on size.

    Premium features like electricity, drive-in access, and 14×40 door heights are usually included in that range.

    Can I skip winterizing if I use indoor storage?

    No. Most indoor units are unheated, so the interior temperature still drops well below freezing on a January night. Winterize the water system, stabilize the fuel, and store the battery correctly regardless of where the rig sleeps.

    Indoor storage protects the exterior and interior; winterization protects the mechanicals.

    Which storage type is best for a pontoon?

    Indoor storage suits pontoons best because it eliminates the snow load that crushes covers, blocks the UV that fades vinyl seats, and keeps out the mice that shred foam cushions.

    If indoor is not available, a properly vented shrink-wrap job under a canopy is the next best option.

    Does outdoor storage void my RV or boat insurance?

    Not usually, but many policies exclude freeze damage and rodent damage as preventable maintenance rather than covered losses.

    Read your policy before deciding: some insurers offer premium discounts for indoor storage, and the payout picture on a claim often looks very different between outdoor and indoor storage.

    Do I need indoor storage in the summer too?

    Not always, but sustained sun exposure damages gel coat, vinyl, and tires faster than most owners realize. If your rig sits for weeks between uses in a sunny lot, indoor storage adds meaningful lifespan.

    Frequent-use owners often park outdoor in summer and switch to indoor for winter.

    Indoor Boat & RV Storage in Central Minnesota

    Clean, dry indoor units up to 14×40 with electricity included, off Highway 10 near Saint Cloud and Little Falls. Get your rig into a bay before the season fills up.

    Sources:
    [1] Minnesota Department of Natural Resources. Boating, Canoeing and Kayaking (Minnesota Facts). Updated May 2025. Retrieved 2026-07-28.
    [2] RV Industry Association. RV Shipments End 2025 at 342,220 Units, Modest 2.5% Growth Over 2024. December 2025. Retrieved 2026-07-28.
    [3] BoatUS. Your Boat Engine’s Chillin’ (Winterizing). Retrieved 2026-07-28.
    [4] NOAA / National Weather Service, via St. Cloud State University Climate Office. January Normal Data for Saint Cloud, Minnesota (1991–2020). Retrieved 2026-07-28.
    [5] U.S. Geological Survey, Water Science School. Water Density. Retrieved 2026-07-28.
  • Pontoon Winterization 101: Protecting Your Boat Through a Minnesota Winter

    Pontoon Winterization 101: Protecting Your Boat Through a Minnesota Winter

    The worst part of spring for a boat owner isn’t the wait for open water. It’s the pontoon that won’t start. You pull off the cover on the first warm Saturday, turn the key, and get a dead click, or the milky oil that means water froze solid inside the motor while you weren’t looking.

    Water is strange stuff. Almost every liquid shrinks as it gets colder, but water does the opposite once it freezes. It expands about 9% in volume, and it does so with enough force to split cast iron. [1]

    That one quirk of physics is why a forgotten cup of water left in your outboard can turn into a five-figure repair by April. In central Minnesota, where January means a month of sub-zero nights, the question isn’t whether trapped water will freeze. It’s whether any is left in your boat to do the damage.

    This guide walks through the whole job, from the engine to the toons, the way we’d do it for our own boats here in the St. Cloud area. None of it is hard. Most of it is just remembering to do it before the first hard freeze.

    Why Minnesota Winters Are So Hard on Boats

    Minnesota loves its boats. The state ranks first in the nation for watercraft per capita, with roughly one registered boat for every six residents. [2] Most of them sit idle from October to May.

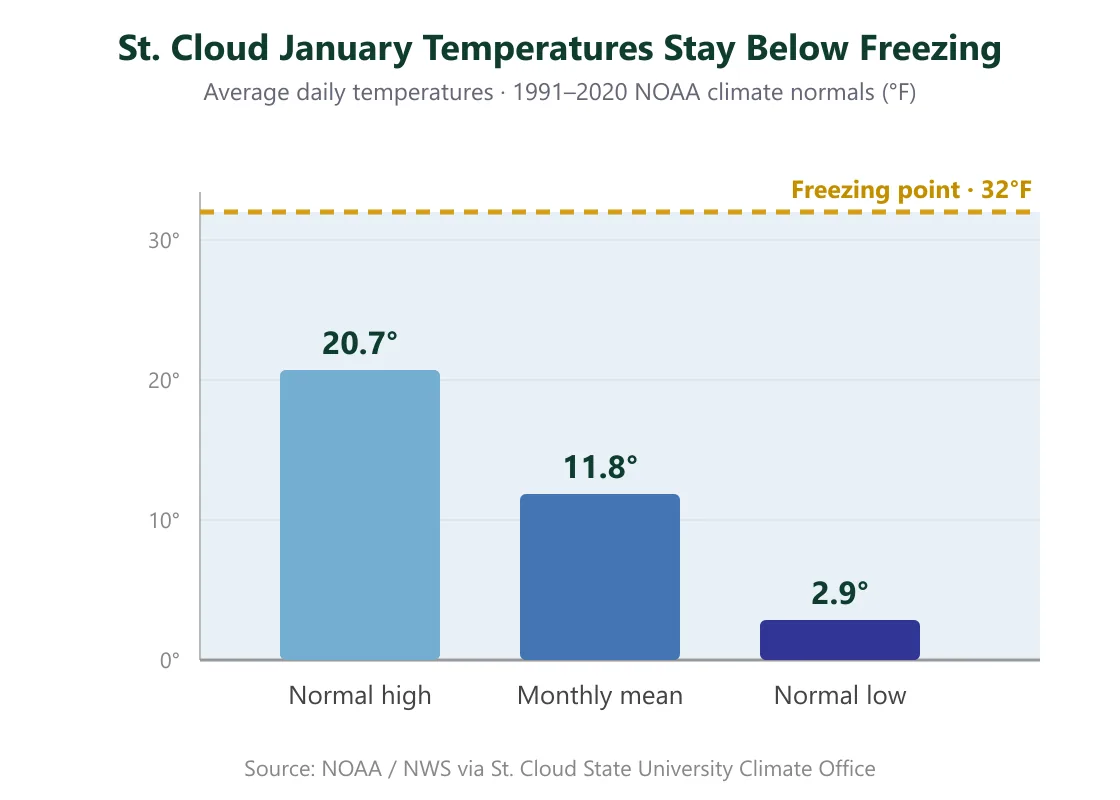
    That long off-season is the problem. Using the 1991–2020 climate normals, the air around St. Cloud never warms up enough in January to thaw anything out. [3] The chart below shows how far below freezing the whole month sits, on average.

    Bar chart of St. Cloud January average temperatures from the 1991 to 2020 NOAA climate normals: normal high 20.7 F, monthly mean 11.8 F, and normal low 2.9 F, all below the 32 F freezing line

    Add water into the mix, and you have a recipe for damage. Water gets into a marine engine’s cooling passages, the exhaust, the gearcase, and the bilge during normal use. Leave it there, let it freeze, and it pries metal apart from the inside.

    Here’s the part owners miss: it isn’t the depth of the cold that breaks a boat; it’s the duration. A single cold night rarely reaches the water deep inside a block. A solid week of it does, every winter, which is exactly what Minnesota delivers.

    What Does Freeze Damage Actually Cost?

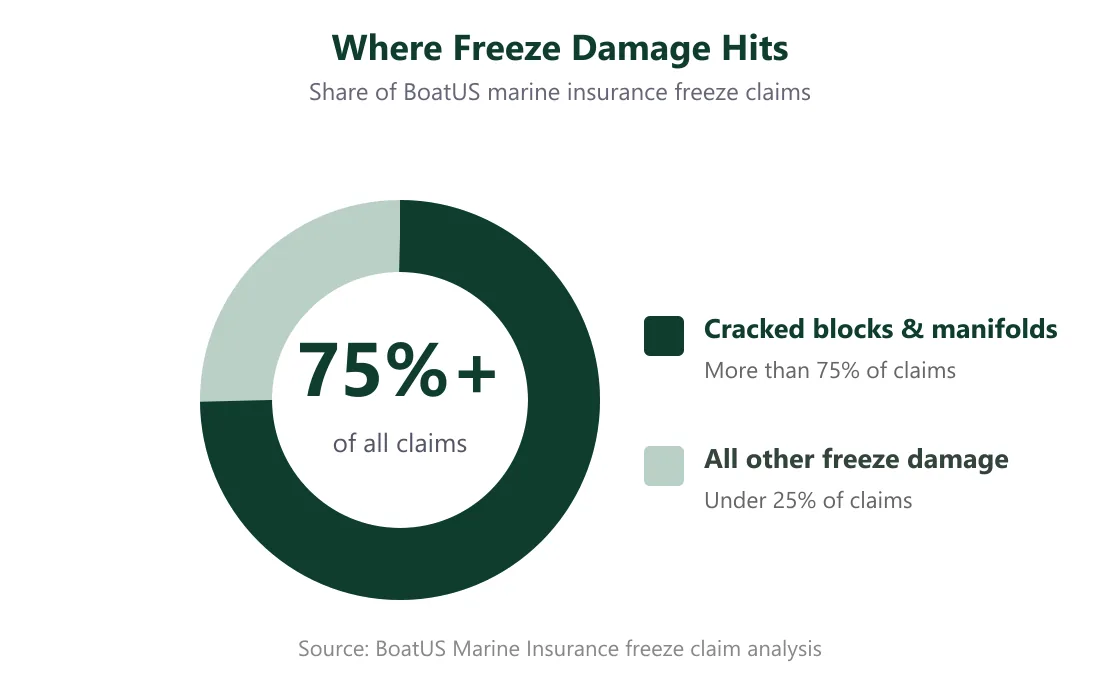
    A lot more than the prevention. When BoatUS analyzed about a decade of its marine insurance freeze claims, it found that the overwhelming majority involved a cracked engine block or exhaust manifold, almost always because water sat in the engine or cooling system through a freeze. [4] The chart below shows how lopsided the claim mix is.

    Donut chart showing more than 75 percent of BoatUS marine insurance freeze claims are cracked engine blocks or exhaust manifolds, with under 25 percent all other freeze damage

    The bill is brutal. Replacing even a small outboard can top $10,000 before labor, and a cracked block can total an older motor outright. Across the country, BoatUS estimates improper storage causes more than $50 million in preventable damage every year. [5]

    The encouraging flip side: BoatUS says its winterizing guidance addresses the reasons behind more than 95% of the freeze claims it handled over the past decade. [4] In other words, this is a problem you can almost entirely engineer away with an afternoon of work and a few gallons of antifreeze.

    How Do You Winterize the Engine and Fuel System?

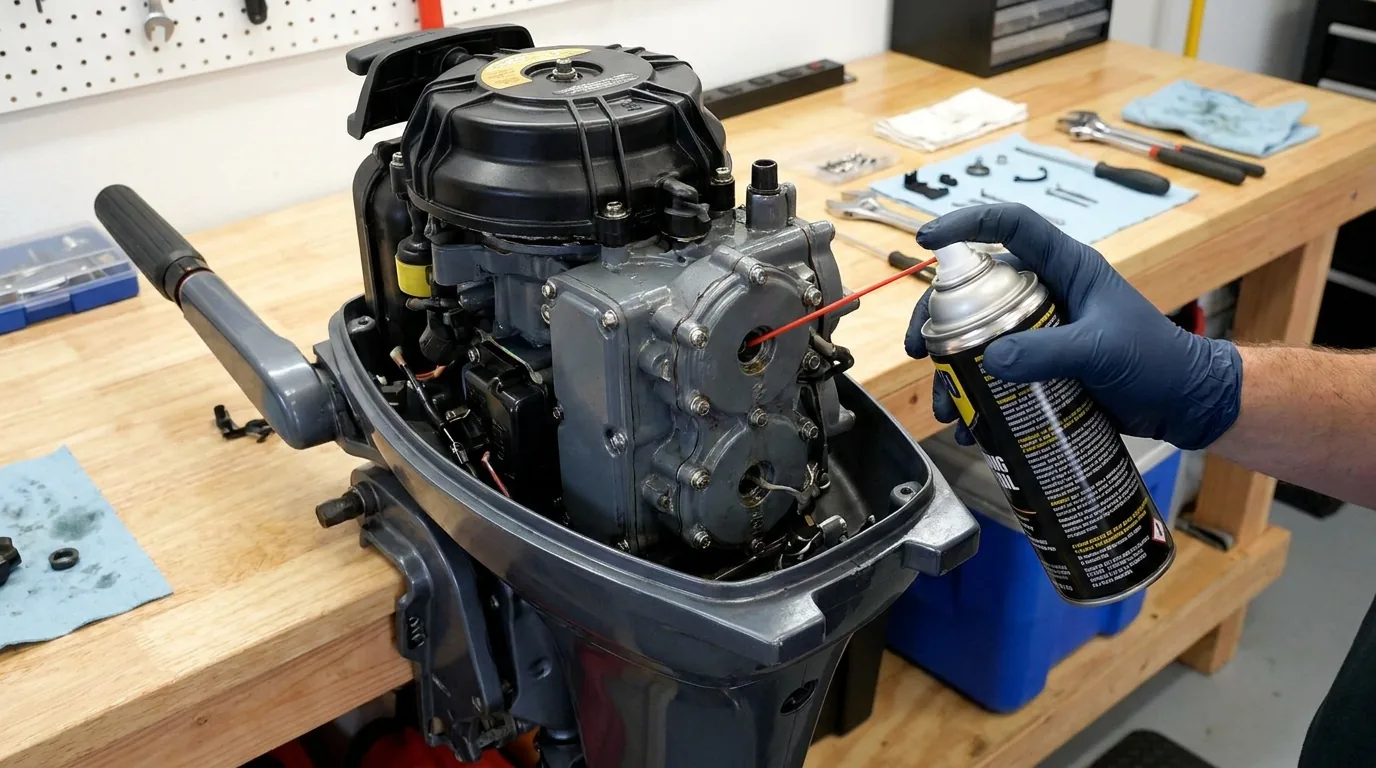
    The engine is where freeze claims are won or lost, so start here. The goal is simple: get the water out, get oil onto bare metal, and keep the fuel from going bad. Mercury Marine’s outboard procedure covers all three. [6]

    A gloved hand spraying fogging oil into an outboard motor on a garage workbench during winterization

    Drain the Water and Add Antifreeze

    Run the motor to operating temperature, then drain the cooling system fully and circulate marine (propylene glycol) antifreeze until it runs out the prop. This pushes out any pockets of plain water that would otherwise freeze and crack a passage.

    Fog the Cylinders

    With the engine warm, spray fogging oil into the cylinders through the spark-plug holes or the air intake. [6] The oil film stops the cylinder walls from rusting while the boat sits for seven months.

    Change the Lower-Unit Gear Lube

    Drain the gearcase and check the old lube. If it looks milky or chocolate-colored, water has gotten in past a seal. That trapped water can freeze and crack the lower unit, so refill with fresh gear oil before storage, not after.

    Treat and Top Off the Fuel

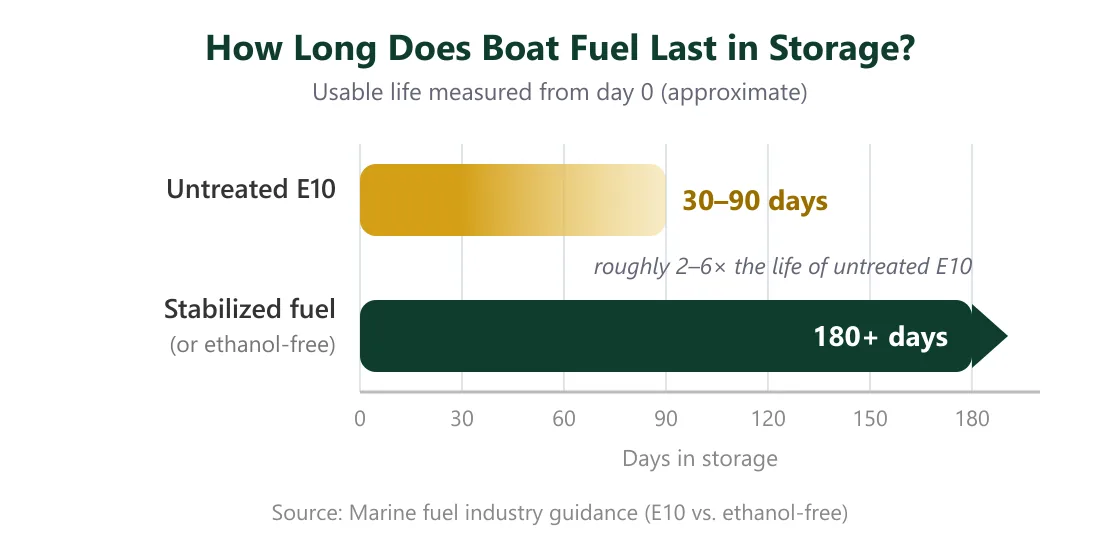
    This step trips up more owners than any other, because of ethanol. Most pump gas is E10, and ethanol is hygroscopic, meaning it pulls water straight out of the air. Untreated E10 breaks down fast in storage, while stabilized or ethanol-free fuel holds up much longer. The chart below shows the gap. [7]

    Bar chart comparing boat fuel storage life: untreated E10 gasoline lasts 30 to 90 days while stabilized or ethanol-free fuel lasts 180 or more days

    The bigger risk with ethanol is water. Once a tank absorbs enough, the fuel undergoes phase separation, which no additive can reverse, so the tank has to be drained.

    The fix is easy. Fill the tank to about 95%, add a marine fuel stabilizer, and run the engine a few minutes so treated fuel reaches the carburetor or injectors. A nearly full, stabilized tank leaves almost no room for condensation to form.

    How Should You Store a Marine Battery in the Cold?

    Cold is hard on batteries, but a dead battery is the one that actually breaks. A fully charged lead-acid battery’s electrolyte stays liquid down to about −67°F. As it discharges, the freezing point climbs fast: a badly run-down battery can freeze near 5°F, and its case can crack. [8] With St. Cloud’s average January low well below that, a weak battery is squarely inside the danger zone.

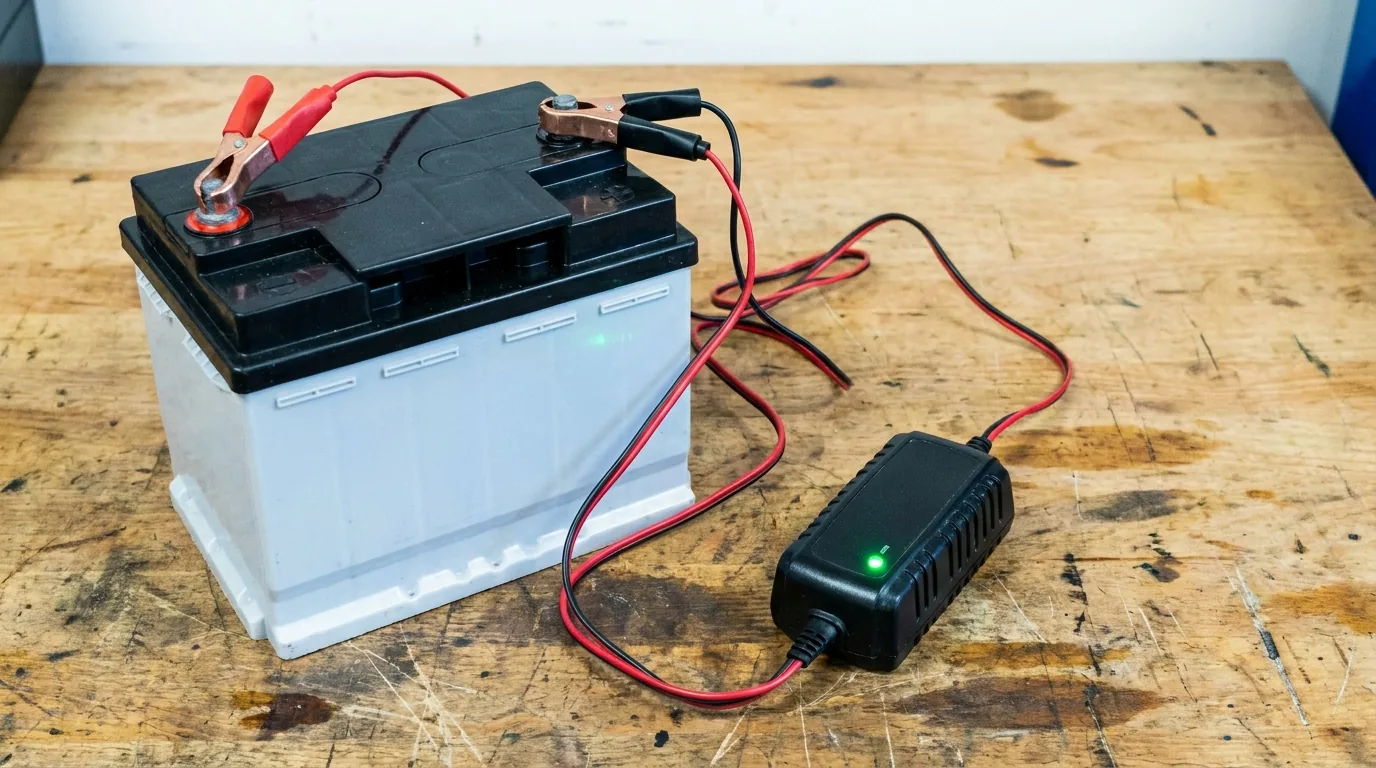
    A 12-volt marine battery on a workbench connected to an automatic trickle charger with a green light

    Cold also robs you of usable power. A battery near freezing delivers well under its rated capacity, and one left to self-discharge all winter slowly slides toward that vulnerable, freezable state. [8]

    What to Do

    • Charge it fully before storage. Never put away a battery that’s even half down.
    • Keep it on a maintainer. A small automatic trickle charger holds the charge without overcooking the cells.
    • Store it dry and off concrete if you can, on a shelf or a board. A heated space is ideal but not required as long as it stays charged.
    • Clean the terminals and give them a light coat of dielectric grease to fend off corrosion.

    Pontoon-Specific Problems You Can’t Ignore

    A pontoon isn’t just a boat with a flat deck. The toons, the furniture, and the open layout create a few headaches that a fishing boat never deals with. Three matter most over a Minnesota winter.

    Mice Love a Stored Pontoon

    Rodents treat a covered pontoon like a heated cabin: dry, sheltered, and full of nesting material. Discover Boating recommends pulling out all food, removing cushions and seats where mice nest, and protecting wiring with rodent tape before storage. [9]

    Be skeptical of the folk remedies, too. Mothballs, dryer sheets, and human hair all get passed around as mouse repellents, but we’ve seen plenty of chewed wiring on boats that were “protected” by a box of dryer sheets. Bet on rodent tape and a stripped, cushion-free interior instead.

    Trapped Moisture Means Mildew

    Pontoon seats are vinyl over foam, and that foam holds water. Seal a damp boat under a non-breathable tarp, and you build a greenhouse: condensation forms, can’t escape, and mildew blooms across every cushion by spring.

    Ventilation is the whole game. A breathable, fitted cover or a properly vented shrink-wrap job lets vapor out while keeping snow and rodents off. A blue poly tarp cinched down tight does the opposite.

    Aluminum and Standing Water

    Aluminum toons resist rust, but they don’t love sitting in slush and road salt all winter, and trapped water inside a toon can freeze. Rinse the pontoons after haul-out, drain them if they have drain plugs, and get the boat up off bare ground so air can move underneath.

    Where You Store the Boat Matters as Much as How

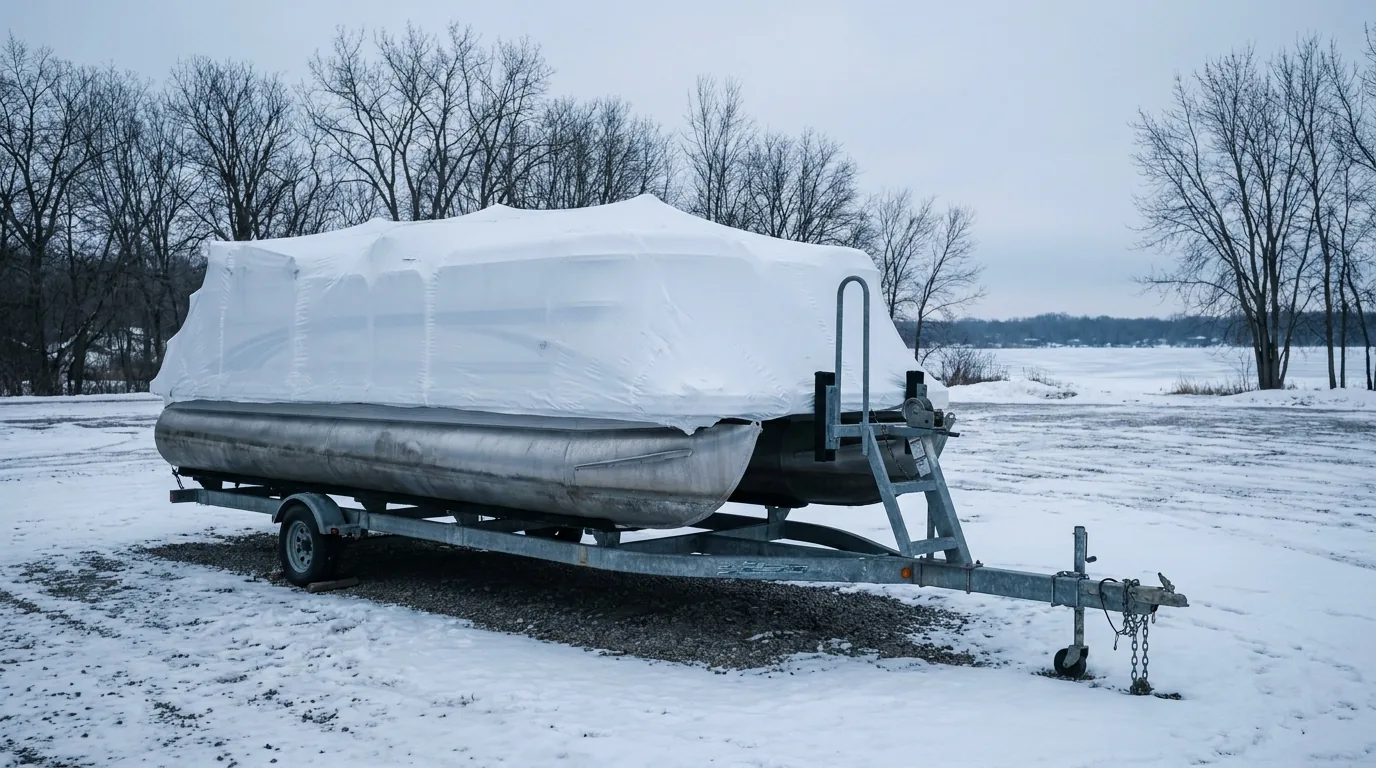
    A covered pontoon boat parked inside a clean indoor self-storage unit with a concrete floor

    You can do every winterizing step perfectly and still lose ground if the boat spends five months under a snowbank. Where it sits decides how much weather, moisture, and critter pressure it has to survive.

    Outdoor storage is the riskiest. Snow load can crush a cover and crack a frame, sun and wind shred wrap, and salt-laden slush works on the aluminum and fasteners. Even a good shrink-wrap job is fighting the elements all winter long.

    Indoor, ventilated storage removes most of those variables at once. No snow load, no UV, no blowing salt, and far less of the wild humidity swing that drives mildew. The boat comes out in spring looking the way it went in.

    What We See at Due North Storage

    The pontoons that give owners trouble in spring almost never fail because of one big mistake. They failed from a stack of small ones: a little water left in the motor, a half-charged battery, a tarp cinched down over damp seats.

    The boats that come out ready to launch were winterized properly and then kept somewhere dry and out of the weather. That combination is the whole secret.

    Store Your Pontoon Indoors This Winter

    Due North Storage offers clean, dry indoor units up to 14×40 with electricity included, with easy access just off Highway 10 in the St. Cloud area. Winterize the boat, roll it in, and forget about it until spring.

    The Pontoon Winterization Checklist

    Pull it all together and the job is one afternoon. Here’s the order we’d run it in:

    Frequently Asked Questions

    When Should I Winterize My Pontoon in Minnesota?

    Aim to finish before the first hard freeze, which in central Minnesota often arrives in October. Once overnight lows are reliably below freezing, any water left in the engine is at risk. Don’t wait for the lakes to ice over, since the damage can happen weeks earlier.

    Can I Just Cover the Boat Instead of Fully Winterizing It?

    No. A cover keeps snow and rodents off, but it does nothing about the water inside the engine, gearcase, and cooling system. With St. Cloud’s January mean well below freezing, that trapped water will freeze and expand, which is what cracks blocks and manifolds. Cover and winterize.

    Do I Really Need to Fog the Engine?

    Yes, if you want the cylinders to survive a seven-month layup. Fogging oil leaves a film that prevents surface rust on the cylinder walls while the motor sits unused. Mercury Marine includes it as a standard step in outboard winterization, and skipping it is a common cause of spring hard-starting.

    Why Does Ethanol Fuel Matter So Much for Winter Storage?

    Ethanol absorbs water from the air, and untreated E10 can start breaking down in 30 to 90 days. If enough water builds up, the fuel phase-separates and no additive can fix it, so the tank must be drained. A nearly full tank with marine stabilizer prevents both problems.

    Is Indoor Storage Worth the Cost for a Pontoon?

    For most owners, yes. Indoor storage eliminates snow load, UV fading, road-salt corrosion, and the humidity swings that grow mildew on vinyl seats. Given that replacing even a small engine can top $10,000, a winter of dry indoor storage is modest protection for a major asset.

    Final Thoughts

    Freeze damage to a pontoon is almost never bad luck. It traces back to water left where it shouldn’t be, fuel that wasn’t treated, or a battery that drifted dead in the cold. Every one of those is preventable in a single afternoon.

    Drain the water, fog the engine, stabilize the fuel, charge the battery, and tuck the boat somewhere dry. Do that, and your pontoon comes out next May ready for the first warm Saturday on the lake instead of a tow to the repair shop.

    Indoor Boat Storage in Central Minnesota

    Clean, dry indoor units up to 14×40 with electricity included, just off Highway 10 in the St. Cloud area. Reserve your pontoon’s winter home before the season fills up.

    Sources:
    [1] U.S. Geological Survey, Water Science School. Water Density. Retrieved 2026-06-29.
    [2] Minnesota DNR. Boating, Canoeing and Kayaking (Minnesota Facts). Updated May 2025.
    [3] NOAA / National Weather Service, via St. Cloud State University Climate Office. January Normal Data for Saint Cloud, Minnesota (1991–2020). Retrieved 2026-06-29.
    [4] BoatUS. Your Boat Engine’s Chillin’ (Winterizing). Retrieved 2026-06-29.
    [5] BoatUS. To Winterize Or Not To Winterize? 2025, retrieved 2026-06-29.
    [6] Mercury Marine. How to Winterize Your Outboard. Retrieved 2026-06-29.
    [7] State of Hawaii DLNR, Division of Boating and Ocean Recreation. Ethanol And Your Marine Engine (E-10). Retrieved 2026-06-29.
    [8] Battery University (Cadex). BU-410: Charging at High and Low Temperatures. Retrieved 2026-06-29.
    [9] Discover Boating. How to Keep Rodents Off Your Boat in the Offseason. Retrieved 2026-06-29.

  • How to Winterize Your RV for a Minnesota Winter: The Complete Storage Checklist

    How to Winterize Your RV for a Minnesota Winter: The Complete Storage Checklist

    The most expensive mistake an RV owner can make in Minnesota costs about two gallons of antifreeze to avoid. Skip it, and the first sound you hear in spring is water spraying behind a wall you can’t reach.

    Water expands by about 9% when it freezes. [1] That one fact is the reason a forgotten cup of water in a low-point drain line can split a fitting wide open by February.

    In central Minnesota, winterizing isn’t a maybe. It’s the difference between rolling out clean in May and opening the door to cracked pipes, a dead battery, and a chewed-up wiring harness.

    This is the full checklist we walk customers through every fall. Work top to bottom and your rig will be ready when the roads thaw.

    Why Minnesota Winters Are Brutal on a Stored RV

    St. Cloud sits below freezing for just over three months a year, from late November into early March. The average January low is about 5°F. [2]

    That’s the average. Minnesota’s all-time record low is 60 below zero, set at Tower in 1996. [3] Your RV plumbing has to survive whatever the season throws at it, not the typical day.

    Here’s the physics that makes it dangerous. As water freezes inside a sealed pipe, it expands and pushes the remaining liquid into a smaller and smaller space.

    Once ice blocks the line, University of Illinois research found that trapped water pressure behind the blockage can climb to about 4,000 psi. [4] Copper, PEX, and plastic fittings all give out long before that. The crack you find in spring was set in motion on the first hard freeze.

    When Should You Winterize Your RV in Minnesota?

    Do it before the first sustained freeze, not after. Around St. Cloud, the first fall freeze typically lands in the last week of September. [5]

    You don’t need to panic at the first frost. But once overnight lows start dipping into the 20s and staying there, your window is closing.

    RV pipes can freeze in a single cold night once temperatures drop into the teens. If your rig is already parked and you’re waiting on a free weekend, move it up the list. October is the safe month to have everything done in our area.

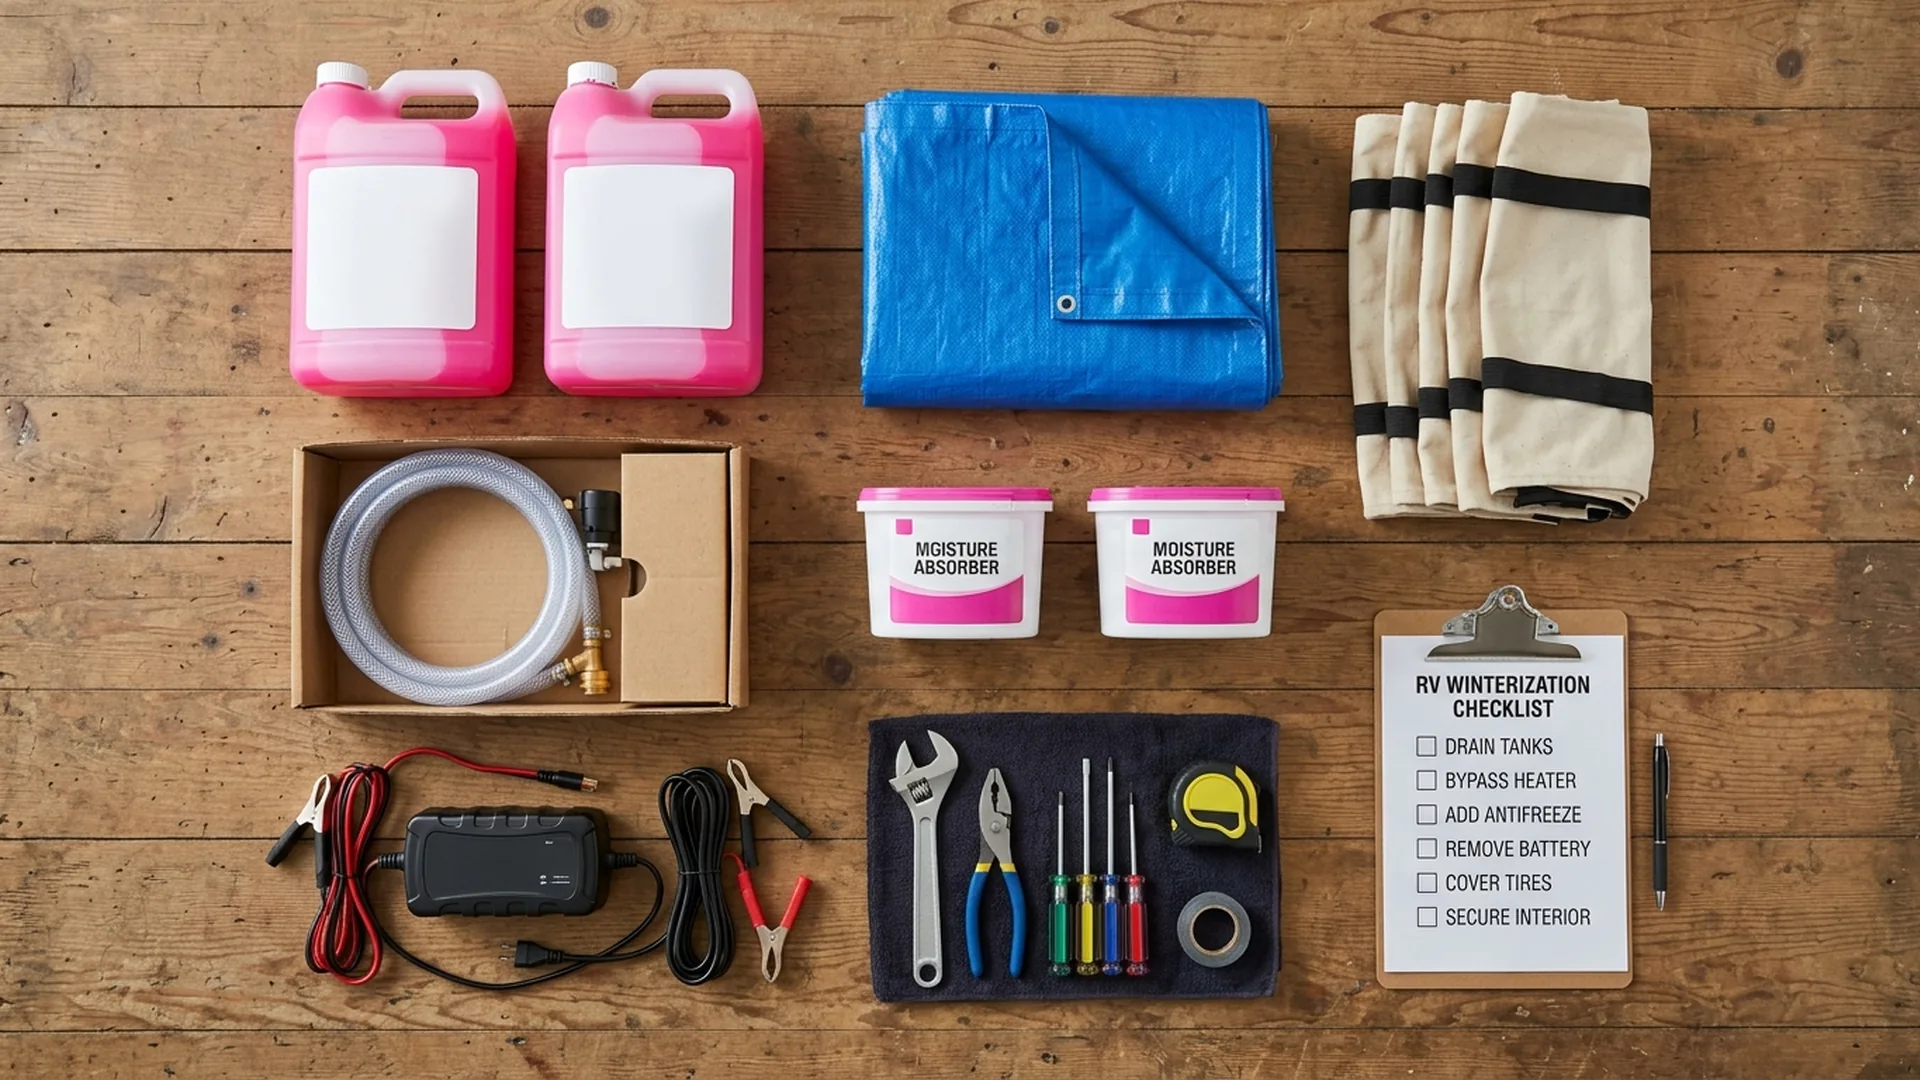
    RV winterization supplies and a checklist laid out on a workbench, including pink antifreeze, a pump kit, tire covers, and a battery tender

    How Do You Protect the Water System from Freezing?

    The plumbing is where winter does the most expensive damage, so this is the part to slow down on. The job has three stages: drain, bypass, then fill the lines with antifreeze.

    Drain Everything First

    Start with empty tanks. Dump the black tank, then the gray tank, then drain the fresh water tank completely.

    Open both the hot and cold low-point drain lines. Open every faucet, inside and out, including the outdoor shower and the toilet valve. You want gravity to pull out as much water as it can.

    Run the water pump for a few seconds to clear it, then shut it off. Don’t let it run dry for long, since that can damage the pump.

    Bypass the Water Heater

    Your water heater holds 6 to 10 gallons. Filling that tank with antifreeze wastes money and you’d just drain it in spring anyway.

    Most RVs have a bypass valve behind an access panel. Set it to bypass so antifreeze skips the tank and goes straight to the lines.

    Before you do, drain the water heater itself. Pull the drain plug or anode rod with the system depressurized and a faucet open, and let it empty fully.

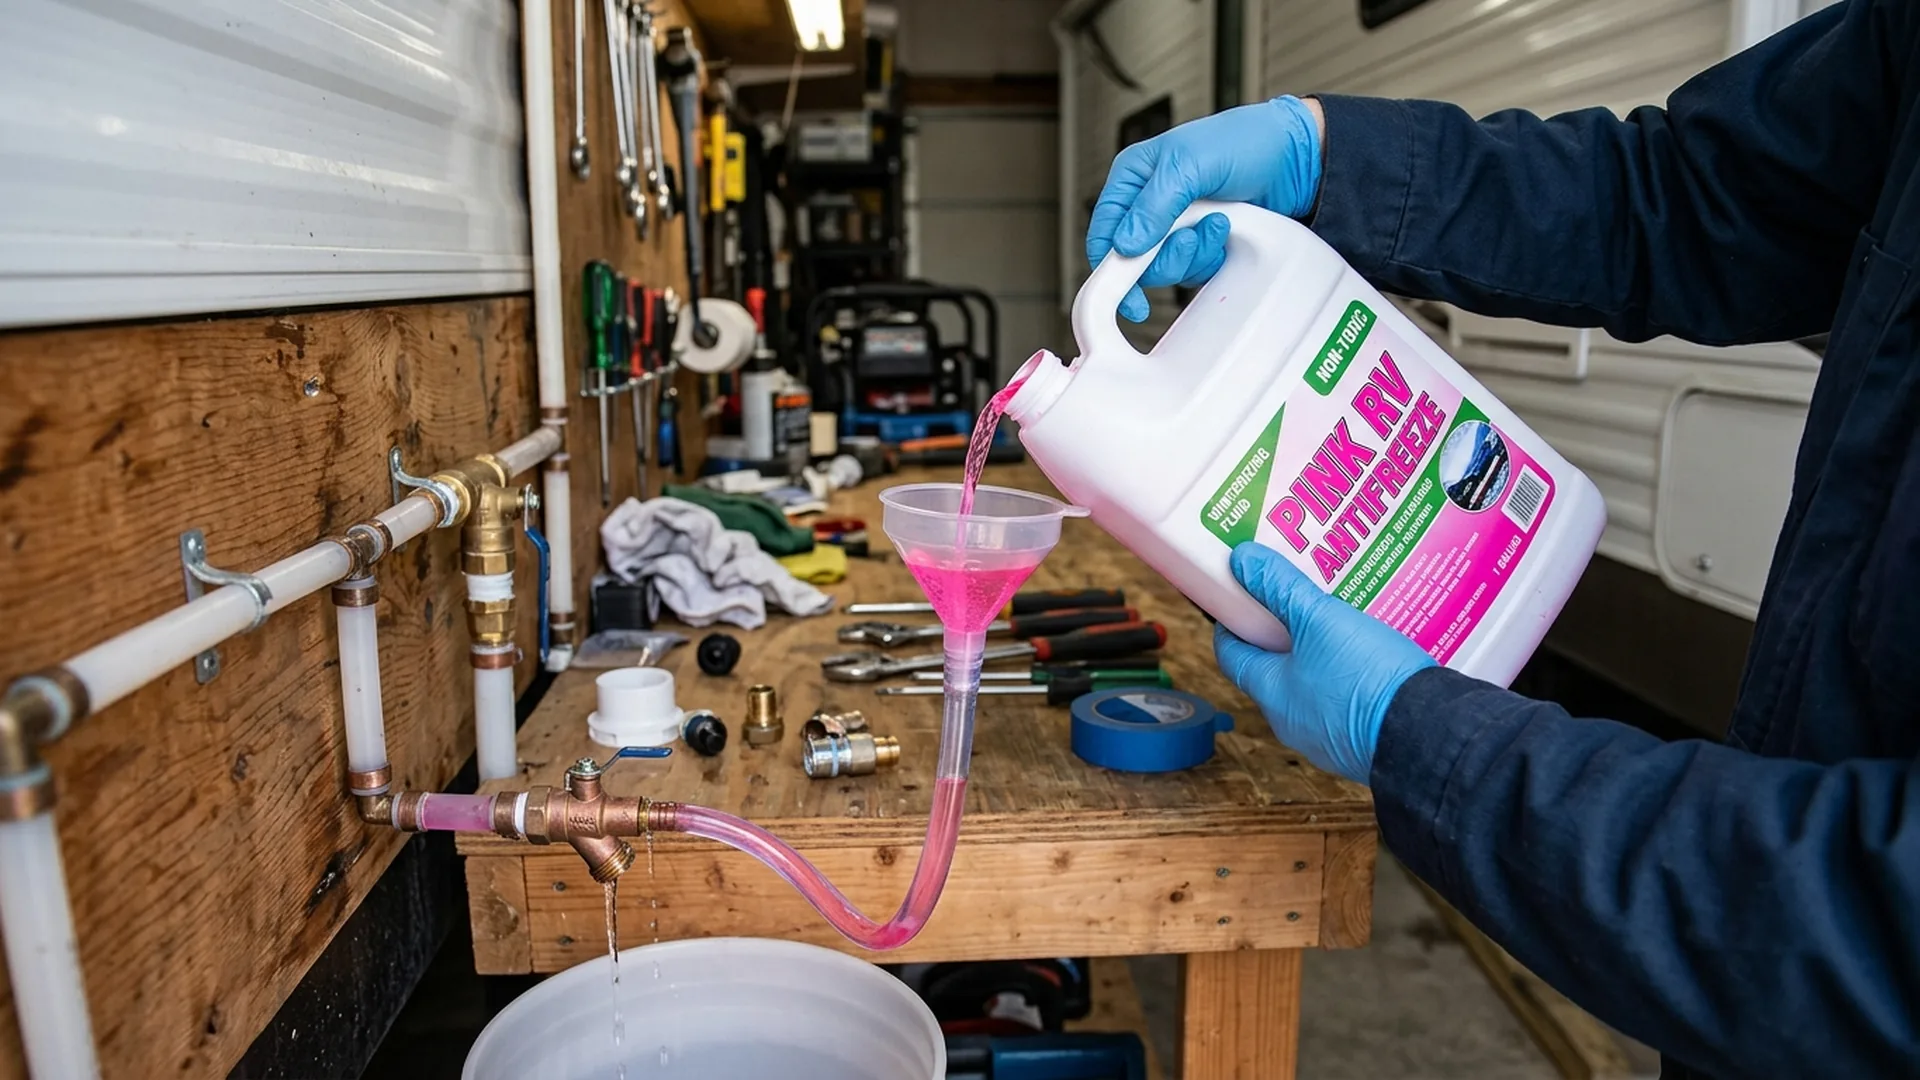
    Gloved hands pouring pink non-toxic RV antifreeze into a camper's water lines

    Add Non-Toxic RV Antifreeze

    Use pink RV and marine antifreeze, which is non-toxic propylene glycol. Never use the green or orange automotive stuff, since ethylene glycol is poisonous and you’ll be drinking from these lines later.

    Winnebago’s guide calls for about two gallons for a typical rig, though larger trailers with a second bathroom need more. [6] Buy an extra jug so you don’t run short halfway through.

    Quality matters here as much as quantity. Camco’s RV antifreeze carries -50°F burst protection (and -30°F freeze protection), which gives you real margin against a central Minnesota cold snap. [7]

    The cleanest way to get antifreeze into the lines is a hand pump or the water pump’s winterizing kit, which draws straight from the jug:

    1. Connect the pump’s siphon hose to a fresh jug of antifreeze.
    2. Open one faucet at a time, hot then cold, until pink fluid runs steady.
    3. Work from the faucet nearest the pump to the farthest one.
    4. Don’t forget the toilet, the outdoor shower, and the washer hookups if you have them.
    5. Pour a cup of antifreeze down each sink and shower drain to fill the P-traps.
    6. Pour a couple of cups into the toilet and flush so it coats the bowl seal and holding tank.

    When every fixture runs pink, the system is protected. That visible color is your confirmation that the line is full and no water pocket is left to freeze.

    What About the Fuel, Engine, and Generator?

    Gasoline doesn’t keep. As it ages, it gums up carburetors and injectors, which is why STA-BIL recommends treating any fuel you’ll store for 30 days or longer. [8] Over a five-month Minnesota layup, untreated fuel can turn into a spring repair bill.

    The fix is cheap. Add a fuel stabilizer, which keeps gas fresh for up to 24 months, and fill the tank to about 95% full. [8] A nearly full tank leaves little room for the air that causes condensation and water in the fuel.

    After you add the stabilizer, run the engine for about five minutes. That pulls treated fuel through the lines, pump, and carburetor or injectors so the whole system is protected, not just the tank.

    Got an onboard generator? Run it under load for a few minutes with stabilized fuel too, then follow your manual on the fuel shutoff. A generator that sits on stale gas all winter is a common no-start in spring.

    How Should You Store the RV Battery for Winter?

    Cold and a low charge are a bad combination. A fully charged lead-acid battery resists freezing down to roughly -80°F, but a fully discharged one can freeze at about 20°F, and a frozen battery is usually cracked and finished. [9]

    So the order matters: charge it fully first, then deal with storage. A battery that goes into winter at full charge has a huge safety margin even in an unheated space.

    You have two good options. Pull the battery and store it somewhere it can stay topped off, or leave it in place on a smart maintainer if your storage has power.

    If you disconnect, remove the negative cable first to avoid shorting a wrench across the terminal. Batteries slowly self-discharge on their own, so a maintainer or a monthly top-off keeps a stored battery from quietly dying before April.

    How Do You Keep Tires and Propane Safe in Storage?

    Tires lose air and take a set when a heavy rig sits in one spot for months. Michelin’s guidance is to keep tires at the pressure on the placard, not over-inflated, and to keep them away from heat and chemicals. [10]

    For a long static layup, the gold standard is taking weight off the tires. Blocking the frame up on jack stands removes the load and helps prevent flat-spotting and sidewall stress.

    If you can’t block it up, at least set correct pressure, park on boards instead of bare ground or grass, and use tire covers to block UV. On a sunny outdoor lot, those covers also slow the cracking that cold and sunlight cause together.

    Propane Tanks

    Cold itself doesn’t hurt propane. The rules are about ventilation and a closed valve.

    Close the cylinder valve fully by turning it clockwise, and store removable tanks outdoors in a ventilated spot, never inside the RV or a closed garage. [11] Cap the connection to keep moisture and debris out of the fitting.

    How Do You Keep Mice Out of a Stored RV?

    This is the damage owners forget about, and it’s brutal. Mice chew wiring, nest in upholstery, and shred insulation, and many RV policies treat the result as preventable maintenance rather than a covered loss. [12]

    It gets worse. A lot of modern wiring uses soy-based insulation that rodents are drawn to, and a single chewed harness can run from several hundred dollars up to roughly $2,900 to fix. An ounce of sealing beats that every time.

    Before you park, walk the underside and find every gap where a pencil could fit. Mice get through openings far smaller than you’d guess.

    • Stuff steel wool or copper mesh into gaps around plumbing and wiring pass-throughs.
    • Remove all food, including the forgotten pantry stuff and pet treats.
    • Empty cabinets, leave a few doors cracked, and skip leaving soft nesting material out.
    • Set traps or place deterrents in the cabinets and underbelly as a backstop.

    Don’t Forget the Roof, Seals, and Cover

    The last walk-around is the exterior. Minnesota snow load and ice work on any weak seam all winter, and a small gap in fall becomes a leak by March.

    Inspect the roof seams, the seals around vents and skylights, and the caulking along every edge. Reseal anything cracked or lifting before water has a chance to get under it.

    Then cover the rig. A breathable RV cover sheds snow and blocks UV without trapping the moisture that causes mildew. If you store outdoors, plan to clear heavy snow off the roof after big storms so the load doesn’t sit on those seams for months.

    What We See at Due North Storage

    Most spring problems we hear about trace back to one skipped step the fall before. The two biggest are a water system that never got antifreeze and a battery left to die in the cold.

    The freeze damage is the painful one. A burst line hides until you pressurize the system in spring, and then it’s leaking behind a wall or under the floor. That repair dwarfs the cost of two gallons of pink antifreeze.

    The pattern we notice? The folks who store indoors with power barely think about any of this. Battery stays on a maintainer, the rig stays dry, and mice and snow load never enter the picture.

    Store your RV somewhere winter can’t reach it.

    Due North Storage offers indoor units up to 14×40 with electricity included, just off Highway 10 in the St. Cloud area. Keep your battery charged and your rig out of the snow all winter.

    Final Thoughts

    Winterizing an RV in Minnesota isn’t complicated, but the order and the details decide whether you spend spring driving or repairing.

    Protect the water lines, charge the battery, stabilize the fuel, and seal out the mice. Do those four things well, and the rest is housekeeping.

    The same logic carries across the rest of the fleet, so if you’re also putting away a boat or a camper, the freeze rules don’t change. A little work in October buys you a clean, ready rig the day the roads open back up.

    Frequently Asked Questions

    How Much Antifreeze Do I Need to Winterize My RV?

    Most RVs need about two gallons of non-toxic pink RV antifreeze, according to Winnebago’s winterizing guide. Larger trailers with a second bathroom or a washer can need three or more.

    Buy an extra jug so you don’t run short, and make sure it’s propylene glycol rated for at least -50°F burst protection for a Minnesota winter.

    Can I Use Regular Automotive Antifreeze in My RV?

    No. Automotive antifreeze is ethylene glycol, which is toxic, and it would contaminate the same lines you drink and cook from later.

    Only use pink RV and marine antifreeze, which is non-toxic propylene glycol made for potable water systems. The two are not interchangeable.

    When Should I Winterize My RV in Central Minnesota?

    Aim to finish by mid to late October. The first fall freeze around St. Cloud usually arrives in late September, and pipes can freeze in a single cold night once lows hit the teens.

    Winterizing before sustained sub-freezing weather sets in is the safe play. Don’t wait for the first hard cold snap.

    Should I Remove My RV Battery for Winter Storage?

    If your storage has no power, yes. Charge the battery fully, disconnect the negative cable first, and store it where it stays topped off. A fully charged battery resists freezing to around -80°F, while a dead one can freeze around 20°F.

    If your unit has an outlet, you can leave the battery in place on a smart maintainer instead.

    Do I Really Need to Worry About Mice in a Stored RV?

    Yes, and it’s one of the costliest surprises. Mice chew wiring and nest in upholstery, and many RV policies treat the damage as preventable rather than covered.

    Seal every gap with steel wool, remove all food, and set traps before you park. A single chewed wiring harness can cost up to roughly $2,900 to repair.

    Is Indoor RV Storage Worth It for a Minnesota Winter?

    For most owners, yes. Indoor storage with electricity lets you keep the battery on a maintainer, keeps snow and ice off the roof and seals, and cuts down on rodent intrusion.

    It also protects the finish and tires from months of UV and freeze-thaw cycles, which adds up over the life of the rig.

    Skip the spring repair bill next year.

    Indoor RV and camper storage with electricity included, just off Highway 10 near St. Cloud. Park it clean in October and pick it up ready in May.

    Sources:
    [1] U.S. Geological Survey. Water Density (Water Science School). Retrieved 2026-06-29.
    [2] Weather Spark (based on NOAA 1991–2020 normals). Average Weather in Saint Cloud, Minnesota. Retrieved 2026-06-29.
    [3] Wikipedia. List of Minnesota Weather Records. Retrieved 2026-06-29.
    [4] Gordon, J. R., Building Research Council, University of Illinois. An Investigation into Freezing and Bursting Water Pipes in Residential Construction, 1996. Retrieved 2026-06-29.
    [5] National Weather Service, Twin Cities. First Fall Freeze Information. Retrieved 2026-06-29.
    [6] Winnebago. RV Winterizing Guide: Tips to Keep in Mind. Retrieved 2026-06-29.
    [7] Camco. RV and Marine Antifreeze, -50°F Burst / -30°F Freeze. Retrieved 2026-06-29.
    [8] Gold Eagle. STA-BIL Storage Fuel Stabilizer. Retrieved 2026-06-29.
    [9] RVelectricity (Mike Sokol). Will My Lead Acid Battery Freeze? Retrieved 2026-06-29.
    [10] Michelin USA. Tire Flat Spotting: Causes, Prevention, and Solutions. Retrieved 2026-06-29.
    [11] Pico Propane. How to Put Your Propane Tank Safe in Storage. Retrieved 2026-06-29.
    [12] Roamly. Does RV Insurance Cover Mice Damage? Retrieved 2026-06-29.

  • What Size Storage Unit Do I Need? Boat, RV & Camper Sizing Guide

    What Size Storage Unit Do I Need? Boat, RV & Camper Sizing Guide

    The quick answer: measure your whole rig from bumper to trailer tongue, add a couple of feet of working room, and match that to the next unit size up. For most boats and campers, that lands at a 10×30. For a full motorhome, it is usually a 12×40 or 14×40.

    The trap is measuring just the hull or just the coach. The trailer, the tongue, and the height on the trailer are what jam people in the doorway on move-in day.

    Picture the first cold Saturday in October. You back the boat up to the unit you reserved over the phone, hop out to swing the door open, and the trailer tongue is still hanging a foot past the threshold. Now you are stuck in the doorway, holding up the line behind you, calling the office to ask if anything bigger is open.

    That scene plays out every fall, and it is almost always a measuring problem, not a bad-luck problem. Minnesota stores more boats per person than any other state, with roughly one registered boat for every six residents. [1] Add in the motorhomes, fifth wheels, and pop-ups, and a lot of garages around here simply run out of room by October.

    So you start shopping for a unit, and the size chart leaves you guessing. Here is how to size it right the first time.

    The One Rule That Decides Your Unit Size

    Size to the footprint your rig actually occupies on the ground, not the length printed in the sales brochure. Brochure length almost always undercounts, because it leaves off the trailer tongue, the swim platform, the spare tire, and the bumper rack.

    A boat trailer is measured from the coupler at the tip of the tongue all the way to the rearmost point, so the trailer is usually longer than the boat sitting on it. [2] That gap is where the trouble usually starts.

    Then add buffer. You want 2 to 4 feet of extra length so you can close the door behind the rig, and about a foot of extra width so you can walk down one side. Snug is not the goal. You will be backing in and out in the dark, in winter gear.

    What Size Storage Unit Do I Need for a Boat?

    Most trailered recreational boats in Minnesota fit a 10×30 unit once you account for the trailer, and that covers the majority of fishing boats, bowriders, and smaller pontoons. Larger pontoons, wakeboard boats, and cabin cruisers move up to a 12×40.

    The two dimensions boaters overlook are the tongue and the beam. The tongue adds 2 to 5 feet of length beyond the hull. Pontoons run wide, often 8.5 to 10 feet across the deck, which eats into a narrow unit faster than length does.

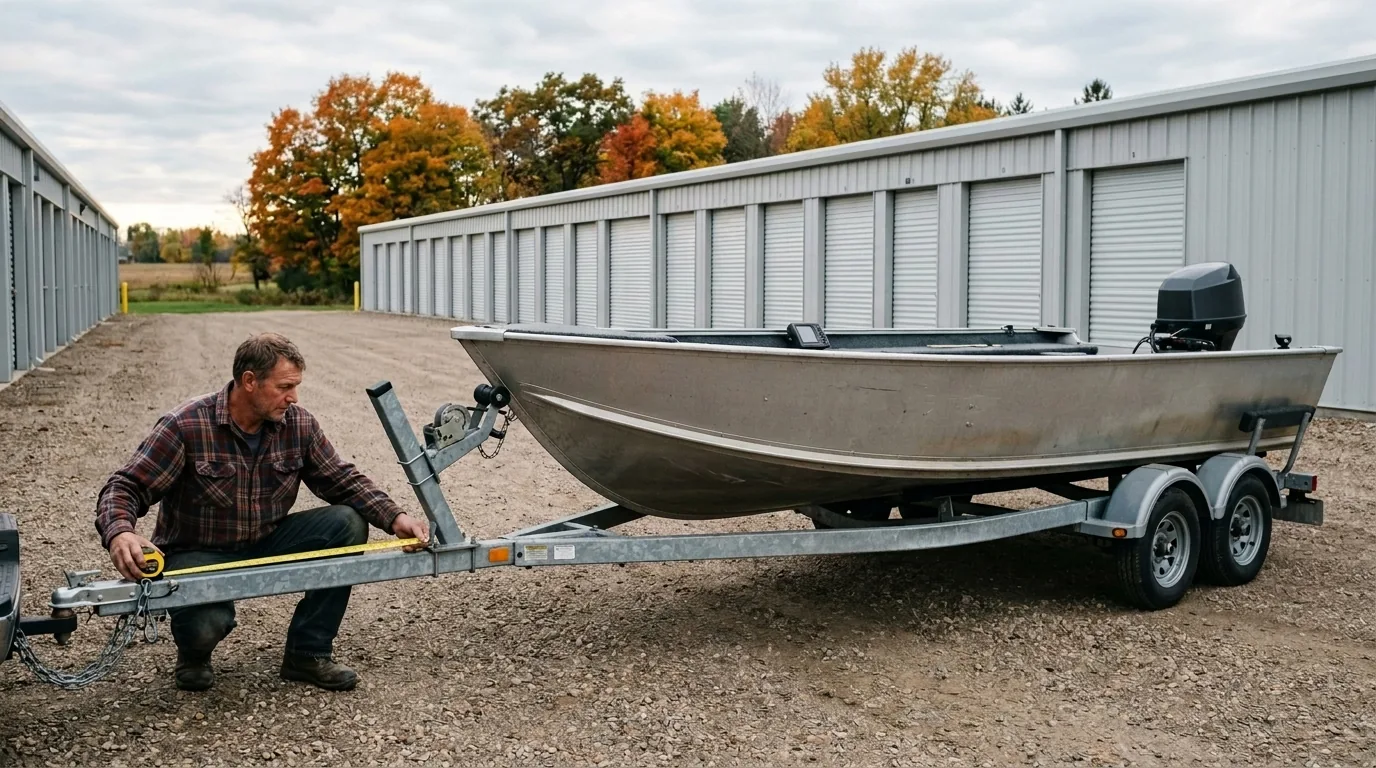
    Man measuring the bumper-to-coupler length of an aluminum fishing boat on its trailer outside a row of storage units
    Boat type Hull length Length with trailer Unit that fits
    Jon boat / small aluminum fishing 12–16 ft ~16–20 ft 10×20
    Fishing boat / bowrider 17–20 ft ~21–25 ft 10×30
    Pontoon (mid-size) 18–22 ft ~22–27 ft 10×30 (watch the width)
    Ski / wakeboard boat 20–24 ft ~24–29 ft 12×30 to 12×40
    Cabin cruiser 26–32 ft ~30–37 ft 12×40 to 14×40

    Do not forget height. A boat sits up high on its bunks, so a tower, a T-top, or a tall windshield can add several feet. Measure to the highest point and make sure it clears the door, not just the ceiling.

    What Size Storage Unit Do I Need for an RV or Motorhome?

    RV sizing comes down to class, and the lengths vary a lot. A Class B camper van slips into a 10×30, while a 40-foot Class A diesel pusher needs a 14×40 with a tall door. Class C and most travel trailers land comfortably in the middle.

    RV ownership keeps climbing, with U.S. shipments reaching 342,220 units in 2025, up 2.5 percent over the year before. [3] More rigs on the road means more owners hunting for a unit that actually fits in the fall.

    Here is the part that trips owners up: length tells you the floor, but height tells you the door. Most RVs stand 10 to 13.5 feet tall. [4] And a travel trailer’s listed length is box length only, so the hitch adds another 2 to 5 feet to what you actually store.

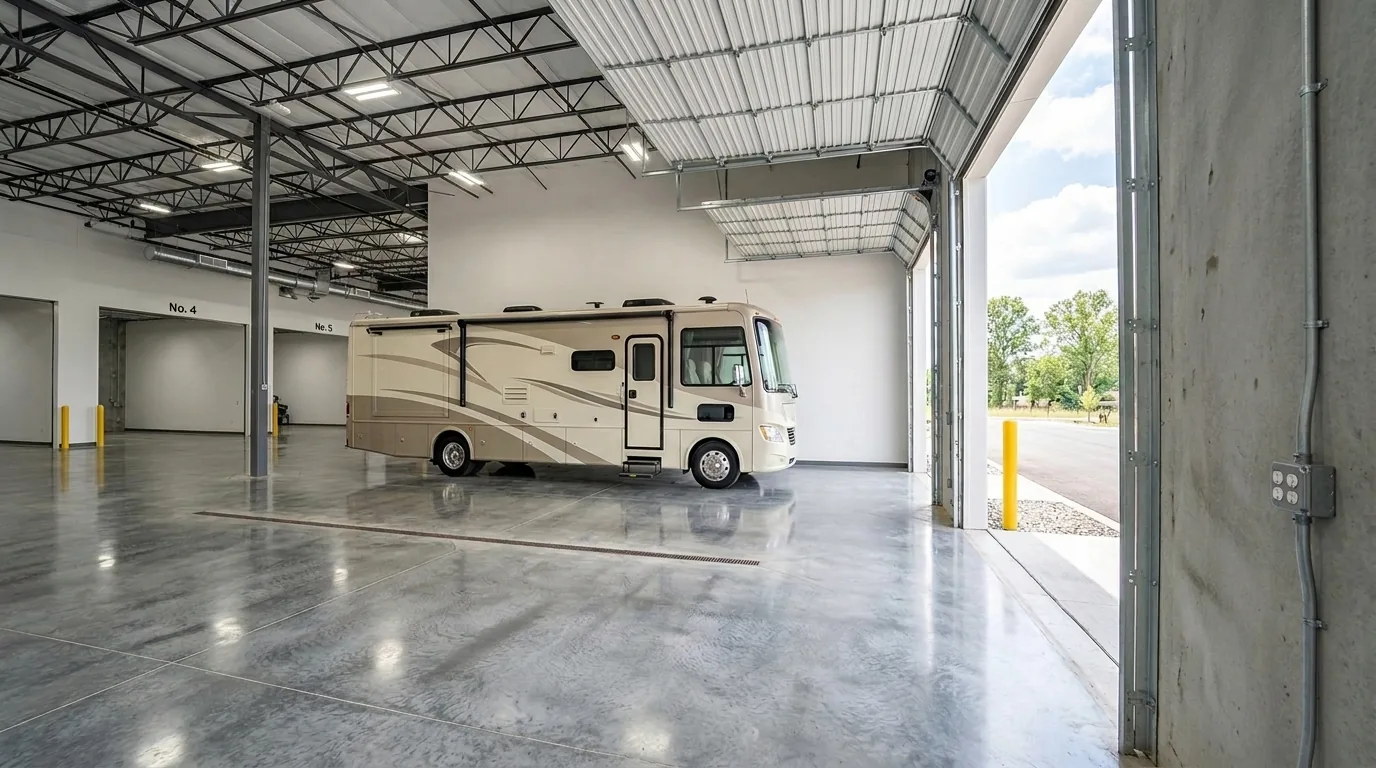
    A Class A motorhome parked inside a clean indoor drive-in storage bay with a tall open roll-up door and an electrical outlet on the wall

    Standard RV width is 8 feet 6 inches, [5] so width is rarely the problem. Door height and total hitched length are what decide whether your motorhome is a 12-foot-wide unit or a 14-foot one.

    What Size Storage Unit Do I Need for a Camper or Travel Trailer?

    Towables are the most common rigs we store, and they span the widest range. A collapsed pop-up tucks into a 10×20, a mid travel trailer fits a 12×30, and a big fifth wheel or toy hauler needs the full 14×40 with a tall door.

    With a camper, the floorplan number is the thing that fools people. A trailer sold as a “26-footer” measures box length only. With the tongue and bumper rack, the real stored length is closer to 29 or 30 feet.

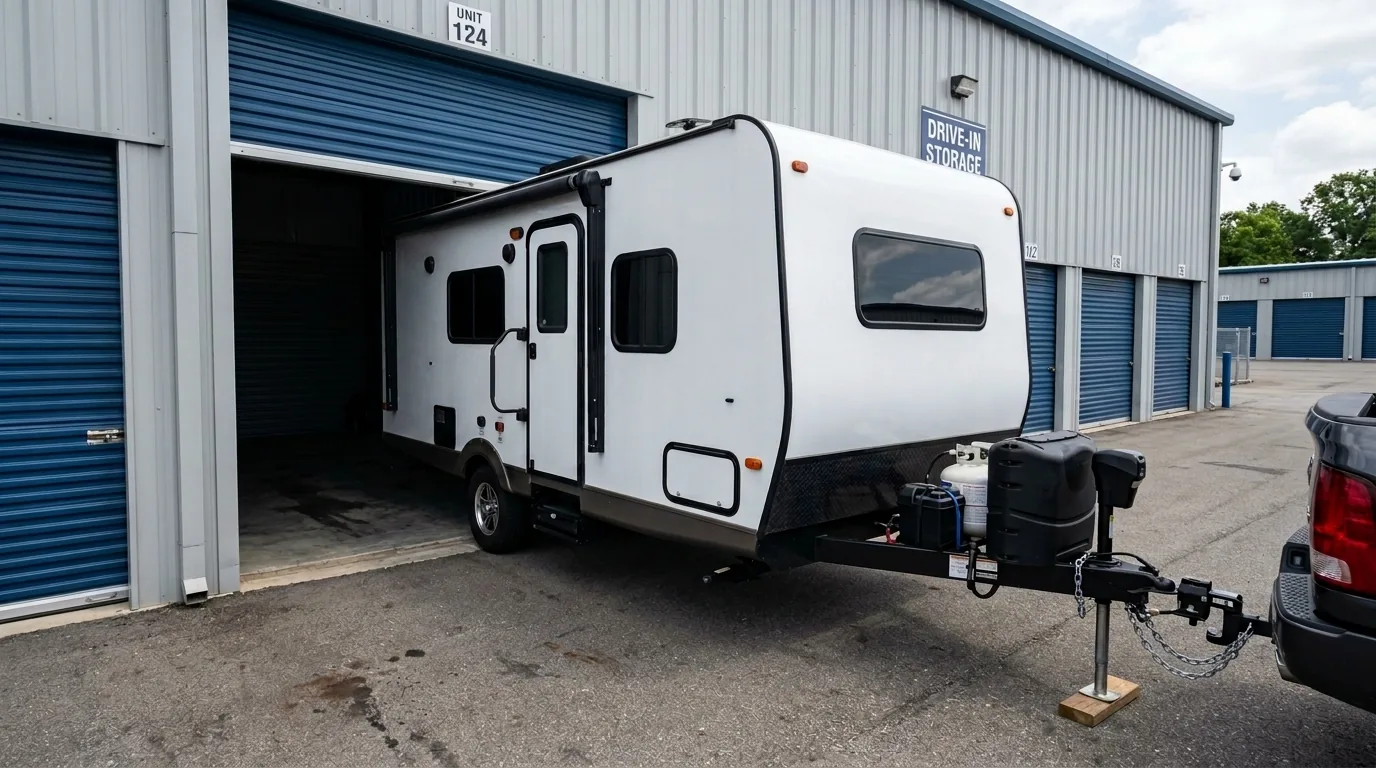
    White travel trailer with A-frame hitch and tongue jack backed up to the open door of an indoor drive-in storage unit
    Camper type Length (with hitch) Height Unit that fits
    Pop-up/folding (collapsed) ~10–18 ft under 5.5 ft 10×20
    Small travel trailer ~16–24 ft 10–11 ft 10×30
    Mid/large travel trailer ~25–38 ft 11–13.5 ft 12×30 to 12×40
    Fifth wheel ~28–48 ft 12–13.5 ft 14×40
    Toy hauler ~26–46 ft 11–13 ft 14×40

    Fifth wheels deserve a special note. The kingpin overhang that rides over the truck bed adds height at the front, and the overall length runs long. When in doubt with a fifth wheel, size up.

    Storage Unit Sizes and What Actually Fits

    Once you have your three numbers, the unit chart gets simple. Storage bays are sold by floor footprint, but for vehicles, the door dimensions matter just as much. Here is how the common sizes shake out for boats, RVs, and campers.

    Unit size Best for Rough fit
    10×20 Pop-up campers, jet skis, small fishing boats, motorcycles Rigs under ~18 ft
    10×30 Fishing boats, bowriders, mid pontoons, small trailers, Class B vans Rigs ~18–28 ft
    12×30 / 12×40 Class C, mid-to-large travel trailers, ski boats Rigs ~28–38 ft
    14×40 Class A motorhomes, large fifth wheels, toy haulers, big pontoons Rigs up to ~40 ft, up to ~14 ft tall

    When your measurement falls right on the line between two sizes, take the larger one. The few extra dollars a month buy you a buffer for gear, easier maneuvering, and room to walk around the rig for off-season checks.

    Not sure which size you need? We will measure it with you.

    Due North Storage offers indoor units up to 14×40 with electricity included, just off Highway 10 in the St. Cloud area. Tell us your rig and we will point you to the right bay.

    Why Door Height and Width Matter as Much as Length

    A unit can be plenty long and still turn you away at the threshold. The roll-up door opening is almost always shorter than the interior ceiling, so the door clearance is the number that decides whether your rig goes in at all.

    Height catches boat owners with towers and RV owners with rooftop air conditioners. A coach listed at 12 feet tall can hit 13 feet once you count the A/C shroud, the antenna, and the trailer height underneath.

    Width matters for the wide loads: pontoons, fifth wheels with slide-outs retracted, and dual-axle trailers. You also need room to open a door, walk the side, and not scrape a mirror on the way in.

    Why So Many Minnesota Owners Store Off-Site

    Two things push boats and RVs out of the driveway here: rules and winter. Many homeowners associations and city ordinances limit how long an RV or boat can sit in a driveway or front yard, and some cap it by length entirely.

    Then there is the season. A rig parked outside through a Minnesota winter takes the full beating of snow load, freeze-thaw, and ice. An enclosed unit with power lets you keep a trickle charger on the battery and the cabin dry until spring.

    That combination is why the off-season pickup line gets long. The owners who reserved a properly sized indoor unit in October are the ones rolling out clean and ready in May.

    Due North runs indoor facilities across central Minnesota, with premium vehicle units in Saint Cloud, Little Falls, Milaca, and Sauk Centre. Each one carries the larger bays that boats, campers, and motorhomes need.

    What We See at Due North Storage

    The most common sizing mistake we watch happen is the boat owner who measured the hull and forgot the trailer. They booked to the 19-foot number, then showed up with a 24-foot rig and nowhere to put the extra five feet.

    Right behind it is the height surprise. A customer is sure their camper “clears 12 feet,” then the rooftop A/C catches the top of the door track. Both are avoidable with one tape measure and five minutes before you reserve.

    Our honest advice: bring us your three numbers, length, width, and height as the rig sits hitched. We would rather put you in the right bay on day one than watch you wrestle a too-small door in November.

    Frequently Asked Questions

    What size storage unit do I need for a 24-foot boat?

    A 24-foot boat usually needs a unit around 28 to 30 feet long once you add the trailer tongue, so a 10×30 or 12×30 is the right target. Check the beam too, since pontoons and wider hulls can crowd a 10-foot-wide bay.

    Always measure the tallest point with the boat on the trailer to confirm it clears the door.

    Will a Class A motorhome fit in a 12-foot-wide unit?

    Usually yes on width, since RVs are capped near 8 feet 6 inches, but a 40-foot Class A needs the length and door height of a 14×40 to move in and out easily. Many Class A coaches stand close to 13.5 feet tall.

    For a full-size diesel pusher, a 14×40 with a tall door is the safer choice.

    How much extra length should I add for the trailer?

    Add 2 to 5 feet beyond the hull or camper box for the trailer tongue and coupler. Boats sit on a frame that extends past the stern, and travel trailers list box length only, leaving off the hitch.

    When the total lands between two unit sizes, choose the larger one for easier parking.

    Does storage unit height really matter for an RV?

    Yes, and it is the number owners miss most often. Most RVs stand 10 to 13.5 feet tall, and rooftop air conditioners, antennas, and the trailer height push the real clearance higher.

    The roll-up door opening, not the interior ceiling, is the dimension that decides if your rig fits. A 14-foot door clears nearly all of them.

    Is an indoor unit worth it over outdoor parking in Minnesota?

    For a Minnesota winter, an enclosed unit protects your rig from snow load, ice, and freeze-thaw damage that outdoor parking cannot. Units with electricity also let you keep a battery maintainer running through the off-season.

    The protection usually pays for itself the first spring you skip a weather-related repair.

    What is the most common RV and boat storage size?

    The 10×30 handles most trailered fishing boats, mid pontoons, and smaller campers, while the 14×40 covers the big motorhomes and fifth wheels. Class C rigs and mid travel trailers sit in between at 12×30 to 12×40.

    Match the unit to your measured length, width, and height rather than the class name alone.

    Reserve the right-sized bay before the fall rush.

    Indoor units up to 14×40 with electricity included, just off Highway 10 in the St. Cloud area. Give us your rig’s length, width, and height, and we will get you into the unit that fits.

    Sources:
    [1] Minnesota Department of Natural Resources. Boating and canoeing facts. Updated May 2025. Retrieved 2026-06-29.
    [2] etrailer.com. How to Determine the Length of a Trailer. Retrieved 2026-07-08.
    [3] RV Industry Association. RV Shipments End 2025 at 342,220 Units, Modest 2.5% Growth Over 2024. December 2025. Retrieved 2026-06-29.
    [4] RecNation Storage. RV Dimensions: Trailer Length, Width, and Height Explained. December 10, 2025. Retrieved 2026-06-29.
    [5] Legal Information Institute, Cornell Law School. 23 CFR § 658.15, Width. Retrieved 2026-07-08.

  • Finding Secure Boat Storage Near St. Cloud

    Finding Secure Boat Storage Near St. Cloud

    How to Find Secure Boat Storage Near St. Cloud

    Finding the right storage unit for your boat or watercraft can be a challenge. Protection from corrosion, thievery, and other damaging aspects is your priority. Yet, finding a storage facility that offers all of these is quite a task in the St. Cloud area.

    If you are looking for storage for your water vessels, then there are certain things you need to keep in mind. Let’s get into it.

    Did you know? Minnesota ranks 4th in the United States in terms of boat ownership. As of this writing, there are over 613,000+ registered motorized boats in the state. [1]

    Why Safe Storage is Important for Boat and Boating Equipment

    Security and damage prevention are two primary benefits of finding the right storage for your boat(s). Finding a storage unit with ample space can ensure you have enough maneuverability. The right storage also ensures you relax and sit back, knowing your investment is safe.

    Here are the key benefits of finding the right indoor storage unit for your boat:

    • Avoids expensive damage from harsh winter weather
    • Deters opportunistic thieves from stealing valuable gear
    • Extends the overall lifespan of marine upholstery
    • Keeps delicate electronics away from extreme humidity
    • Maintains the structural integrity of the fiberglass
    • Prevents unwanted pests from nesting inside cabins
    • Protects the exterior paint from harmful UV rays
    • Reduces annual maintenance costs

    Boats storage

    What to Look for in a St. Cloud Boat Storage Facility

    There are certain things you should look for in your boat storage. From security to temperature control, the safety of your boat or boating equipment relies on the storage unit you choose.

    Here are the factors you should consider:

    1. Controlled Access & Security

    Look for theft and vandalism prevention policies and tactics used by the storage facility. See if they offer controlled access and whether surveillance via security personnel or cameras is available. If indoor/covered storage has unit-based security, it is not easy to breach them.

    To keep it simple, here is what you should look for:

    • Controlled access via single and gated entrances that require a key code or card
    • Well-lit area to deter intruders
    • Offers 24/7 surveillance via high-definition security cameras
    • Offers individual security measures for each unit

    2. Damage Prevention

    Any facilities that offer damage prevention should be at the top of your list. Weatherproof and dry storage facilities ensure your boat and its components are safe from corrosion.

    Look for the following key features:

    • Dry ground and drainage systems
    • Indoor and covered options
    • Weatherproofing via insulation or other measures

    3. Cleanliness and Maintenance

    Check if the facility focuses on orderliness. See their policy and measures to keep the area clean and maintained.

    Analyze the following key aspects:

    • Active pest control measures to prevent rodents, spiders, bugs, etc.
    • Orderliness to keep the site clean, tidy, and debris-free
    • Spots designated for washing, flushing, and performing minor maintenance

    4. Accessibility and Convenience

    Look for a facility that offers easy and 24/7 drive-up access. This includes easy access to your particular storage without facing any obstacles. Look for a self-storage facility that has wide doors to maneuver your boat.

    5. Ample Space and Area

    Another thing to look for in a facility is extra space for boat equipment. You must look for wide aisles and a turning radius that ensures easy maneuvering. Accessible drive-up units ensure you can park and take out your boat without risk of damage.

    If you need a secure facility for your boat in the St. Cloud area, then Due North is available. Unit sizes range from 11’ x 22’ to 14’ x 40’. Call (320) 290-2193 to check availability.

    Source:

    [1] Wagner, J. (2024, May 28). How common is boat ownership in Minnesota compared to the rest of the U.S.? CBS News. https://www.cbsnews.com/minnesota/news/boat-ownership-costs-maintenance-storage-slips/

  • Battery Care 101: Get Your ATV Ready for the First Spring Ride

    Battery Care 101: Get Your ATV Ready for the First Spring Ride

    After months in winter storage, most ATV batteries fail their first spring startup for one of three reasons: corroded terminals, a deeply discharged cell, or physical damage like swelling or cracks.

    A 20-minute inspect-clean-test-charge routine catches all three before they ruin opening day on the trail.

    The crisp air signals a welcome change, and for ATV enthusiasts it means the long-awaited return to the trail. After months of winter storage, the urge to hit the throttle is almost overwhelming.

    Until the moment you turn the key and hear nothing but a dead click. A dormant battery is the silent saboteur of your first spring adventure, and the fix is almost always preventable.

    The Role of Your ATV’s Battery

    Your ATV’s battery is more than just a component. It’s the powerhouse that breathes life into your entire vehicle, responsible for initiating the combustion process by sending a surge of power to the starter motor and turning the engine over.

    Beyond starting, the battery provides the electrical current for ignition, lights, the display panel, and any accessories you’ve fitted, from winches to GPS units. Without a healthy battery, even the most capable ATV is useless.

    Why Spring Readiness Matters

    Winter storage, while necessary, is a long stretch of inactivity that wears on a battery. Lead-acid and AGM batteries naturally self-discharge whenever they sit unused.

    Polaris’s official maintenance guidance recommends keeping a battery on a trickle charger or topping it off monthly precisely to counter this drain. [1]

    If left unchecked, a battery that seemed healthy last fall can be completely depleted by spring.

    Spring battery care does two things. It gets you riding sooner this season, and it adds years to the battery’s service life so you replace it less often.

    Step-by-Step Spring Battery Inspection and Cleaning

    Before attempting to start your ATV or connecting a charger, inspect and clean the battery first. This clears the electrical path and surfaces any damage that could turn into a roadside breakdown.

    Safety First: Preparing to Work on Your Powersports Vehicle

    Park your ATV on a stable, level surface. If you’re working in a garage, open a door or window for ventilation. Put on safety glasses and gloves before you start.

    Locating and Accessing Your ATV Battery

    The battery on most ATVs is located under the seat, in a compartment behind a plastic panel, or sometimes in the front.

    Consult your owner’s manual for the exact location and any specific instructions for accessing it, which may involve removing seats, body panels, or racks.

    Thorough Visual Inspection for Damage

    Once accessed, carefully inspect the battery case for any signs of damage. Look for:

    • Cracks or punctures: can lead to leaks and electrolyte loss.
    • Swelling or bulging: often indicates internal damage from overcharging or freezing.
    • Corrosion: white or greenish powdery buildup on the terminals.
    • Leaks: any liquid seeping from the case or around the terminals.

    If you find significant damage or leaks, the battery needs to be replaced. No amount of cleaning will save it.

    Cleaning Battery Terminals and Cables

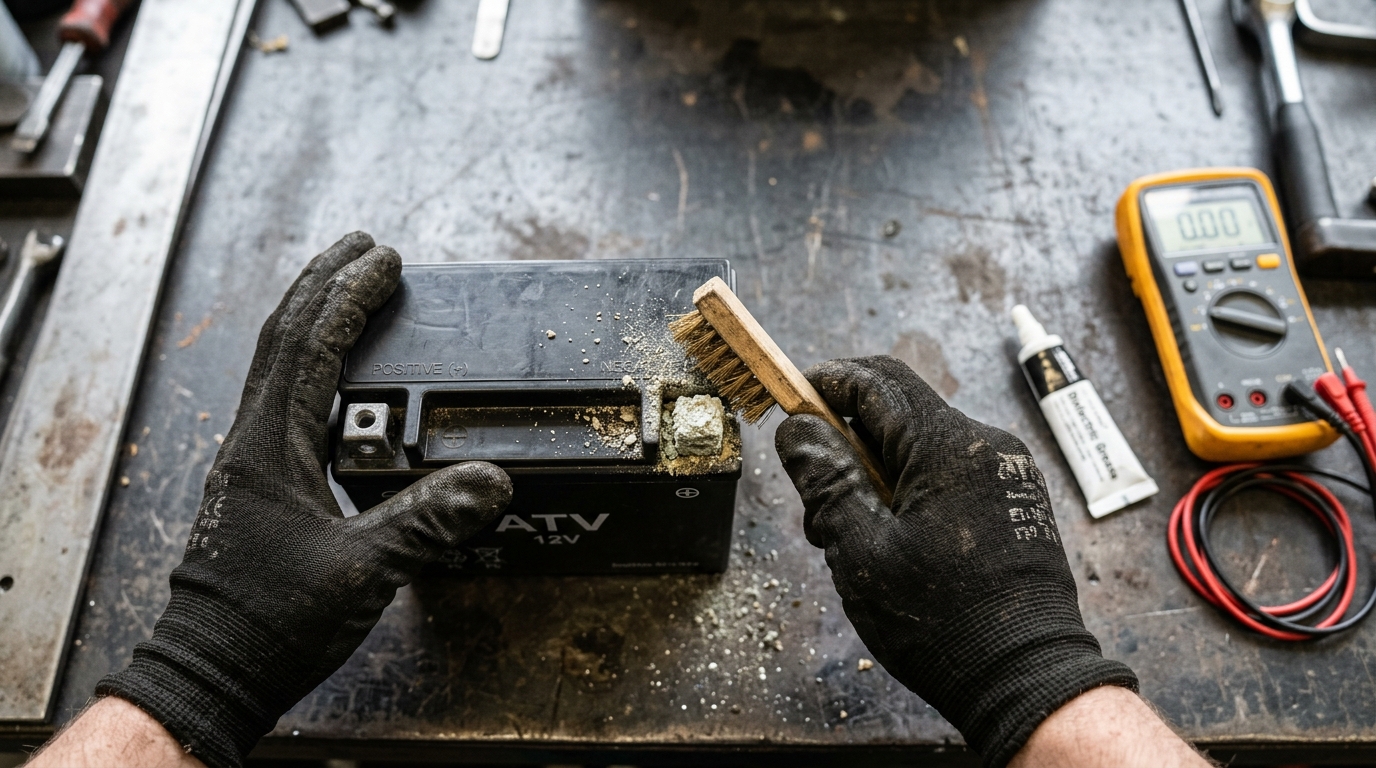
    Cleaning ATV battery terminals with a wire brush to remove corrosion

    Corrosion on battery terminals and cable connectors impedes electrical flow, hindering starting and charging.

    1. Disconnect cables if you haven’t already (negative first).
    2. Scrub the terminals with a wire brush and battery terminal cleaner or a baking soda and water mixture, until you see bright, shiny metal.
    3. Rinse and dry with clean water (avoid getting excessive water inside the battery if it’s not sealed) and a clean rag.
    4. Apply protectant: a thin layer of dielectric grease on both the posts and the inside of the cable connectors creates a barrier against moisture and dirt.

    Securing Electrical Connections

    Reconnect the cables in reverse order: positive (red) first, then negative (black). Make sure the clamps are snug.

    A loose connection causes intermittent power issues that mimic a dead battery, and they’re maddening to diagnose. If you can wiggle the clamp by hand, it’s not tight enough.

    Testing Your ATV Battery’s Current Health

    After cleaning, test the battery’s charge level and overall health to determine if it’s ready for the season or needs attention.

    Using a Voltmeter for Accurate Readings

    A multimeter is your primary diagnostic tool. Connect the red lead to the positive (+) terminal and the black lead to the negative (−) terminal.

    Make sure the ignition is off, and the battery hasn’t been recently charged or discharged for at least a few hours. Otherwise, you’ll get a misleadingly high reading.

    These are resting voltages. If your ATV has a charging system issue, the voltage may read higher than expected when the engine is running, which can mask the underlying problem. [2]

    Performing a Load Test (Optional, for Advanced Diagnosis)

    A load test is a more definitive way to assess battery health. It measures the battery’s ability to deliver power under simulated operating conditions.

    1. Connect a load tester to the battery terminals.
    2. Apply load per the tester’s instructions, usually half the battery’s rated amperage for 10–15 seconds.
    3. Read the voltage under load. A healthy battery should hold above 9.6V. A significant drop below that means the battery is weak and needs replacement, even if the resting voltage looked fine. [3]

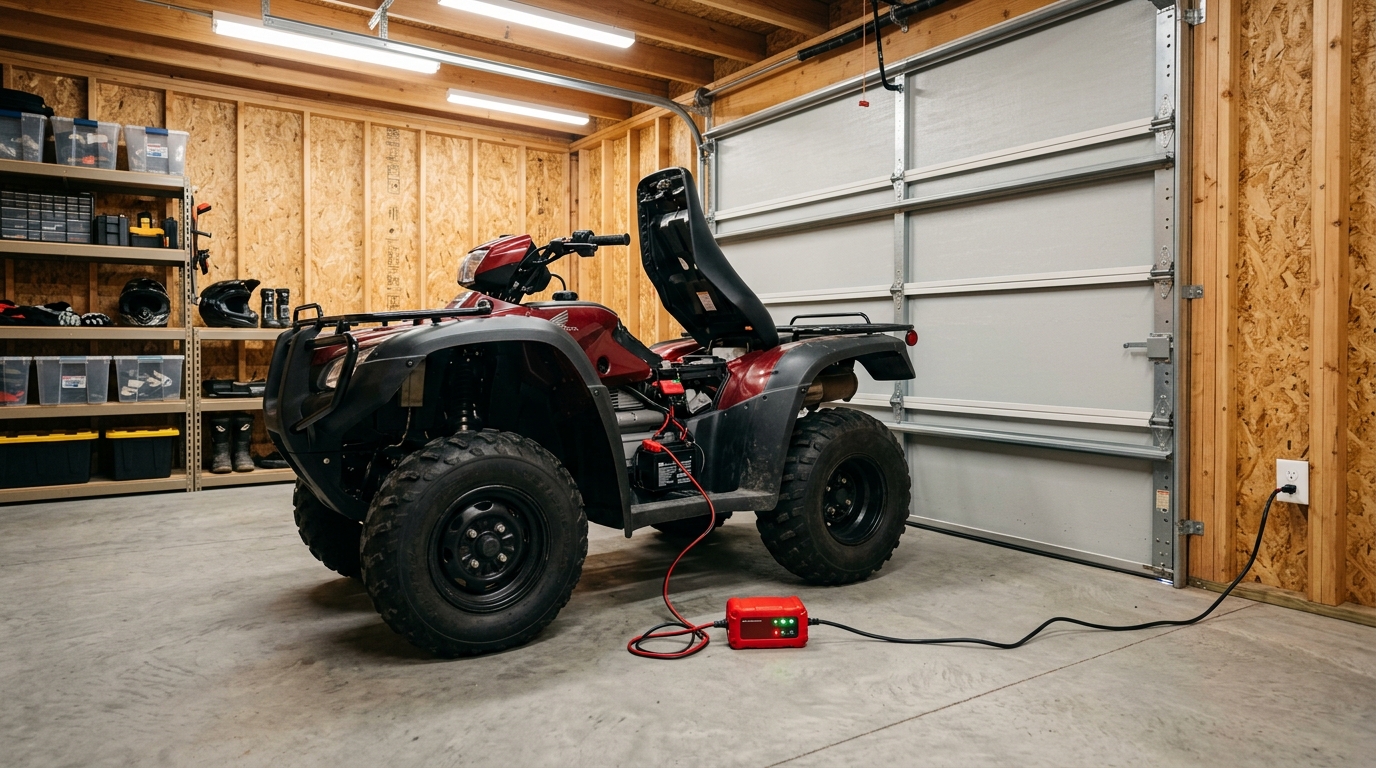
    Proper Charging Techniques for Your ATV’s Battery

    If your battery’s voltage is low or it failed a load test, charge it properly. The right charger and technique stretch battery life and get it ready for your next ride.

    Choosing the Right Battery Charger for Your ATV

    Avoid using high-amperage automotive chargers: they can overcharge and damage smaller ATV batteries. Always confirm the charger is compatible with your battery type.

    Safely Connecting Your Charger

    1. Disconnect the battery from the ATV’s electrical system.
    2. Connect the charger’s positive (+) lead to the positive terminal.
    3. Connect the negative (−) lead to the negative terminal.
    4. Make sure the clamps are firmly attached.
    5. Plug the charger into a grounded AC outlet.

    The Charging Process: Duration and Monitoring

    Follow the charger manufacturer’s instructions for duration. Smart chargers will indicate when the battery is fully charged. For other chargers, monitor the voltage. A fully charged battery should read approximately 12.8 to 13.0 volts.

    Avoid leaving a battery on a basic charger indefinitely; overcharging causes damage. A smart charger or battery maintainer is the best option for keeping it topped up during inactivity.

    Can-Am’s official storage guide recommends the same approach: connect a trickle charger during long off-season layups to prevent the deep discharge that ruins batteries before spring. [4]

    ATV connected to a trickle charger during winter storage

    What to Do If Your Battery Won’t Hold a Charge

    If your battery repeatedly fails to hold a charge, even after proper charging and testing, it’s likely at the end of its service life. Internal sulfation, damaged plates, or a failing internal cell can prevent it from retaining power.

    The most sensible course is replacement. Buy a new battery that meets or exceeds your ATV manufacturer’s specs, paying attention to the CCA (Cold Cranking Amps) rating and physical size.

    What we see at Due North Storage

    When customers pick up ATVs in spring, the most common complaint we hear is the same one every year: a dead battery on the first start attempt.

    Nine times out of ten, the unit was either left disconnected from a maintainer all winter or stored somewhere without an outlet.

    The fix is almost always cheaper than a new battery, and it starts in October, not April.

    Skip the spring battery hassle next year.

    Every Due North Storage unit includes electricity. Keep a trickle charger on your ATV all winter and start next spring with a fully charged battery, every time.

    Maintaining Battery Longevity Throughout the Riding Season

    Battery care doesn’t end with spring preparation. A worn-out battery turns into mid-trail delays, so good riding-season habits add years of reliable starts.

    Regular Visual Checks Before Every Ride

    Before heading out, take a few moments to visually inspect the battery. Look for loose connections, corrosion buildup on the terminals, or damage to the casing. It takes 30 seconds and saves whole days.

    Keeping Terminals Clean and Protected from Dirt and Mud

    ATVs are subjected to harsh environments: mud, dirt, and dust. These contaminants work their way into electrical connections, causing corrosion and poor conductivity.

    After a ride through particularly dirty terrain, wipe down the battery area and inspect the terminals. Reapply dielectric grease periodically if you notice any uneven wear.

    Keeping the terminals clean matters as much as tire pressure or oil levels.

    Avoiding Deep Discharges

    Deep discharges, when a battery is drained to very low voltage, are hard on lead-acid batteries and especially AGM types. Each deep discharge cycle causes irreversible damage to the plates, reducing capacity and overall lifespan.

    Avoid letting accessories run with the engine off for extended periods. If you use winches or other high-draw accessories, run the engine simultaneously so the charging system can keep up.

    Final Thoughts

    A few minutes of battery care up front means your ATV is ready when you are.

    A well-maintained battery is just one part of a fully prepared vehicle, so while you’re at it, also check brake fluids, oil levels, filters, tire pressure, and fuel stability.

    The same prep logic applies across the rest of your toys, especially the off-season machines that are easy to overlook, like the storage mistakes that lead to mold and mildew in stored snowmobiles.

    Follow these practices and your ATV will be eagerly waiting for whatever adventures spring has in store.

    Frequently Asked Questions

    What voltage should a healthy ATV battery read?

    A fully charged ATV battery should read 12.8 volts or higher when it has been sitting and is not being charged or used. Around 12.6V means it is only partially charged and could use a top-off.

    Below 12.5V means it needs charging right away, and anything under 12.4V usually means the battery is damaged and likely needs to be replaced.

    Always test with the ignition off and after the battery has rested for at least a few hours.

    Can I use a car battery charger on my ATV battery?

    You shouldn’t. Car chargers push too many amps for a smaller ATV battery, which can overheat it and cause permanent damage.

    Use a smart charger or trickle charger built for powersports batteries instead. These adjust the current to match what your battery actually needs, and most can stay connected for months without overcharging.

    Why does my ATV battery die over winter?

    Lead-acid and AGM batteries slowly lose charge on their own, even when they are disconnected and not in use. Cold temperatures speed up that process.

    Over a few months of storage, a battery that was healthy in October can drop low enough that it won’t start your ATV in April. A trickle charger keeps it topped off so it is ready when you are.

    Should I disconnect my ATV battery for winter storage?

    Disconnecting the negative cable helps if you have no way to plug in a maintainer, because it stops slow drains from the ATV’s electronics. But even disconnected, the battery will still self-discharge over time.

    The better option is to leave it connected to a trickle charger or smart maintainer all winter so it stays at full charge and is ready to start in spring.

    Is it okay to leave a battery maintainer on all the time?

    Yes, as long as it is a true smart maintainer or trickle charger built for long-term use. These chargers shut off or switch to a very low float current once the battery is full, so they will not overcharge it.

    Don’t leave a basic high-amp automotive charger connected, because it can boil off electrolyte and ruin the battery.

    How long does it take to charge an ATV battery?

    It depends on how low the battery is and the charger’s output. A smart charger usually brings a moderately discharged battery back to full in 4 to 8 hours, and it will tell you when it is done.

    A trickle charger can take 24 hours or more, but it can stay connected indefinitely without harm.

    Avoid forcing a fast charge: slower charging is easier on the battery and extends its life.

    Store your ATV with us next winter.

    Indoor units up to 14×40 with electricity included, just off Highway 10 in the St. Cloud area. Avoid the dead-battery surprise next April.

    Sources:
    [1] Polaris. Battery Charging and Maintenance Tips for Polaris Off-Road Vehicles. Retrieved 2026-05-05.
    [2] Chengjoseph. (2026, January 15). How to charge ATV battery safely: Expert tips to maximize lifespan. TYCORUN.
    [3] SuperATV. UTV and ATV Slow Cranking, Let’s Troubleshoot It.
    [4] Can-Am (BRP). How to Store an ATV or SxS for Winter. Retrieved 2026-05-05.

  • How to Winterize Your Boat for Winter Storage: A Comprehensive Step-by-Step Guide

    How to Winterize Your Boat for Winter Storage: A Comprehensive Step-by-Step Guide

    A Guide for How to Winterize Your Boat for Winter Storage

    As the boating season draws to a close, a crucial task appears on every owner’s horizon: boat winterization. This isn’t just an end-of-season chore; it’s the single most important act of preventative maintenance you can perform.

    With annual U.S. sales of boats and marine products totaling about $57.7 billion in 2023, protecting your investment from harsh winter conditions is very important.

    Proper winter storage preparation ensures your vessel weathers the cold safely, preventing costly damage and guaranteeing a swift, trouble-free launch next spring.

    Why Proper Boat Winterization Protects Your Investment

    Neglecting to winterize your boat is a gamble against nature, and the odds are not in your favor. Water left in the engine block, cooling system, or plumbing can freeze, expand, and lead to cracked engines or burst pipes—repairs that can cost thousands.

    This reality is reflected in the growing boat maintenance and repair market, which is expected to reach $23.9 Billion by 2030. Furthermore, with the nautical industry focusing more on sustainability and maintaining existing vessels amidst market shifts, as noted by Oria Marine, preserving your boat’s condition is more important than ever.

    A proper winterizing process protects your engine, fuel system, and plumbing system from corrosion, deposits, and freeze damage, saving you money and extending the life of your vessel.

    What This Guide Covers: A Step-by-Step Approach for All Boat Types

    This guide provides a comprehensive, step-by-step process for a thorough boat winterization. We will cover everything from gathering the right supplies and preparing your engine—whether it’s one of the common outboard engines, powerful inboard engines, or versatile stern drives—to protecting your fuel and water systems. We provide detailed instructions. Always check your owner’s manual for model-specific requirements.

    When to Winterize: Understanding Your Climate and Timing

    Timing is critical. You should begin the winterizing process when you are certain your boating season is over and before the first hard freeze is forecasted. For boaters in northern climates, this is especially crucial as temperatures can drop unexpectedly. Waiting too long can turn a routine maintenance task into an emergency repair. Plan to have your boat fully prepared for winter storage at least a week before consistent freezing temperatures are expected.

    When to Winterize: Understanding Your Climate and Timing

    Section 1: Gather Your Supplies & Prepare for Success

    Before you begin, a well-organized toolkit will make the entire process smoother and more efficient. Having everything on hand prevents delays and ensures you don’t miss a critical step. Preparation is the foundation of a successful boat winterization.

    The Essential Winterization Toolkit: A Comprehensive List

    Your toolkit should be a mix of specific marine products and general-purpose tools. Always start by reading your boat’s owner’s manual for any unique requirements or recommended products.

    Essential Fluids and Chemicals:

    • Marine-Specific Fuel Stabilizer Additive: A quality fuel treatment to prevent degradation and protect the fuel system.
    • Engine Oil & Oil Filter: For the critical end-of-season oil change.
    • Lower-Unit Lube / Gear Lube: Essential for stern drives and outboard engines.
    • Engine Fogging Oil: To coat internal engine components and prevent rust.
    • Marine & RV Antifreeze: Specifically non-toxic propylene glycol antifreeze for engine cooling systems and the plumbing system. Do not use automotive antifreeze, as it is toxic to aquatic life.
    • Grease: Marine-grade grease for fittings and propellers.
    • Cleaners & Waxes: For cleaning the hull, deck, and interior to prevent mold and mildew.

    Tools and Equipment:

    • Socket/Wrench Set
    • Screwdrivers
    • Oil Filter Wrench
    • Gear Lube Pump
    • Flush Muffs (“Ears”)
    • Hoses & Funnels
    • Rags & Absorbent Pads
    • Wire Brush: For cleaning battery terminals.
    • Trickle Charger or Battery Tender: To maintain battery health.

    Pre-Winterization Checks: What to Inspect Before You Start

    Before diving into mechanical tasks, perform a thorough inspection. Look for hull cracks, inspect propellers, and test electrical components. Addressing minor repairs now is far easier than discovering them in the spring. Give your boat a complete cleaning inside and out to prevent mold and mildew from taking hold. This is also the time to decide on your boat storage plan. Review your storage options, which can range from a marina slip or wet slips (requiring in-water winterization) to various forms of dry storage like dry stack storage. If using a professional service, inquire about their winter packages. Protecting your boat from the elements is key, so choose a high-quality boat cover or consider professional shrink wrapping for maximum protection against water intrusion.

    Pre-Winterization Checks: What to Inspect Before You Start

    Section 2: Engine Winterization – The Heart of Your Boat’s Survival

    The engine is the most expensive and complex component of your boat. Protecting it from freezing temperatures and internal corrosion is the most critical part of the winterizing process. Proper engine winterization is your best defense against catastrophic failure.

    General Engine Winterization Principles (Applies to All Types)

    Regardless of your engine type, the core goals are the same: remove corrosive contaminants, protect internal parts from rust, and ensure no water remains to freeze and expand. Start by warming the engine to operating temperature. This lets the old oil drain more completely. The oil takes suspended impurities with it.

    Outboard Engines: Step-by-Step Winterization

    1. Fuel Stabilization: Add the correct amount of fuel treatment to your fuel tank and run the engine for 10-15 minutes on flush muffs to ensure the stabilized fuel circulates through the entire fuel system.
    2. Fog the Engine: While the engine is still running, spray fogging oil into the air intakes until the engine stalls. This coats internal surfaces with a protective layer of oil.
    3. Change Gear Lube: Place a drain pan under the lower unit. Remove the upper and lower drain screws and let the gear lube drain completely. A milky appearance indicates water intrusion and a potential seal failure that needs immediate attention. Refill with fresh lower-unit lube from the bottom hole until it seeps out the top, then replace both screws.
    4. Drain Cooling System: Once the engine is off, trim it to the full down position to allow all water to drain from the cooling system. This is a vital step to prevent freezing.

    Inboard Engines: Comprehensive Winterization

    1. Warm the Engine & Change Oil: After reaching operating temperature, pump out the old oil. Replace the oil filter, applying a light coat of new oil to the gasket. Refill with the manufacturer-recommended oil.
    2. Flush and Drain Cooling System: For raw-water cooled engines, flush the system with fresh water. Then, drain the entire system by opening all petcocks and removing drain plugs on the engine block and manifolds. Don’t forget to check the exhaust ports.
    3. Circulate Antifreeze: Close all drains. Use a 5-gallon bucket and a hose connected to the main water intake to run Marine & RV Antifreeze through the engine cooling systems. Start the engine and let it draw in the antifreeze until you see pink fluid exiting the exhaust. This ensures complete protection. It’s also a good time to inspect the water pump impeller and replace it if it shows signs of wear.

    Stern Drives (Inboard/Outboard): Specific Winterization Steps

    Stern drives require a combination of inboard and outboard winterization procedures.

    1. Engine Winterization: Follow the complete process for inboard engines, including the oil change, fuel stabilization, and circulating antifreeze through the cooling system.
    2. Outdrive Maintenance: Inspect the outdrive, especially the rubber bellows, for cracks. Clean off any marine growth.
    3. Change Gear Lube: As with outboard engines, drain, inspect, and refill the gear lube in the outdrive.
    4. Storage Position: Store the outdrive in the full down position. This prevents water from collecting in the housing and keeps the bellows from developing a permanent crease.

    Stern Drives (Inboard/Outboard): Specific Winterization Steps

    Section 3: Fuel System Protection – Preventing Corrosion and Deposits

    Modern fuels, especially those with ethanol, can cause significant problems over a long winter storage period. Protecting your fuel system is essential for a quick, reliable start in the spring.

    The Importance of Fuel Stabilization: Combating Ethanol and Oxidation

    Ethanol attracts water, which can lead to phase separation where a corrosive water-ethanol mixture sinks to the bottom of your fuel tank. Fuel also oxidizes, creating gums that clog lines, filters, and injectors. A quality marine-specific fuel stabilizer additive prevents both of these destructive processes.

    Filling the Fuel Tank: Full vs. Partially Full (and why)

    For winter storage, it is best to fill the fuel tank to about 90% capacity. A full tank leaves less room for air, which minimizes condensation from forming on the tank walls and contaminating your fuel. After filling, add the stabilizer and run the engine for a few minutes to circulate the treated fuel.

    Fuel Filter and Fuel/Water Separator: Inspection and Replacement

    The end of the season is the perfect time to replace your fuel filter and drain or replace your fuel/water separator. This removes any trapped water or debris before storage. Starting the spring with a fresh filter is cheap insurance against fuel delivery problems that could derail your first trip.

    Draining the Carburetor (if applicable)

    For carbureted engines, it’s good practice to drain the carburetor float bowls after running stabilized fuel through the engine. This removes the last bit of fuel that could evaporate and leave varnish deposits, which can clog the tiny jets and passages critical for engine performance.

    Section 4: Water and Plumbing Systems – Averting Frozen Catastrophe

    Any water left in your boat’s plumbing system—tanks, pipes, pumps, or heads—is a ticking time bomb in freezing weather. Draining and protecting these systems is non-negotiable.

    Draining All Freshwater Systems

    Start by opening all faucets and turning on the freshwater pump to drain the hot water heater and empty the tank completely. Use low-point drains if available. Ensure all water circulation is stopped and every drop of water is out of the lines. Don’t forget to remove the transom drain plug once the boat is out of the water.

    Treating the Plumbing System with Antifreeze

    Once drained, the plumbing system must be filled with non-toxic Marine & RV Antifreeze. You can use a winterizing kit to pump antifreeze directly into the system. Or, pour antifreeze into the empty freshwater tank. Then run each faucet until the pink fluid appears. This protects all pipes, pumps, and fixtures from freezing.

    Head (Toilet) and Holding Tank Winterization

    After pumping out the holding tank at an approved facility, add antifreeze to the empty tank to protect the discharge plumbing. Pour antifreeze into the toilet bowl and flush it through the system to winterize the intake and discharge lines, ensuring all components are protected.

    Bilge Maintenance: Ensuring a Dry Start to Spring

    A clean, dry bilge is crucial. Pump out all water and scrub it with a cleaner to remove oil and grime. This prevents odors and mold and mildew. Check that the bilge pump and its float switch are functioning correctly, though you should not rely on them during storage when batteries are disconnected.

    Preventing Mold and Mildew in Water Systems

    Even after draining, residual moisture can promote mold and mildew. Running antifreeze through the systems helps. Also, prop open any storage compartments, refrigerators, and freezers. This allows air to circulate during winter storage. Use moisture-absorbing products in enclosed cabin spaces.

    Section 5: Battery Care and Electrical Systems

    Winter is tough on batteries. Cold temperatures can drain their charge, and a fully discharged battery can freeze, crack, and be completely destroyed. Proper care of your electrical system is essential for a successful spring launch.

    Removing and Storing Your Batteries

    It is highly recommended to remove batteries from the boat for winter storage. Clean the battery terminals and cable ends with a wire brush to remove corrosion. Store the batteries in a cool, dry place off concrete floors, such as on a wooden shelf in a garage or basement. This applies to standard lead-acid batteries as well as a lithium-ion battery or NiMH batteries, though always check the manufacturer’s specific storage recommendations.

    Maintaining Battery Charge During Storage

    A fully charged battery will not freeze. Throughout the winter, check the battery’s charge level monthly. The best solution is to connect the stored batteries to a smart trickle charger or battery tender. This device monitors the charge and delivers power only when needed. It prevents overcharging.

    Maintaining Battery Charge During Storage

    Disconnecting Other Electrical Components

    To prevent any drain on the system, disconnect other onboard electrical components. This also protects sensitive electronics from cold and moisture. Consider removing expensive items like chartplotters, fish finders, or even your portable Bluetooth speaker and storing them at home. Don’t forget to check your safety equipment and bring flares or fire extinguishers indoors if their lifespan could be affected by extreme cold.

    Conclusion

    Proper boat winterization is not just a suggestion. It is a basic responsibility of boat ownership. It protects your boat and your money. Follow these steps carefully. Prepare your engine and fuel system. Safeguard your plumbing and batteries. This creates a shield against harsh winter damage. This process is an investment in your boat’s longevity and ensures that when warm weather returns, you’re ready for a new season of enjoyment.

    For those who prefer professional assistance, many marinas like Margaritaville at Lanier Islands Marina offer comprehensive winter packages. You can get a quote or contact members to discuss your specific boat storage needs. If you’re looking to build your skills, consider a boating education course to become more confident in your maintenance abilities. When spring arrives, perform a pre-launch check and plan for a short shakedown cruise to ensure all systems are running smoothly. Take the time to do it right, and your boat will be ready for adventure when you are.