Category: Boats

  • Indoor vs. Outdoor vs. Covered Storage: Which Is Right for Your Boat or RV?

    Indoor vs. Outdoor vs. Covered Storage: Which Is Right for Your Boat or RV?

    The first warm Saturday in April, you peel the cover off the boat and a mouse bolts from a nest in the captain’s chair. The vinyl is shredded, the wiring underneath is chewed, and the season has not even started. That morning was decided back in October, by one choice: where it spent the winter.

    The cheapest storage option in central Minnesota is a spot in your driveway. It is also the most expensive one, because that is where the freeze damage, rodent chewing, and sun-baked gel coat get done. Where you park a boat or RV for the off-season decides how much of it survives to next spring.

    Central Minnesota is thick with rigs that need an off-season home. As of 2025, Minnesota ranks first in the nation for registered boats per capita, roughly one for every six residents, [1] and RV makers shipped 342,220 units nationwide in 2025. [2] Most of them sit unused for months, and where they sit is the whole question.

    Storage comes in three flavors: fully enclosed indoor units, open-sided covered canopies, and open-air outdoor lots. Each has a price, and each has a real cost that shows up months later. This guide walks through what you actually get for the money, so you can match the option to the boat or RV instead of the sticker price.

    What Are Your Three Storage Options?

    Storage facilities usually market three tiers, and knowing which tier you are looking at prevents a lot of surprise the first winter. The names get used loosely, so it helps to define them the way the industry actually does.

    Indoor Storage (Fully Enclosed)

    Indoor units are walled and roofed, with a lockable door. You back the boat or RV in, close the door, and it sits in a sealed bay for the off-season. Premium indoor units include electricity, drive-in access, and door heights that fit tall coaches and pontoons.

    What you get: no snow load, no UV, no wind-driven rain, and a much smaller opening for rodents to find. What you pay: the highest per-month rate of the three options, offset by the fact that you skip most weather-related repair bills.

    Covered Storage (Canopy)

    Covered spots have a roof and often side walls on one or two sides, but the ends and at least one long side are open. Think of a pole barn without full walls. Snow load lands on the canopy instead of the rig, and the sun does not hit the deck directly.

    What you get: solid protection from snow load and UV, plus a break from most precipitation. What you pay: less than indoor, more than open outdoor. What still gets in: blowing snow, blowing dust, road-salt spray, and small animals looking for shelter.
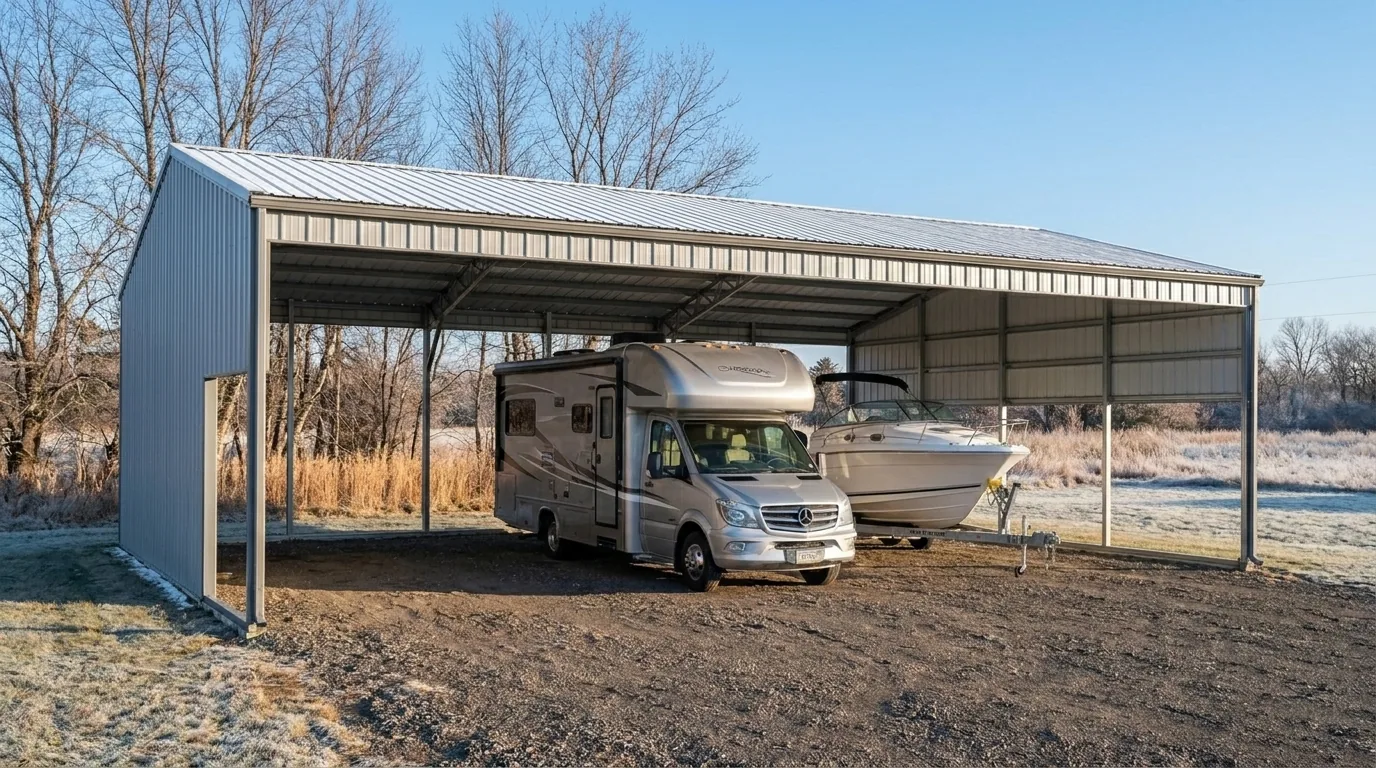
    RV and boat parked under an open-sided steel canopy with snow on the roof at a central Minnesota storage facility
    A canopy takes the snow load and blocks direct sun, but the sides stay open to wind and pests.

    Outdoor Storage (Open Lot)

    Outdoor storage is a marked parking spot or a section of gravel or asphalt with no roof or walls. It sits under the sky for six to seven months.

    What you get: the lowest monthly cost, plus easy back-in and pull-out access. What you pay: everything else. Snow accumulates on the cover, sun bakes the finish, freeze-thaw cycles work the seams, and rodents get a wide-open runway.

    How Much Protection Does Each Option Actually Offer?

    Protection breaks down into four things a boat or RV cares about: freeze exposure, snow load, UV and weather, and rodent pressure. Here is how the three storage types stack up on each.

    Factor Indoor Covered Outdoor
    Freeze exposure Same as outside air (unheated units), but no wind chill or blowing snow on seals Same as outside, some wind protection Full exposure, wind chill, freeze-thaw hitting every seam
    Snow load Zero on the rig Zero on the rig; canopy takes the weight Heavy load risk on covers, roofs, and frames
    UV and weather Fully shielded Roof blocks direct sun and rain Continuous UV, rain, and salt spray
    Rodent pressure Low; single entry point Moderate; open sides invite small animals High; no barrier at all

    Notice what indoor storage does not do: it does not heat the space. Most indoor storage in central Minnesota is unheated, so the interior temperature still drops well below freezing on a January night. That is why winterization matters regardless of where it spends the winter.

    What indoor storage does do is remove everything else. No snow load on the roof, no UV on the gel coat, no blowing salt on the aluminum, no rodent freeway from the field next door. It sits in still, dry air for seven months.

    What Does Storage Cost in Central Minnesota?

    Prices swing quite a bit between facilities and unit sizes, but the general shape holds. Outdoor lots run the cheapest, canopies sit in the middle, and enclosed indoor bays cost the most. Location matters too: units close to the highway with easy access typically list higher than remote lots that require a longer drive to reach.

    Rough monthly ranges for secure boat and RV storage near St. Cloud, whether you own a boat, an RV, or a camper:

    • Outdoor lot: $40 to $90 per month, depending on lot access and whether the surface is gravel or paved.
    • Covered canopy: $75 to $150 per month, usually with basic electrical shared across the row.
    • Indoor unit: $125 to $280 per month for premium sizes from 11×22 up to 14×40, typically with individual electricity and drive-in access.

    The math changes when you fold in what each option costs when something goes wrong. When BoatUS analyzed roughly a decade of its marine insurance freeze claims, more than 75% involved a cracked engine block or exhaust manifold, and the group estimates improper storage causes over $50 million in preventable damage nationwide every year. [3]

    A single cracked block can total an older outboard. Replacing one commonly runs well above $10,000 before labor. Set that against the roughly $120 per month gap between outdoor and premium indoor storage over a seven-month layup, and the “expensive” option starts to look like the cheap one.

    Which Storage Type Wins for a Minnesota Winter?

    Winter is where the three tiers separate the most. St. Cloud sits below freezing for just over three months a year, from late November into early March, and in the 1991–2020 climate normals its average January low sits near 2.9°F. [4] Water expands about 9% when it freezes, [5] with enough force to crack a cast-iron engine block. [3]

    Add the two facts together and any water left in the engine, cooling system, or water lines becomes a repair bill. That is true whether it winters indoors or outdoors, which is why full winterization is the price of entry either way. Where storage type matters most is in the second layer of damage: the roof, the finish, the interior, and the electrical.

    Outdoor storage catches all of it. A February snowstorm dumps eight inches on the cover, the sun warms it in the afternoon, it refreezes overnight, and by March the seams under it have been worked loose. Mice hop up from the field, find a gap, and spend the winter nesting in the cushions.
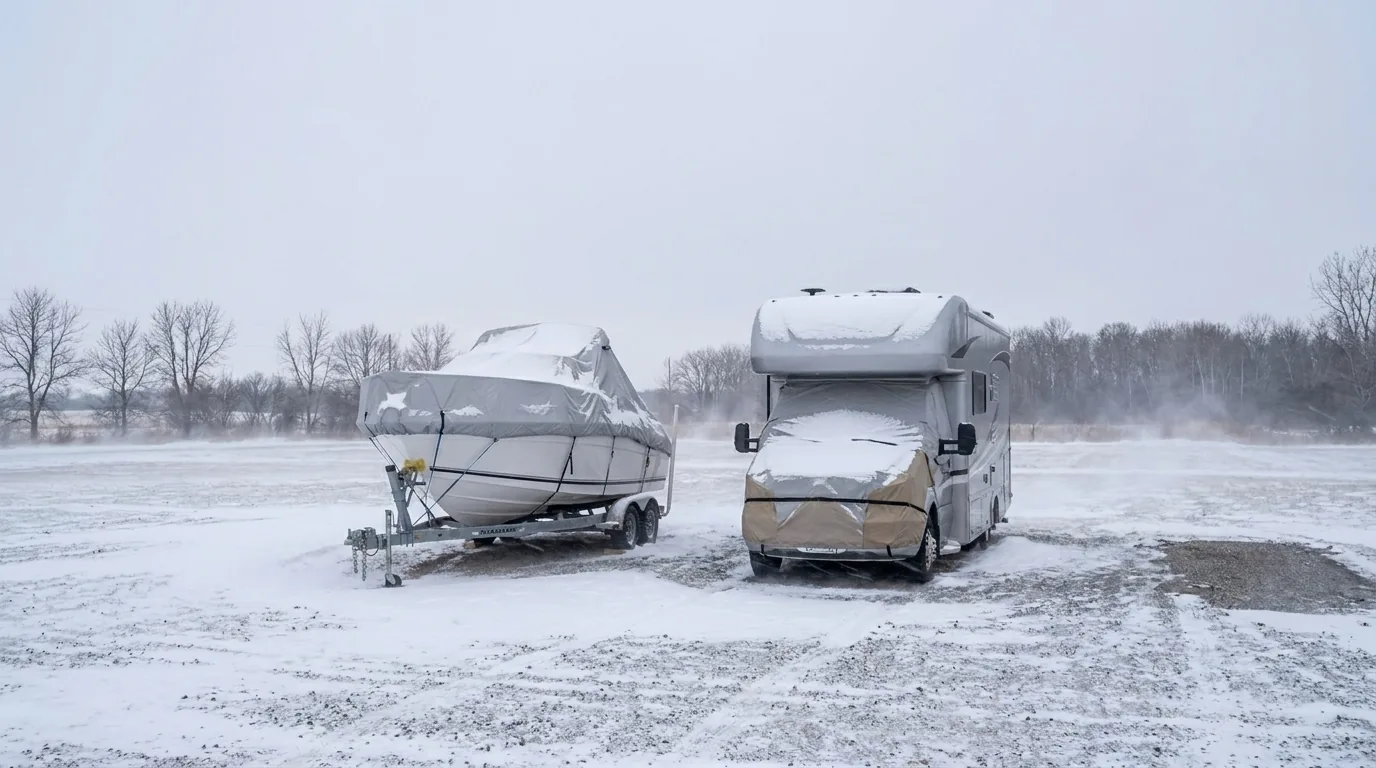
    Covered boat and travel trailer under deep snow on an open outdoor storage lot in Minnesota winter
    On an open lot, snow piles on the cover and freeze-thaw works every seam all winter.

    Indoor storage removes those variables at once. The cover, the tires, and the electrical harness look the way they did in October, because nothing has been working on them all winter. If you are already going to winterize the RV or the boat, indoor storage is what protects the work you just did.

    What About Summer Storage?

    Summer is easier on a stored rig, but not free. Sun exposure adds up fast on vinyl seats, gel coat, and tire sidewalls, and one that sits three weeks between weekend uses in a full-sun outdoor lot ages noticeably in one season.

    Frequent-use owners often park outdoor during the boating and camping months, when the boat or RV is out on the water or on the road most weekends. Occasional-use owners tend to keep indoor storage year-round so the finish and the interior stay showroom clean between longer gaps.

    Covered storage splits the difference well in summer. The roof blocks direct sun and the daily rain hits the canopy instead of the deck, and the open sides let air circulate so nothing stays damp. If it lives outdoors during the season, a canopy spot is a small upgrade with a real payoff for the finish.

    How Do You Choose the Right Option for Your Rig?

    Match the storage tier to what you own and how you use it, then check that the bay actually fits the rig; our guide to what size storage unit you need walks through the dimensions. The bigger the investment and the longer the layup, the more indoor storage makes sense.

    A rough sorting rule:

    • Choose indoor if the rig is worth $30,000 or more, sits for four or more months at a time, has a battery you want on a maintainer, or has soft goods (vinyl seats, canvas, custom interior) you want to protect.
    • Choose covered if you want a middle-tier upgrade over open outdoor, or if it is used frequently in the off-season and you mostly need snow-load and UV protection.
    • Choose outdoor if the boat or RV is inexpensive to replace, you keep an eye on it through the winter, and you are comfortable with a full winterization routine and a high-quality cover.

    There is a fourth factor most owners forget: HOA rules and city ordinances. A lot of central Minnesota neighborhoods cap how long an RV or boat can sit in a driveway, and some ban them entirely. If the driveway is not really an option, the choice narrows to which paid storage tier fits the rig and the budget.

    What We See at Due North Storage

    The pattern is consistent every spring. The rigs that come out ready to launch or roll are almost always the ones that spent the winter indoors, whether that is with us or in an owner’s shop. The rigs that come in for surprise repairs almost always spent the winter outside under a tarp.
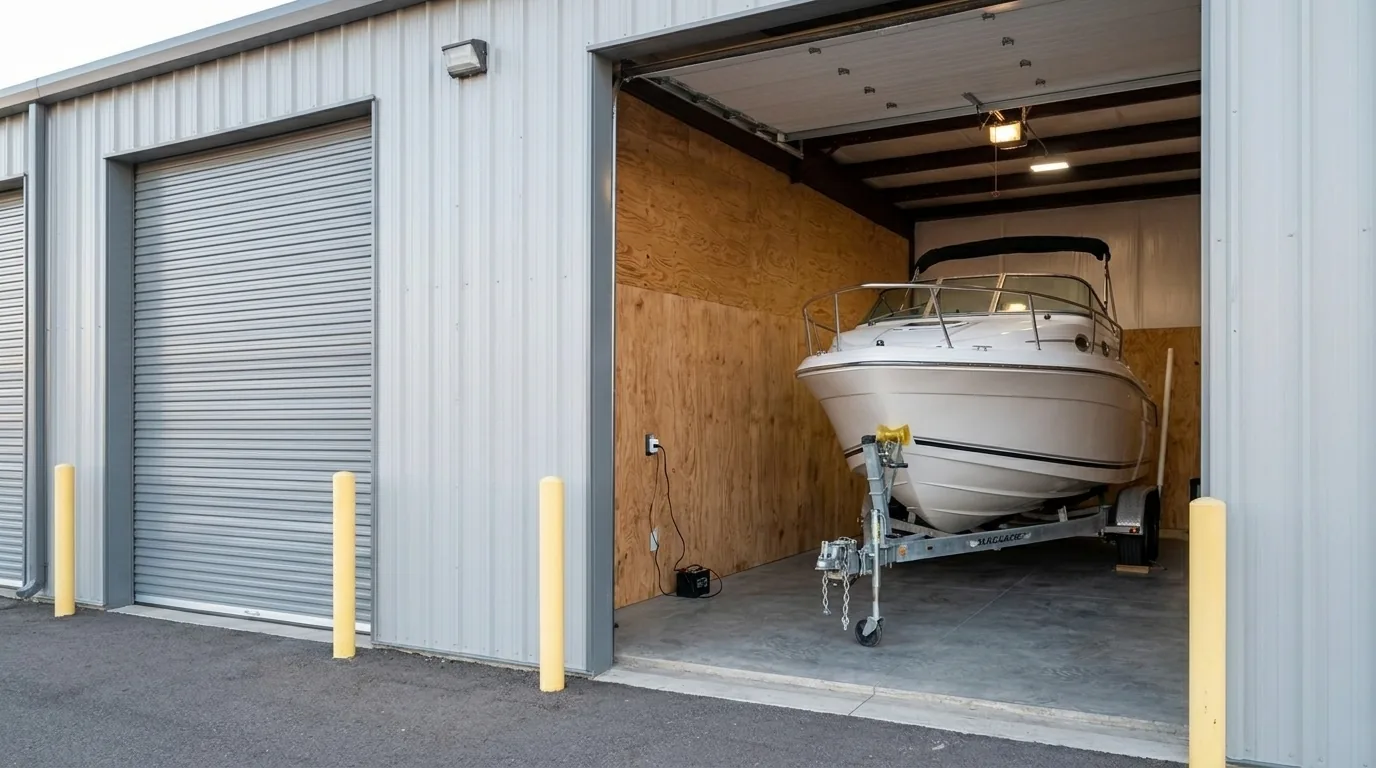
    Boat on a trailer inside a clean enclosed indoor storage unit with the door open
    An enclosed unit keeps the boat or RV in still, dry air, with an outlet for a battery maintainer.

    Freeze damage gets the headlines because it is the most expensive single failure, and that piece is preventable with proper winterization regardless of storage. What indoor storage prevents is the slow-motion damage: the faded gel coat, the mildew on the seats, the mouse-chewed wiring harness, the cracked cover seam that leaked water into the cabin from December through March.

    Owners tell us the calm feeling is worth as much as the physical protection. You are not checking the weather app after every storm to see if you need to sweep the roof. The rig is safe, dry, and ready when you are.

    Store Indoors This Season

    Due North Storage offers indoor units up to 14×40 with electricity included, just off Highway 10 in the St. Cloud area. Skip the snow load, the freeze-thaw, and the spring surprises.

    Final Thoughts

    The right storage tier is the one that matches the value of the rig and the length of the layup. Outdoor is cheap and honest about what it delivers. Covered is a real upgrade for snow load and UV, but leaves the sides open. Indoor costs the most up front and, for most Minnesota owners, quietly pays for itself over one bad-luck winter avoided.

    Whatever you choose, do the winterizing work in October. The rig that arrives at storage properly prepped comes out clean in April. The rig that skips those steps comes out with a repair estimate. Where it sleeps decides how much of the season it costs you.

    Frequently Asked Questions

    Is indoor storage worth the extra cost in Minnesota?

    For most boat and RV owners, yes. Indoor storage removes snow load, UV, and rodent pressure, and units with electricity keep the battery on a maintainer all winter.

    Given that a replacement outboard can top $10,000, the price gap between outdoor and indoor storage usually pays for itself the first spring you skip a weather-related repair.

    Does a covered outdoor space protect against Minnesota cold?

    A canopy blocks snow and UV, but the air temperature inside is still the outside temperature. Freeze damage happens the same way under a canopy as in the open, so you still need to fully winterize the rig.

    Covered storage is better than open outdoor, but it is not a substitute for winterization.

    How much does boat or RV storage cost in central Minnesota?

    Outdoor lots typically run the lowest, covered canopies sit in the middle, and indoor units cost the most. In the St. Cloud area, indoor vehicle units generally range from about $125 to $280 a month depending on size.

    Premium features like electricity, drive-in access, and 14×40 door heights are usually included in that range.

    Can I skip winterizing if I use indoor storage?

    No. Most indoor units are unheated, so the interior temperature still drops well below freezing on a January night. Winterize the water system, stabilize the fuel, and store the battery correctly regardless of where the rig sleeps.

    Indoor storage protects the exterior and interior; winterization protects the mechanicals.

    Which storage type is best for a pontoon?

    Indoor storage suits pontoons best because it eliminates the snow load that crushes covers, blocks the UV that fades vinyl seats, and keeps out the mice that shred foam cushions.

    If indoor is not available, a properly vented shrink-wrap job under a canopy is the next best option.

    Does outdoor storage void my RV or boat insurance?

    Not usually, but many policies exclude freeze damage and rodent damage as preventable maintenance rather than covered losses.

    Read your policy before deciding: some insurers offer premium discounts for indoor storage, and the payout picture on a claim often looks very different between outdoor and indoor storage.

    Do I need indoor storage in the summer too?

    Not always, but sustained sun exposure damages gel coat, vinyl, and tires faster than most owners realize. If your rig sits for weeks between uses in a sunny lot, indoor storage adds meaningful lifespan.

    Frequent-use owners often park outdoor in summer and switch to indoor for winter.

    Indoor Boat & RV Storage in Central Minnesota

    Clean, dry indoor units up to 14×40 with electricity included, off Highway 10 near Saint Cloud and Little Falls. Get your rig into a bay before the season fills up.

    Sources:
    [1] Minnesota Department of Natural Resources. Boating, Canoeing and Kayaking (Minnesota Facts). Updated May 2025. Retrieved 2026-07-28.
    [2] RV Industry Association. RV Shipments End 2025 at 342,220 Units, Modest 2.5% Growth Over 2024. December 2025. Retrieved 2026-07-28.
    [3] BoatUS. Your Boat Engine’s Chillin’ (Winterizing). Retrieved 2026-07-28.
    [4] NOAA / National Weather Service, via St. Cloud State University Climate Office. January Normal Data for Saint Cloud, Minnesota (1991–2020). Retrieved 2026-07-28.
    [5] U.S. Geological Survey, Water Science School. Water Density. Retrieved 2026-07-28.
  • Finding Secure Boat Storage Near St. Cloud

    Finding Secure Boat Storage Near St. Cloud

    How to Find Secure Boat Storage Near St. Cloud

    Finding the right storage unit for your boat or watercraft can be a challenge. Protection from corrosion, thievery, and other damaging aspects is your priority. Yet, finding a storage facility that offers all of these is quite a task in the St. Cloud area.

    If you are looking for storage for your water vessels, then there are certain things you need to keep in mind. Let’s get into it.

    Did you know? Minnesota ranks 4th in the United States in terms of boat ownership. As of this writing, there are over 613,000+ registered motorized boats in the state. [1]

    Why Safe Storage is Important for Boat and Boating Equipment

    Security and damage prevention are two primary benefits of finding the right storage for your boat(s). Finding a storage unit with ample space can ensure you have enough maneuverability. The right storage also ensures you relax and sit back, knowing your investment is safe.

    Here are the key benefits of finding the right indoor storage unit for your boat:

    • Avoids expensive damage from harsh winter weather
    • Deters opportunistic thieves from stealing valuable gear
    • Extends the overall lifespan of marine upholstery
    • Keeps delicate electronics away from extreme humidity
    • Maintains the structural integrity of the fiberglass
    • Prevents unwanted pests from nesting inside cabins
    • Protects the exterior paint from harmful UV rays
    • Reduces annual maintenance costs

    Boats storage

    What to Look for in a St. Cloud Boat Storage Facility

    There are certain things you should look for in your boat storage. From security to temperature control, the safety of your boat or boating equipment relies on the storage unit you choose.

    Here are the factors you should consider:

    1. Controlled Access & Security

    Look for theft and vandalism prevention policies and tactics used by the storage facility. See if they offer controlled access and whether surveillance via security personnel or cameras is available. If indoor/covered storage has unit-based security, it is not easy to breach them.

    To keep it simple, here is what you should look for:

    • Controlled access via single and gated entrances that require a key code or card
    • Well-lit area to deter intruders
    • Offers 24/7 surveillance via high-definition security cameras
    • Offers individual security measures for each unit

    2. Damage Prevention

    Any facilities that offer damage prevention should be at the top of your list. Weatherproof and dry storage facilities ensure your boat and its components are safe from corrosion.

    Look for the following key features:

    • Dry ground and drainage systems
    • Indoor and covered options
    • Weatherproofing via insulation or other measures

    3. Cleanliness and Maintenance

    Check if the facility focuses on orderliness. See their policy and measures to keep the area clean and maintained.

    Analyze the following key aspects:

    • Active pest control measures to prevent rodents, spiders, bugs, etc.
    • Orderliness to keep the site clean, tidy, and debris-free
    • Spots designated for washing, flushing, and performing minor maintenance

    4. Accessibility and Convenience

    Look for a facility that offers easy and 24/7 drive-up access. This includes easy access to your particular storage without facing any obstacles. Look for a self-storage facility that has wide doors to maneuver your boat.

    5. Ample Space and Area

    Another thing to look for in a facility is extra space for boat equipment. You must look for wide aisles and a turning radius that ensures easy maneuvering. Accessible drive-up units ensure you can park and take out your boat without risk of damage.

    If you need a secure facility for your boat in the St. Cloud area, then Due North is available. Unit sizes range from 11’ x 22’ to 14’ x 40’. Call (320) 290-2193 to check availability.

    Source:

    [1] Wagner, J. (2024, May 28). How common is boat ownership in Minnesota compared to the rest of the U.S.? CBS News. https://www.cbsnews.com/minnesota/news/boat-ownership-costs-maintenance-storage-slips/

  • How to Winterize Your Boat for Winter Storage: A Comprehensive Step-by-Step Guide

    How to Winterize Your Boat for Winter Storage: A Comprehensive Step-by-Step Guide

    A Guide for How to Winterize Your Boat for Winter Storage

    As the boating season draws to a close, a crucial task appears on every owner’s horizon: boat winterization. This isn’t just an end-of-season chore; it’s the single most important act of preventative maintenance you can perform.

    With annual U.S. sales of boats and marine products totaling about $57.7 billion in 2023, protecting your investment from harsh winter conditions is very important.

    Proper winter storage preparation ensures your vessel weathers the cold safely, preventing costly damage and guaranteeing a swift, trouble-free launch next spring.

    Why Proper Boat Winterization Protects Your Investment

    Neglecting to winterize your boat is a gamble against nature, and the odds are not in your favor. Water left in the engine block, cooling system, or plumbing can freeze, expand, and lead to cracked engines or burst pipes—repairs that can cost thousands.

    This reality is reflected in the growing boat maintenance and repair market, which is expected to reach $23.9 Billion by 2030. Furthermore, with the nautical industry focusing more on sustainability and maintaining existing vessels amidst market shifts, as noted by Oria Marine, preserving your boat’s condition is more important than ever.

    A proper winterizing process protects your engine, fuel system, and plumbing system from corrosion, deposits, and freeze damage, saving you money and extending the life of your vessel.

    What This Guide Covers: A Step-by-Step Approach for All Boat Types

    This guide provides a comprehensive, step-by-step process for a thorough boat winterization. We will cover everything from gathering the right supplies and preparing your engine—whether it’s one of the common outboard engines, powerful inboard engines, or versatile stern drives—to protecting your fuel and water systems. We provide detailed instructions. Always check your owner’s manual for model-specific requirements.

    When to Winterize: Understanding Your Climate and Timing

    Timing is critical. You should begin the winterizing process when you are certain your boating season is over and before the first hard freeze is forecasted. For boaters in northern climates, this is especially crucial as temperatures can drop unexpectedly. Waiting too long can turn a routine maintenance task into an emergency repair. Plan to have your boat fully prepared for winter storage at least a week before consistent freezing temperatures are expected.

    When to Winterize: Understanding Your Climate and Timing

    Section 1: Gather Your Supplies & Prepare for Success

    Before you begin, a well-organized toolkit will make the entire process smoother and more efficient. Having everything on hand prevents delays and ensures you don’t miss a critical step. Preparation is the foundation of a successful boat winterization.

    The Essential Winterization Toolkit: A Comprehensive List

    Your toolkit should be a mix of specific marine products and general-purpose tools. Always start by reading your boat’s owner’s manual for any unique requirements or recommended products.

    Essential Fluids and Chemicals:

    • Marine-Specific Fuel Stabilizer Additive: A quality fuel treatment to prevent degradation and protect the fuel system.
    • Engine Oil & Oil Filter: For the critical end-of-season oil change.
    • Lower-Unit Lube / Gear Lube: Essential for stern drives and outboard engines.
    • Engine Fogging Oil: To coat internal engine components and prevent rust.
    • Marine & RV Antifreeze: Specifically non-toxic propylene glycol antifreeze for engine cooling systems and the plumbing system. Do not use automotive antifreeze, as it is toxic to aquatic life.
    • Grease: Marine-grade grease for fittings and propellers.
    • Cleaners & Waxes: For cleaning the hull, deck, and interior to prevent mold and mildew.

    Tools and Equipment:

    • Socket/Wrench Set
    • Screwdrivers
    • Oil Filter Wrench
    • Gear Lube Pump
    • Flush Muffs (“Ears”)
    • Hoses & Funnels
    • Rags & Absorbent Pads
    • Wire Brush: For cleaning battery terminals.
    • Trickle Charger or Battery Tender: To maintain battery health.

    Pre-Winterization Checks: What to Inspect Before You Start

    Before diving into mechanical tasks, perform a thorough inspection. Look for hull cracks, inspect propellers, and test electrical components. Addressing minor repairs now is far easier than discovering them in the spring. Give your boat a complete cleaning inside and out to prevent mold and mildew from taking hold. This is also the time to decide on your boat storage plan. Review your storage options, which can range from a marina slip or wet slips (requiring in-water winterization) to various forms of dry storage like dry stack storage. If using a professional service, inquire about their winter packages. Protecting your boat from the elements is key, so choose a high-quality boat cover or consider professional shrink wrapping for maximum protection against water intrusion.

    Pre-Winterization Checks: What to Inspect Before You Start

    Section 2: Engine Winterization – The Heart of Your Boat’s Survival

    The engine is the most expensive and complex component of your boat. Protecting it from freezing temperatures and internal corrosion is the most critical part of the winterizing process. Proper engine winterization is your best defense against catastrophic failure.

    General Engine Winterization Principles (Applies to All Types)

    Regardless of your engine type, the core goals are the same: remove corrosive contaminants, protect internal parts from rust, and ensure no water remains to freeze and expand. Start by warming the engine to operating temperature. This lets the old oil drain more completely. The oil takes suspended impurities with it.

    Outboard Engines: Step-by-Step Winterization

    1. Fuel Stabilization: Add the correct amount of fuel treatment to your fuel tank and run the engine for 10-15 minutes on flush muffs to ensure the stabilized fuel circulates through the entire fuel system.
    2. Fog the Engine: While the engine is still running, spray fogging oil into the air intakes until the engine stalls. This coats internal surfaces with a protective layer of oil.
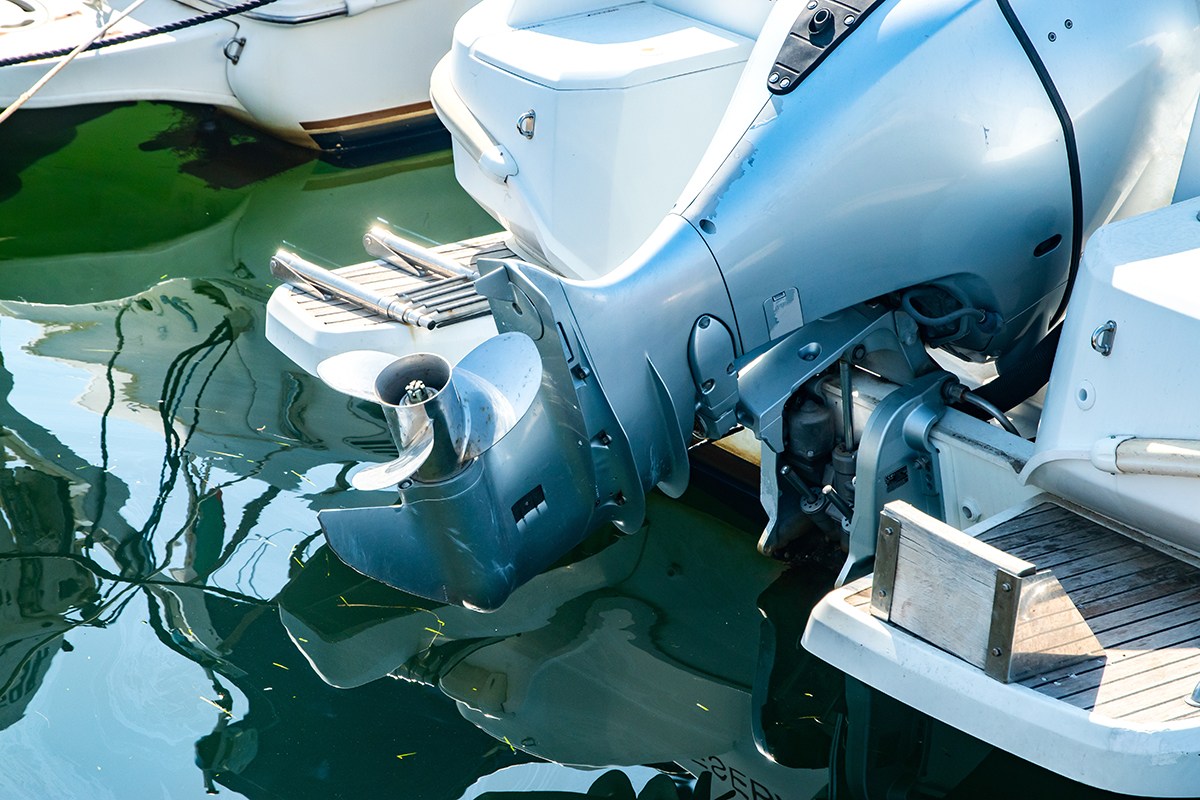
    3. Change Gear Lube: Place a drain pan under the lower unit. Remove the upper and lower drain screws and let the gear lube drain completely. A milky appearance indicates water intrusion and a potential seal failure that needs immediate attention. Refill with fresh lower-unit lube from the bottom hole until it seeps out the top, then replace both screws.
    4. Drain Cooling System: Once the engine is off, trim it to the full down position to allow all water to drain from the cooling system. This is a vital step to prevent freezing.

    Inboard Engines: Comprehensive Winterization

    1. Warm the Engine & Change Oil: After reaching operating temperature, pump out the old oil. Replace the oil filter, applying a light coat of new oil to the gasket. Refill with the manufacturer-recommended oil.
    2. Flush and Drain Cooling System: For raw-water cooled engines, flush the system with fresh water. Then, drain the entire system by opening all petcocks and removing drain plugs on the engine block and manifolds. Don’t forget to check the exhaust ports.
    3. Circulate Antifreeze: Close all drains. Use a 5-gallon bucket and a hose connected to the main water intake to run Marine & RV Antifreeze through the engine cooling systems. Start the engine and let it draw in the antifreeze until you see pink fluid exiting the exhaust. This ensures complete protection. It’s also a good time to inspect the water pump impeller and replace it if it shows signs of wear.

    Stern Drives (Inboard/Outboard): Specific Winterization Steps

    Stern drives require a combination of inboard and outboard winterization procedures.

    1. Engine Winterization: Follow the complete process for inboard engines, including the oil change, fuel stabilization, and circulating antifreeze through the cooling system.
    2. Outdrive Maintenance: Inspect the outdrive, especially the rubber bellows, for cracks. Clean off any marine growth.
    3. Change Gear Lube: As with outboard engines, drain, inspect, and refill the gear lube in the outdrive.
    4. Storage Position: Store the outdrive in the full down position. This prevents water from collecting in the housing and keeps the bellows from developing a permanent crease.

    Stern Drives (Inboard/Outboard): Specific Winterization Steps

    Section 3: Fuel System Protection – Preventing Corrosion and Deposits

    Modern fuels, especially those with ethanol, can cause significant problems over a long winter storage period. Protecting your fuel system is essential for a quick, reliable start in the spring.

    The Importance of Fuel Stabilization: Combating Ethanol and Oxidation

    Ethanol attracts water, which can lead to phase separation where a corrosive water-ethanol mixture sinks to the bottom of your fuel tank. Fuel also oxidizes, creating gums that clog lines, filters, and injectors. A quality marine-specific fuel stabilizer additive prevents both of these destructive processes.

    Filling the Fuel Tank: Full vs. Partially Full (and why)

    For winter storage, it is best to fill the fuel tank to about 90% capacity. A full tank leaves less room for air, which minimizes condensation from forming on the tank walls and contaminating your fuel. After filling, add the stabilizer and run the engine for a few minutes to circulate the treated fuel.

    Fuel Filter and Fuel/Water Separator: Inspection and Replacement

    The end of the season is the perfect time to replace your fuel filter and drain or replace your fuel/water separator. This removes any trapped water or debris before storage. Starting the spring with a fresh filter is cheap insurance against fuel delivery problems that could derail your first trip.

    Draining the Carburetor (if applicable)

    For carbureted engines, it’s good practice to drain the carburetor float bowls after running stabilized fuel through the engine. This removes the last bit of fuel that could evaporate and leave varnish deposits, which can clog the tiny jets and passages critical for engine performance.

    Section 4: Water and Plumbing Systems – Averting Frozen Catastrophe

    Any water left in your boat’s plumbing system—tanks, pipes, pumps, or heads—is a ticking time bomb in freezing weather. Draining and protecting these systems is non-negotiable.

    Draining All Freshwater Systems

    Start by opening all faucets and turning on the freshwater pump to drain the hot water heater and empty the tank completely. Use low-point drains if available. Ensure all water circulation is stopped and every drop of water is out of the lines. Don’t forget to remove the transom drain plug once the boat is out of the water.

    Treating the Plumbing System with Antifreeze

    Once drained, the plumbing system must be filled with non-toxic Marine & RV Antifreeze. You can use a winterizing kit to pump antifreeze directly into the system. Or, pour antifreeze into the empty freshwater tank. Then run each faucet until the pink fluid appears. This protects all pipes, pumps, and fixtures from freezing.

    Head (Toilet) and Holding Tank Winterization

    After pumping out the holding tank at an approved facility, add antifreeze to the empty tank to protect the discharge plumbing. Pour antifreeze into the toilet bowl and flush it through the system to winterize the intake and discharge lines, ensuring all components are protected.

    Bilge Maintenance: Ensuring a Dry Start to Spring

    A clean, dry bilge is crucial. Pump out all water and scrub it with a cleaner to remove oil and grime. This prevents odors and mold and mildew. Check that the bilge pump and its float switch are functioning correctly, though you should not rely on them during storage when batteries are disconnected.

    Preventing Mold and Mildew in Water Systems

    Even after draining, residual moisture can promote mold and mildew. Running antifreeze through the systems helps. Also, prop open any storage compartments, refrigerators, and freezers. This allows air to circulate during winter storage. Use moisture-absorbing products in enclosed cabin spaces.

    Section 5: Battery Care and Electrical Systems

    Winter is tough on batteries. Cold temperatures can drain their charge, and a fully discharged battery can freeze, crack, and be completely destroyed. Proper care of your electrical system is essential for a successful spring launch.

    Removing and Storing Your Batteries

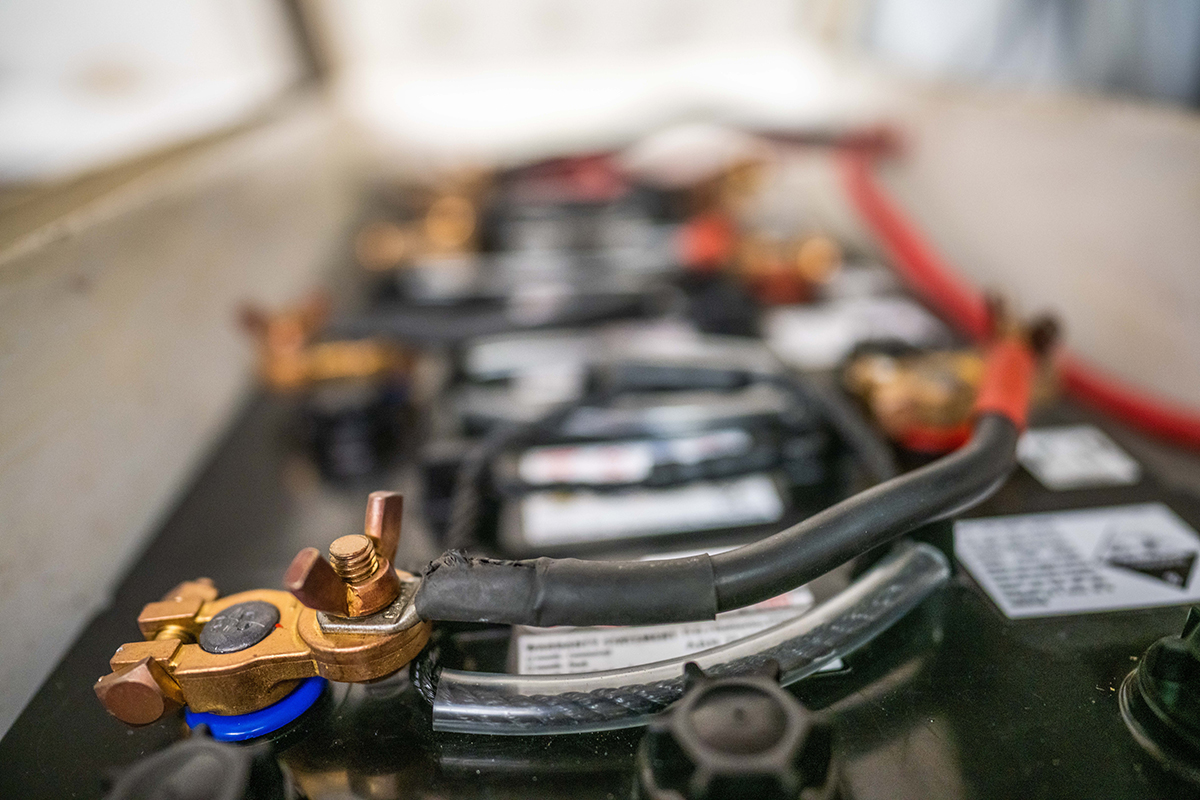
    It is highly recommended to remove batteries from the boat for winter storage. Clean the battery terminals and cable ends with a wire brush to remove corrosion. Store the batteries in a cool, dry place off concrete floors, such as on a wooden shelf in a garage or basement. This applies to standard lead-acid batteries as well as a lithium-ion battery or NiMH batteries, though always check the manufacturer’s specific storage recommendations.

    Maintaining Battery Charge During Storage

    A fully charged battery will not freeze. Throughout the winter, check the battery’s charge level monthly. The best solution is to connect the stored batteries to a smart trickle charger or battery tender. This device monitors the charge and delivers power only when needed. It prevents overcharging.

    Maintaining Battery Charge During Storage

    Disconnecting Other Electrical Components

    To prevent any drain on the system, disconnect other onboard electrical components. This also protects sensitive electronics from cold and moisture. Consider removing expensive items like chartplotters, fish finders, or even your portable Bluetooth speaker and storing them at home. Don’t forget to check your safety equipment and bring flares or fire extinguishers indoors if their lifespan could be affected by extreme cold.

    Conclusion

    Proper boat winterization is not just a suggestion. It is a basic responsibility of boat ownership. It protects your boat and your money. Follow these steps carefully. Prepare your engine and fuel system. Safeguard your plumbing and batteries. This creates a shield against harsh winter damage. This process is an investment in your boat’s longevity and ensures that when warm weather returns, you’re ready for a new season of enjoyment.

    For those who prefer professional assistance, many marinas like Margaritaville at Lanier Islands Marina offer comprehensive winter packages. You can get a quote or contact members to discuss your specific boat storage needs. If you’re looking to build your skills, consider a boating education course to become more confident in your maintenance abilities. When spring arrives, perform a pre-launch check and plan for a short shakedown cruise to ensure all systems are running smoothly. Take the time to do it right, and your boat will be ready for adventure when you are.